No Bake Chocolate Oat Bars: Broke Pinterest Fix
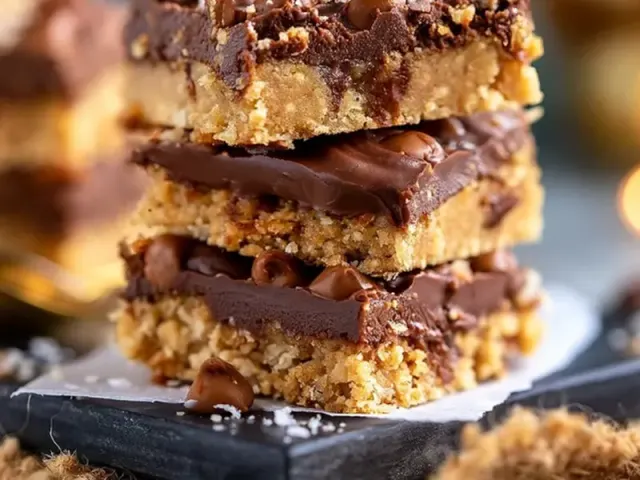
You found that Pinterest photo. The perfect stack of chocolate oat bars, glossy and neat, promising a no-bake miracle. You tried it. It crumbled into a sad pile of oats on your counter. I've been there, and I know exactly why it happened.

The problem isn't you. It's the recipe's binder-to-dry ratio. Most no-bake bar recipes skimp on the sticky stuff because they want to look healthy. But oats are thirsty. They soak up liquid over time, and what looked like a wet mixture at minute five turns into dust by minute sixty. For tent camping, that's a disaster — you need bars that survive a hike in your pack, not a crumb collection in a Ziploc.
Here's the fix: double the binder. I use melted chocolate and a liquid sweetener. The chocolate solidifies as it cools, locking everything together. The sweetener keeps the bars pliable so they don't turn into hockey pucks. It's a simple technique change, but it makes all the difference.
The Binding Ratio That Works
For every 2 cups of dry ingredients (oats plus cocoa powder), you need at least 1 full cup of liquid binder. That's honey, maple syrup, melted coconut oil, or nut butter — or a combination. Cut that, and you're back to crumble city.
I use a 50/50 split: half coconut oil (or butter) and half honey. The oil gives richness, the honey provides stick. If you're at a high-altitude campsite above 5,000 feet, increase the liquid by two tablespoons — dry air pulls moisture out of everything, including your bars.
The Press Is Everything
Don't pat the mixture gently into the pan. Press it like you mean it. I use the bottom of a flat measuring cup, pressing each section for ten seconds. The surface should look smooth and compact, with no visible gaps. If you can see air pockets, the bars will break along those fault lines later.
For camping with kids, let them press the mixture. It's a good sensory activity, and they'll be more invested in eating the result. Just make sure little hands are clean — or use a sheet of wax paper between their fingers and the mixture.
Chill Time Isn't Optional
Thirty minutes in the fridge is a lie. These bars need at least two hours, preferably overnight. The binder needs time to fully set. If you're making them at home before a trip, chill them overnight, then transfer to a cooler in the morning. They'll stay firm for two to three days in a well-packed cooler with a good ice block.
No refrigerator at your campsite? Use coconut oil instead of butter. Coconut oil solidifies at 76°F, so on a cool evening, these bars will set just sitting on a picnic table. In hot weather, keep them in the cooler and let them warm for five minutes before eating — they soften into a fudgy texture that's even better.
The Camping-Specific Tweaks
These bars are designed to travel. I wrap each one in a small square of parchment paper, then stack them in a hard-sided container. A plastic takeout container works well. The parchment prevents sticking and gives each bar a grab-and-go wrapper.
If you're hiking to your site, double-wrap the bars. Put the parchment-wrapped bars in a ziplock bag, then inside a stuff sack. The extra layer protects against crushing. I've carried these on a six-mile hike with no breakage — just a few crumbs at the bottom of the bag, which I ate as a reward at the summit.
One more tip: add a tablespoon of chia seeds or flax meal to the dry mix. It adds fiber and helps absorb any excess moisture, keeping the bars shelf-stable longer. It's a small addition that makes a big difference on a multi-day trip.
What to Do When It's Raining
Rain changes everything about camping food. If you're stuck in a tent with a sudden downpour, these bars are your friend. They don't require cooking, they don't produce smell, and they won't attract bears if stored properly. Keep them sealed in a bear canister or odor-proof bag at least 100 yards from your tent.
On a wet afternoon, I'll spread a bar with a little extra peanut butter from a squeeze pouch. It turns a simple snack into a more satisfying lunch without leaving the tent. No stove, no mess, no wet firewood required.
The takeaway? Don't trust Pinterest at face value. Trust technique. Double your binder, press hard, chill long, and you'll have no bake chocolate oat bars that actually hold together — at home and on the trail.
Frequently Asked Questions
Why do my no bake chocolate oat bars fall apart?
The most common reason is not enough binder. The oats soak up the liquid over time, so if your mixture seems wet enough when you press it, it will be dry after an hour. Use a ratio of 1 part liquid binder (honey, maple syrup, or melted chocolate) to 2 parts dry ingredients by volume. Also, chill the bars for at least 2 hours, not just 30 minutes.
Can I make these bars without a refrigerator at the campsite?
Yes, but you need a cooler with plenty of ice. For a no-chill version, substitute coconut oil for butter — it sets at room temperature below 76°F. In hot weather, keep the bars in a sealed container inside your cooler. They will soften but not melt completely if you use coconut oil.
What kind of oats work best for no bake chocolate oat bars?
Old-fashioned rolled oats are best. Quick oats absorb too much liquid and turn mushy, while steel-cut oats stay too hard and the bars won't hold together. Stick with rolled oats for the right texture and structure.
No Bake Chocolate Oat Bars: Broke Pinterest Fix

These no bake chocolate oat bars are the antidote to Pinterest fails. The secret is a double-binding technique: melted chocolate plus a liquid sweetener, pressed firmly into a parchment-lined pan, then chilled until fully set. They hold together in a backpack or cooler, making them perfect for tent camping.
- 2 cups old-fashioned rolled oats
- 1 cup unsweetened cocoa powder
- 1/2 cup honey or maple syrup
- 1/2 cup coconut oil or unsalted butter
- 1/2 cup creamy peanut butter or sunflower seed butter
- 1/2 teaspoon salt (skip if using salted butter)
- 1 teaspoon vanilla extract
- 1/3 cup mini chocolate chips (optional, for texture)
- Line an 8x8-inch baking dish with parchment paper, leaving overhang on two sides for easy lifting.
- In a small saucepan over low heat, combine the coconut oil (or butter), honey (or maple syrup), and peanut butter. Stir until fully melted and smooth. Do not let it boil — remove from heat as soon as it's liquid.
- Sift the cocoa powder into a large mixing bowl to remove lumps. Add the rolled oats and salt. Whisk to combine.
- Pour the warm liquid mixture over the dry ingredients. Add vanilla extract. Stir with a rubber spatula until every oat is coated. The mixture should look like damp sand — no dry patches.
- Fold in the mini chocolate chips if using. The residual warmth will soften them slightly, which helps the bars stick together.
- Transfer the mixture to the prepared dish. Press it down very firmly — use the bottom of a flat measuring cup or a glass. This is the critical step. Press until the surface is completely even and compact.
- Refrigerate for at least 2 hours, or until fully firm. For camping, chill overnight.
- Lift the block out using the parchment overhang. Place on a cutting board and slice into 16 squares with a sharp knife. Store in an airtight container in the cooler.
- At camp, let the bars sit at room temperature for 5 minutes before eating — they soften slightly and taste richer.
Recipe: No Bake Chocolate Oat Bars: Broke Pinterest Fix
Ingredients
- 2 cups old-fashioned rolled oats
- 1 cup unsweetened cocoa powder
- 1/2 cup honey or maple syrup
- 1/2 cup coconut oil or unsalted butter
- 1/2 cup creamy peanut butter or sunflower seed butter
- 1/2 teaspoon salt (skip if using salted butter)
- 1 teaspoon vanilla extract
- 1/3 cup mini chocolate chips (optional, for texture)
Instructions
- Line an 8x8-inch baking dish with parchment paper, leaving overhang on two sides for easy lifting.
- In a small saucepan over low heat, combine the coconut oil (or butter), honey (or maple syrup), and peanut butter. Stir until fully melted and smooth. Do not let it boil — remove from heat as soon as it's liquid.
- Sift the cocoa powder into a large mixing bowl to remove lumps. Add the rolled oats and salt. Whisk to combine.
- Pour the warm liquid mixture over the dry ingredients. Add vanilla extract. Stir with a rubber spatula until every oat is coated. The mixture should look like damp sand — no dry patches.
- Fold in the mini chocolate chips if using. The residual warmth will soften them slightly, which helps the bars stick together.
- Transfer the mixture to the prepared dish. Press it down very firmly — use the bottom of a flat measuring cup or a glass. This is the critical step. Press until the surface is completely even and compact.
- Refrigerate for at least 2 hours, or until fully firm. For camping, chill overnight.
- Lift the block out using the parchment overhang. Place on a cutting board and slice into 16 squares with a sharp knife. Store in an airtight container in the cooler.
- At camp, let the bars sit at room temperature for 5 minutes before eating — they soften slightly and taste richer.