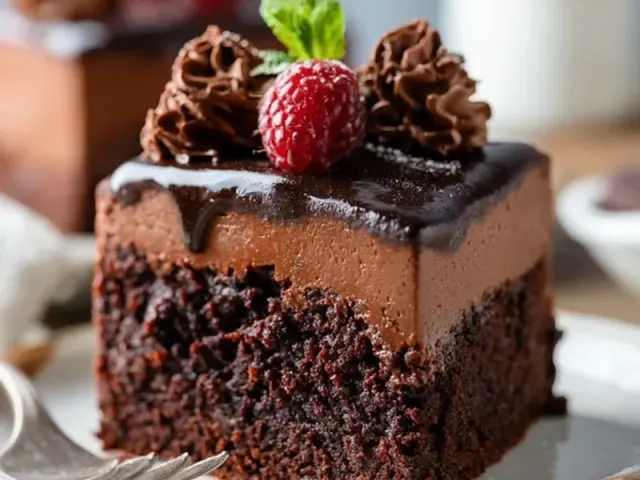
No Bake Chocolate Cheesecake Camping Dessert
The first time I made a no bake chocolate cheesecake at a campsite, I was skeptical. Cream cheese and cocoa powder, mixed in a bowl, set in a cooler — would it really taste like the real thing? It did. Better, actually. The texture was dense and silky, the chocolate deep without being sweet. And the best part: no oven, no stove, no fuss.

Why This Works for Camping
This method relies on two things: a firm crust that holds together with butter, and a filling that sets through chilling, not heat. The cooler becomes your refrigerator. The key is getting the cream cheese soft enough to mix smoothly. If it's cold from the cooler, it will lump. I always pack the cream cheese at the top of the cooler where it stays cool but not frozen, and take it out 30 minutes before starting.
One trick I swear by: crush the graham crackers inside a sealed zip-top bag using the bottom of a pot. It's quieter than a food processor and saves on dishes. For the butter, melt it in a small saucepan over low heat or even in a metal cup set in a shallow pan of hot water. No stove? No problem. Just soften the butter in the sun for a few minutes, or place the wrapped stick against a warm water bottle.
The Crust: Simple and Sturdy
I use a 1.5:1 ratio of crumbs to butter by volume. That means for every 1.5 cups of crumbs, I add 1/3 cup melted butter. This gives a crust that presses firmly and won't crumble when you cut. Press it into the container with the back of a spoon, then chill it while you make the filling. If you're in a warm climate, set the crust in the shade or on a cold rock to keep it from softening.
The Filling: Smooth and Rich
Here is where technique matters. Soften the cream cheese until it yields to gentle pressure. Mix it first on its own to break any lumps, then add the powdered sugar and cocoa. I sift the cocoa through a fine strainer to avoid clumps — one less thing to stir out later. The heavy cream goes in last. Stir slowly at first, then faster as it thickens. You want a consistency like thick pudding. If it's too thin, add an extra tablespoon of cocoa powder. If too thick, a splash of milk thins it right out.
Pour the filling over the crust and spread it level. I tap the container on the table to release air bubbles, then cover it tightly. The lid matters: a loose cover lets in cooler air that can dry the surface. Use a tight-fitting lid or press plastic wrap directly onto the filling.
Setting Time: The Patience Game
In a well-packed cooler with plenty of ice, this cheesecake sets in about 4 hours. But I've learned that overnight is better. The texture firms up evenly, and the flavors deepen. If you're camping in hot weather, bury the container under ice packs or set it in the coldest part of the cooler. Avoid opening the cooler repeatedly while it sets. Each time warm air rushes in, the setting slows down.
A common mistake is rushing the process. If you cut into it too soon, the filling will be loose. Give it the full time. When it's ready, the surface will feel firm to the touch, and a knife will slide through cleanly.
Serving and Storing
Slice it cold, right from the cooler. I use a plastic knife to avoid scratching my container. The cheesecake keeps for up to two days if you keep it cold. After that, the texture softens as the cream cheese absorbs moisture. If you have leftovers, press a piece of wax paper against the cut surface to prevent a skin from forming.
For a variation, swap the graham crackers for crushed chocolate cookies, or add a pinch of cinnamon to the crust. The base recipe is forgiving. But the classic version — rich, creamy, no bake — is the one I come back to every time. It proves that a great dessert doesn't need an oven. Just a cooler, a little patience, and good chocolate.
Takeaway
No bake chocolate cheesecake is one of those camping desserts that surprises everyone. It looks indulgent, tastes professional, and requires almost no gear. The technique is straightforward: a sturdy crust, a smooth filling, and enough chill time. Follow the steps, and you'll have a dessert that earns genuine awe around the campfire.
Frequently Asked Questions
Can I use a different crust if I don't have graham crackers?
Absolutely. Crushed digestive biscuits, vanilla wafers, or even crushed pretzels work well. Just adjust the butter slightly to get a sand-like texture that holds together when pressed.
How long does this cheesecake last in a cooler?
Properly stored in a sealed container in a cold cooler (below 40°F), it keeps for up to 2 days. After that, the texture may soften. I always pack it on ice and keep the cooler out of direct sun.
What if I don't have a portable whisk or mixer?
A sturdy fork works in a pinch, but a small balloon whisk is better. For the smoothest filling, soften the cream cheese to room temperature before mixing. If it's too stiff, set the bowl in a shallow dish of cool water for 10 minutes, then stir.
No Bake Chocolate Cheesecake Camping Dessert

A rich, creamy no bake chocolate cheesecake made entirely without an oven, perfect for tent camping. The filling sets in a cooler, and the crust uses crushed graham crackers and melted butter.
- 1.5 cups graham cracker crumbs (finely crushed)
- 1/3 cup unsalted butter (melted)
- 2 tablespoons granulated sugar
- 16 ounces cream cheese (softened to room temperature)
- 1/2 cup powdered sugar
- 1/3 cup cocoa powder (unsweetened)
- 1 teaspoon vanilla extract
- 1/2 cup heavy cream (heavy cream or full-fat coconut cream for dairy-free)
- In a medium bowl, combine graham cracker crumbs, melted butter, and granulated sugar. Stir until the mixture feels like wet sand.
- Press the crumb mixture firmly into the bottom of an 8-inch square container or a deep pie tin. Use the back of a spoon to compact it evenly. Place in the cooler while you make the filling.
- In a separate bowl, beat the softened cream cheese with a fork or small whisk until smooth. Add powdered sugar, cocoa powder, and vanilla. Mix until no lumps remain.
- Pour in the heavy cream and stir until the filling is thick and glossy. It should hold its shape when you lift the whisk.
- Spoon the filling over the crust and spread it level. Tap the container gently to release any air bubbles.
- Cover tightly with a lid or plastic wrap. Place in the coldest part of your cooler (on top of ice packs) and let it chill for at least 4 hours, or overnight for best texture.
- Slice and serve cold. If the cheesecake is too soft after 4 hours, it needs more time to set. Patience pays off here.
Recipe: No Bake Chocolate Cheesecake Camping Dessert
Ingredients
- 1.5 cups graham cracker crumbs (finely crushed)
- 1/3 cup unsalted butter (melted)
- 2 tablespoons granulated sugar
- 16 ounces cream cheese (softened to room temperature)
- 1/2 cup powdered sugar
- 1/3 cup cocoa powder (unsweetened)
- 1 teaspoon vanilla extract
- 1/2 cup heavy cream (heavy cream or full-fat coconut cream for dairy-free)
Instructions
- In a medium bowl, combine graham cracker crumbs, melted butter, and granulated sugar. Stir until the mixture feels like wet sand.
- Press the crumb mixture firmly into the bottom of an 8-inch square container or a deep pie tin. Use the back of a spoon to compact it evenly. Place in the cooler while you make the filling.
- In a separate bowl, beat the softened cream cheese with a fork or small whisk until smooth. Add powdered sugar, cocoa powder, and vanilla. Mix until no lumps remain.
- Pour in the heavy cream and stir until the filling is thick and glossy. It should hold its shape when you lift the whisk.
- Spoon the filling over the crust and spread it level. Tap the container gently to release any air bubbles.
- Cover tightly with a lid or plastic wrap. Place in the coldest part of your cooler (on top of ice packs) and let it chill for at least 4 hours, or overnight for best texture.
- Slice and serve cold. If the cheesecake is too soft after 4 hours, it needs more time to set. Patience pays off here.