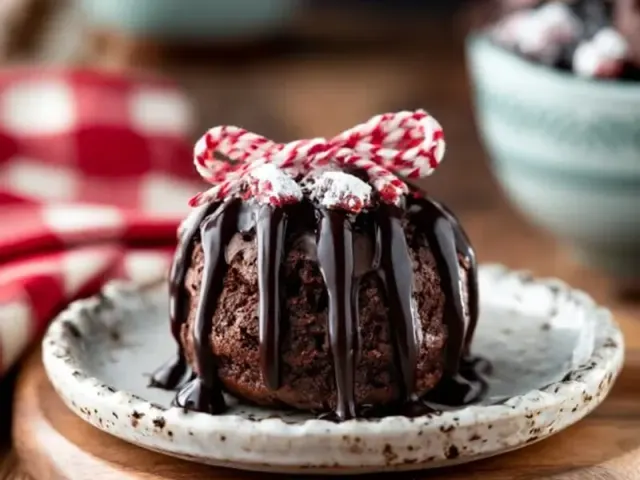
How Hot Chocolate Bombs Change Your Camping Routine
The first time I tried a hot chocolate bomb at a campsite, I was skeptical. A hollow chocolate sphere that melts into a mug of hot water? It sounded like a gimmick. But the moment that shell cracked open and a plume of marshmallows burst to the surface, I understood. This wasn't just a drink — it was a moment. And it changed everything about how I approach a cold evening inside the tent.

Hot chocolate bombs are a game-changer for camping because they turn a simple hot drink into an experience. They pack small, require no refrigeration, and need only hot water and a mug. But the real magic is in the technique — how you pack them, how you melt them, and how you adapt them to the realities of wind, rain, and uneven ground.
Why Hot Chocolate Bombs Work at Camp
Most camping hot cocoa comes from a packet. It's fine. It warms you up. But a hot chocolate bomb adds a layer of richness — the chocolate shell melts into the water, creating a creamier texture than powder alone. The marshmallows inside puff up as they hydrate. It feels like a luxury, but it's actually simpler than packing a dozen ingredients.
The key is to make or buy bombs that are sturdy enough to survive the trip. Store-bought ones are often delicate, made with thin chocolate that cracks easily. If you make your own (recipe below), you can control the thickness. I use a full tablespoon of chocolate per hemisphere — that's about twice what most recipes call for. The extra thickness means they won't shatter in your pack, and they melt more slowly in the mug, releasing flavor over a minute instead of all at once.
Packing Bombs for the Trail
I learned the hard way that tossing a few bombs into a ziplock bag is a recipe for chocolate dust. Here's what works: use a hard-sided container — a small plastic food storage box or a metal tin. Line the bottom with a folded paper towel for cushion. Place each bomb in its own compartment, or separate them with crumpled parchment paper. If you're using a round tin, nestle the bombs so they don't roll against each other.
One trick that changed everything: after making the bombs, I freeze them for 15 minutes before packing. This hardens the chocolate further and makes them less likely to dent. Once frozen, I wrap each one individually in a square of wax paper. The wax paper also prevents them from sticking together if the temperature rises.
During transport, keep the container in the middle of your pack, surrounded by soft items like a puffy jacket or sleeping bag. Avoid putting it near the bottom where heavy gear can crush it, or near the top where it might bounce out when you open the pack.
Melting at Camp: The Right Technique
Melting a hot chocolate bomb at camp is different than at home. You don't have a microwave, and your water temperature is less controlled. Here's the method I use every time:
- Boil water on your camp stove or over the fire. Let it sit off the heat for 20 seconds — if you pour boiling water directly onto the bomb, the chocolate can seize and turn grainy.
- Pour the hot water into a camping mug. Leave an inch of space at the top so you can stir without spilling.
- Drop the bomb into the mug. Don't stir yet. Let it sit for 10 seconds. The chocolate will begin to melt from the bottom up, releasing the cocoa mix and marshmallows.
- After 10 seconds, stir gently with a spoon or a clean stick. The chocolate will finish melting into the water. If you see chunks, stir a little more — they should dissolve within 30 seconds.
A common mistake is using too little water. The bomb needs enough hot water to fully dissolve the chocolate and cocoa mix. I use about 8 ounces of water per bomb — that's a standard camping mug. If your mug is smaller, use half a bomb instead.
Adapting for Wind and Cold
On a windy day, your water cools fast. To keep it hot enough to melt the bomb, pour the water immediately after it stops boiling, and cover the mug with a lid or a small plate while the bomb melts. If you're using a metal mug, wrap a bandana around the outside for insulation — it keeps the heat in and saves your fingers.
In cold weather (below 40°F), the chocolate bomb itself can get brittle. If you've stored them in a cool place, let the bomb sit in your pocket for 5 minutes before dropping it into the water. A room-temperature bomb melts more evenly than a cold one.
Making Your Own Bombs: The Camping Version
Store-bought bombs are convenient, but homemade ones let you control the thickness and fill. The recipe below is designed for camping: thicker shells, a simple cocoa mix filling, and mini marshmallows that rehydrate well. I use semi-sweet chocolate because it has a higher cocoa butter content than milk chocolate, which means it melts smoothly and doesn't get sticky in warm weather.
One tip that makes a difference: after sealing the two halves, I refrigerate the bombs for 30 minutes, then dip the top in a thin layer of melted white chocolate. This creates a visual marker — you can see at a glance which end is up — and the white chocolate adds a subtle sweetness. It also reinforces the seam, so the bomb is less likely to open during transport.
Safety Notes for Camp Cooking
Hot chocolate bombs themselves are safe — they're just chocolate and cocoa. But the process of heating water at camp comes with risks. Always use a camp stove on a stable, level surface away from tent walls and sleeping bags. If you're heating water over a campfire, use a kettle with a long handle and keep children at a safe distance. Never leave boiling water unattended.
For storing bombs at camp, keep them in a cool, dry place inside your food storage container. If you're in bear country, store them with your other food in a bear canister or bear bag — chocolate is a strong attractant. And remember, the marshmallows inside the bomb are still marshmallows; they'll attract ants and rodents if left out.
Takeaway
Hot chocolate bombs aren't just a novelty — they're a practical way to elevate a simple camp drink into something memorable. With the right packing technique and a little patience with the melting process, you can enjoy a rich, creamy hot chocolate that feels like a treat rather than a chore. The first time you see that chocolate shell crack open and marshmallows rise to the surface, you'll understand why it changes everything.
Frequently Asked Questions
Can hot chocolate bombs survive a bumpy hike?
Yes, if you pack them right. Use a hard-sided container like a small plastic tub or a metal tin, and cushion each bomb with crumpled parchment paper or a soft cloth. Avoid soft bags where they can get crushed by heavier gear. I always place the container in the center of my pack, surrounded by clothes or a sleeping bag for extra padding.
How do I melt a hot chocolate bomb at camp without a microwave?
Heat water in a camp stove kettle or over a campfire until it's steaming but not boiling hard. Pour the hot water into a camping mug, drop in the bomb, and stir gently. The heat from the water melts the chocolate shell in about 30 seconds. If you're using a metal mug, let the water cool for 10 seconds after boiling to avoid scorching the chocolate.
What if the bomb doesn't melt all the way?
This usually happens if the water isn't hot enough or the bomb is too thick. Make sure your water is just below boiling — around 190°F to 200°F. If you're at high altitude, water boils at a lower temperature, so let it boil for an extra minute before pouring. You can also break the chocolate shell with a spoon to help it dissolve faster.
Are hot chocolate bombs safe to use around kids at camp?
Yes, with supervision. The main concern is handling hot water near a campfire or stove. For kids, I pour the hot water into their mug myself and let them drop the bomb in. Wait 30 seconds, then stir. The bomb itself is just chocolate and cocoa mix — no safety issues there. Just make sure the mug is stable on a flat surface, not on a log or uneven ground.
How Hot Chocolate Bombs Change Your Camping Routine

These homemade hot chocolate bombs are designed for camping: they travel well, melt easily in hot water, and include a surprise marshmallow filling. Each bomb is a single serving that transforms a plain mug of hot water into a rich, creamy cocoa.
- 12 ounces semi-sweet chocolate chips (or chopped chocolate bars)
- 1/4 cup powdered hot cocoa mix (your favorite brand)
- 1/2 cup mini marshmallows (or dehydrated mini marshmallows for longer shelf life)
- 1/2 cup heavy cream (optional, for richer cocoa)
- 1 tablespoon coconut oil (optional, helps chocolate set smoothly)
- Melt the chocolate chips in a double boiler or microwave in 30-second bursts, stirring until smooth. If using, stir in the coconut oil for a glossier finish.
- Using a small silicone hemisphere mold (2-inch diameter), spoon about 1 tablespoon of melted chocolate into each half-mold. Use the back of a spoon or a pastry brush to coat the inside evenly, right up to the rim. Tap the mold gently on the counter to release air bubbles.
- Place the molds in the refrigerator for 10 minutes, or until the chocolate is firm to the touch. Do not freeze — condensation can cause the chocolate to bloom later.
- Carefully pop the chocolate halves out of the molds. Fill half of the hemispheres with 1 teaspoon of cocoa mix and 4-5 mini marshmallows. Leave a small gap at the top.
- Heat a small plate or the bottom of a dry skillet on low heat for 30 seconds. Gently press the rim of an empty chocolate hemisphere onto the warm surface for 3-4 seconds to melt the edge slightly. Immediately place it on top of a filled hemisphere and press gently to seal. Run your finger around the seam to smooth it out.
- Repeat with all halves. Let the finished bombs sit at room temperature for 5 minutes to set the seal. Store in an airtight container at cool room temperature for up to 2 weeks, or refrigerate for longer storage.
Recipe: How Hot Chocolate Bombs Change Your Camping Routine
Ingredients
- 12 ounces semi-sweet chocolate chips (or chopped chocolate bars)
- 1/4 cup powdered hot cocoa mix (your favorite brand)
- 1/2 cup mini marshmallows (or dehydrated mini marshmallows for longer shelf life)
- 1/2 cup heavy cream (optional, for richer cocoa)
- 1 tablespoon coconut oil (optional, helps chocolate set smoothly)
Instructions
- Melt the chocolate chips in a double boiler or microwave in 30-second bursts, stirring until smooth. If using, stir in the coconut oil for a glossier finish.
- Using a small silicone hemisphere mold (2-inch diameter), spoon about 1 tablespoon of melted chocolate into each half-mold. Use the back of a spoon or a pastry brush to coat the inside evenly, right up to the rim. Tap the mold gently on the counter to release air bubbles.
- Place the molds in the refrigerator for 10 minutes, or until the chocolate is firm to the touch. Do not freeze — condensation can cause the chocolate to bloom later.
- Carefully pop the chocolate halves out of the molds. Fill half of the hemispheres with 1 teaspoon of cocoa mix and 4-5 mini marshmallows. Leave a small gap at the top.
- Heat a small plate or the bottom of a dry skillet on low heat for 30 seconds. Gently press the rim of an empty chocolate hemisphere onto the warm surface for 3-4 seconds to melt the edge slightly. Immediately place it on top of a filled hemisphere and press gently to seal. Run your finger around the seam to smooth it out.
- Repeat with all halves. Let the finished bombs sit at room temperature for 5 minutes to set the seal. Store in an airtight container at cool room temperature for up to 2 weeks, or refrigerate for longer storage.