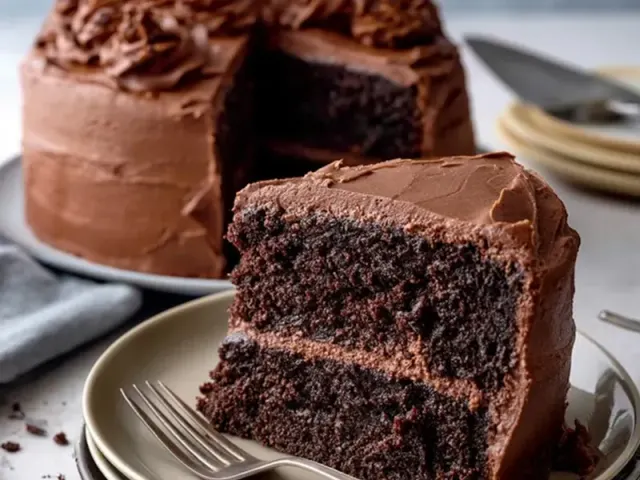
How Camping Chocolate Cake Changes Everything
The first time I pulled a warm chocolate cake out of the coals, the silence around the campfire shifted. People stopped mid-sentence. The smell of cocoa and vanilla cut through the pine smoke. That moment taught me something I still believe: a chocolate cake changes everything about a camping trip.

A tent camping trip can feel like a series of chores. Set up the tent. Pump the sleeping pad. Filter the water. Cook the dehydrated meal. You do these things because you love being outside, but they don’t feel like treats. A real, from-scratch chocolate cake baked over the fire turns the whole experience into something special. It says: we are not just surviving out here. We are living.
Why This Cake Works at Camp
This isn’t a fussy recipe. It uses basic ingredients you can pack without worry. The batter comes together in one bowl. You don’t need a mixer or a thermometer. The Dutch oven does the work, turning a thin, watery batter into a moist, tender crumb. The hot water in the batter is the trick — it blooms the cocoa and keeps the cake from drying out over the long bake time.
The most common mistake I see is using too many coals underneath. People think more heat means faster baking. It doesn’t. It means a burnt bottom and a raw middle. The ratio matters: roughly twice as many coals on top as below. For a 10-inch Dutch oven, that’s about 8 briquettes underneath and 14 on top. If you’re using a campfire, let the wood burn down to glowing coals first, then rake a bed of coals under the oven and pile more on the lid.
Gear You Actually Need
A cast iron Dutch oven with legs and a flat, rimmed lid. The legs keep the oven off the coals so air can circulate. The rimmed lid holds coals on top without them sliding off. A lid lifter is not a luxury — it’s safety. That lid gets hot enough to burn through a thick glove. Use a lid lifter every time.
Parchment paper. Cut a circle to fit the bottom of your oven. It makes removing the cake simple and keeps the bottom from sticking. Without it, you’ll be scraping cake off cast iron, and that’s a sad way to end a meal.
Charcoal briquettes are easier to manage than a campfire for baking. They burn at a consistent temperature and you can count them precisely. If you’re using a campfire, you need a good bed of coals — at least a shovelful — and you’ll have to add more coals halfway through. Practice makes this easier.
Setting Up for Success
Choose a spot out of the wind. Wind steals heat from the Dutch oven and makes the coals burn unevenly. Set up a small windbreak with rocks or a cooler if needed. Make sure your cooking area is clear of dry grass and leaves. Coals can roll.
Prep the batter at home. Mix all the dry ingredients in a zip-top bag. Write the wet ingredients on the bag with a marker so you don’t forget. At camp, dump the dry mix into a bowl, add the wet ingredients, stir, and pour. No measuring cups needed after you leave home.
The Technique: Baking Over Coals
Light your coals 20 minutes before you plan to bake. They need to be gray on the outside, glowing orange inside. Arrange the bottom coals in a circle slightly smaller than the Dutch oven’s base. This prevents a direct hot spot in the center.
Set the oven on the coals. Place the lid on. Arrange the top coals around the edge of the lid, not in the middle. The heat radiates inward. Rotate the oven a quarter turn every 10 minutes. Rotate the lid a quarter turn in the opposite direction. This evens out the heat and prevents burning.
Resist the urge to peek. Every time you lift the lid, heat escapes and the cake can fall. Check at the 30-minute mark with a skewer. If it comes out clean, it’s done. If not, replace the lid and give it 5 more minutes.
Weather and Terrain Adjustments
Cold weather: your coals will burn hotter and faster. Use fewer coals overall — try 6 underneath and 12 on top. Check the cake earlier. Windy weather: build a three-sided windbreak with rocks or logs. The wind can double your bake time by cooling the oven. Rainy weather: set up a tarp over your cooking area. A wet lid means steam inside the oven, which makes the cake soggy on top.
High altitude: above 5,000 feet, reduce the baking soda to 3/4 teaspoon and increase the oven temperature by using a few more coals on top. The cake will rise faster, so check it at 25 minutes.
Serving and Sharing
Let the cake cool for 10 minutes before serving. It will be fragile right out of the oven. Serve it straight from the Dutch oven with a spoon for each person. Or invert it onto a plate if you used parchment paper. A dusting of powdered sugar from a small shaker makes it look fancy. A dollop of canned whipped cream or a scoop of shelf-stable ice cream turns it into a celebration.
Store leftovers in a sealed container. In warm weather, keep it in a bear-proof canister away from your tent. The smell attracts animals. In cool weather, it will keep for two days, but I’ve never seen it last that long.
The Real Change
A chocolate cake at camp changes the mood, not just the menu. It slows down the evening. People gather around the fire longer. They talk. They laugh. They forget about the blisters and the cold sleeping bag. That cake says you planned for joy, not just for meals. That’s the change that matters.
Pack your ingredients. Practice the coals. And when you pull that warm, dark cake out of the Dutch oven, watch what happens around the fire. You’ll understand.
Frequently Asked Questions
Can I bake chocolate cake in a regular pot over a campfire?
Not safely or reliably. A regular pot lacks the thick walls and tight lid of a Dutch oven, which distributes heat evenly and traps steam. You risk burning the bottom and leaving the center raw. Use a dedicated camp Dutch oven with legs and a rimmed lid to hold coals.
How do I know when the cake is done without an oven thermometer?
Insert a clean twig or skewer into the center. If it comes out clean or with just a few moist crumbs, it’s done. Also check the edges: they should pull away slightly from the sides of the Dutch oven. Avoid opening the lid too often, as each peek lets out heat.
What if I don’t have a lid lifter?
You can use a sturdy stick or a pair of fireproof gloves. But a lid lifter is safer and gives you better control. The lid and the oven get extremely hot, and dropping the lid in the coals means ashes in your cake. I consider a lid lifter essential, not optional.
Can I use a boxed cake mix for camping?
Yes, and it works beautifully. The key is to pre-mix the dry ingredients at home in a sealed bag. At camp, add the wet ingredients (water, oil, eggs) right in the bag, knead to combine, then pour into the greased Dutch oven. No bowls needed, and less cleanup.
How Camping Chocolate Cake Changes Everything

A simple, moist chocolate cake baked entirely over campfire coals in a Dutch oven. This recipe uses basic ingredients and yields a rich dessert that feels like a luxury in the backcountry.
- 1.5 cups all-purpose flour
- 1 cup granulated sugar
- 0.5 cup unsweetened cocoa powder
- 1 teaspoon baking soda
- 0.5 teaspoon baking powder
- 0.5 teaspoon salt
- 1 cup buttermilk (or 1 cup milk + 1 tbsp lemon juice)
- 0.5 cup vegetable oil
- 2 large eggs
- 2 teaspoons vanilla extract
- 0.5 cup hot water
- 1 tablespoon butter or oil (for greasing the Dutch oven)
- Grease the inside of a 10-inch Dutch oven thoroughly with butter or oil. Line the bottom with a circle of parchment paper if you have it (makes lifting the cake out much easier).
- In a large bowl, whisk together the flour, sugar, cocoa powder, baking soda, baking powder, and salt.
- Add the buttermilk, vegetable oil, eggs, and vanilla. Mix until smooth. The batter will be thick.
- Pour in the hot water and stir until just combined. The batter will be thin — that’s correct.
- Pour the batter into the prepared Dutch oven. Place the lid on.
- Prepare a campfire or a bed of charcoal briquettes. For a 10-inch oven, you need about 8 briquettes underneath and 14 on top. Arrange the coals in a circle under the oven’s legs and on the lid.
- Bake for 30–35 minutes. Rotate the Dutch oven a quarter turn every 10 minutes to avoid hot spots. Check doneness with a skewer or twig.
- Carefully remove the lid using a lid lifter. Let the cake cool for 10 minutes before serving directly from the Dutch oven or inverting onto a plate.
Recipe: How Camping Chocolate Cake Changes Everything
Ingredients
- 1.5 cups all-purpose flour
- 1 cup granulated sugar
- 0.5 cup unsweetened cocoa powder
- 1 teaspoon baking soda
- 0.5 teaspoon baking powder
- 0.5 teaspoon salt
- 1 cup buttermilk (or 1 cup milk + 1 tbsp lemon juice)
- 0.5 cup vegetable oil
- 2 large eggs
- 2 teaspoons vanilla extract
- 0.5 cup hot water
- 1 tablespoon butter or oil (for greasing the Dutch oven)
Instructions
- Grease the inside of a 10-inch Dutch oven thoroughly with butter or oil. Line the bottom with a circle of parchment paper if you have it (makes lifting the cake out much easier).
- In a large bowl, whisk together the flour, sugar, cocoa powder, baking soda, baking powder, and salt.
- Add the buttermilk, vegetable oil, eggs, and vanilla. Mix until smooth. The batter will be thick.
- Pour in the hot water and stir until just combined. The batter will be thin — that’s correct.
- Pour the batter into the prepared Dutch oven. Place the lid on.
- Prepare a campfire or a bed of charcoal briquettes. For a 10-inch oven, you need about 8 briquettes underneath and 14 on top. Arrange the coals in a circle under the oven’s legs and on the lid.
- Bake for 30–35 minutes. Rotate the Dutch oven a quarter turn every 10 minutes to avoid hot spots. Check doneness with a skewer or twig.
- Carefully remove the lid using a lid lifter. Let the cake cool for 10 minutes before serving directly from the Dutch oven or inverting onto a plate.