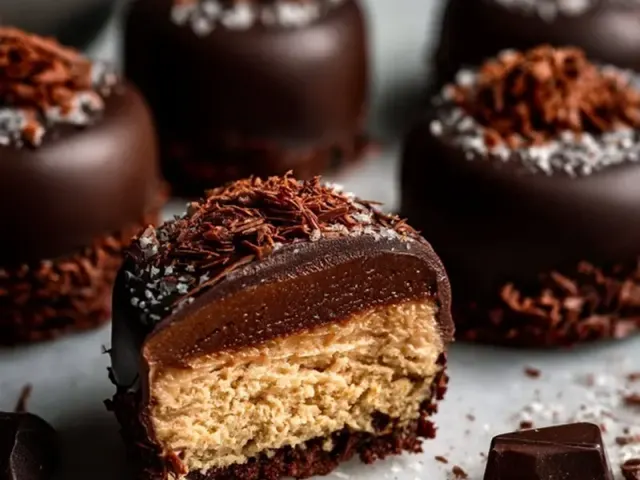
Chocolate Truffle Balls: Everyone's Obsessed Camping Treat
There's something about the cool, quiet air of a camping evening that makes me crave a little sweetness. The fire crackles, the stars come out, and a bite of rich chocolate hits just right. That's where these chocolate truffle balls come in. They're everyone's obsessed — and for good reason. They're simple, decadent, and, with a few specific tricks, they travel shockingly well.

Why Truffle Balls Work for Tent Camping
Most camping desserts are either too messy (marshmallow goo everywhere) or too complicated (I'm looking at you, campfire cake). Truffle balls are the sweet spot. They're no-bake, so you make them at home and just pack them in. The key is getting the texture right — too soft and they'll turn into a puddle in your cooler. Too dry and they're not worth the calories.
My trick: after rolling the truffles, I pop them in the freezer for 30 minutes before coating. That extra chill firms up the ganache just enough so the coating sticks evenly and they hold their shape even on a warm hike to the site.
Choosing the Right Chocolate
For camping, go with a dark chocolate that's 60% to 70% cacao. Anything less and the truffles soften too fast at room temperature. Anything more and they can turn grainy when mixed with cream. I chop the chocolate bar into even, small pieces — about the size of peas. Uniform pieces melt evenly, which means a smoother ganache and no lumps.
The Cream: Don't Boil It
This is the most common mistake I see. You heat the cream until it just simmers — tiny bubbles around the edge, not a rolling boil. Boiling cream can scorch it, giving the truffles a slightly cooked flavor. I use a heavy-bottomed saucepan and watch it closely. Once the cream is hot, I pour it over the chocolate and let it sit for two full minutes before stirring. That rest is what lets the chocolate melt gently without seizing.
Rolling Without the Mess
Here's a camp-specific trick: dust your palms lightly with cocoa powder before rolling each ball. The ganache will be sticky, and this keeps it from clinging to your hands. Roll each portion into a smooth ball — about the size of a walnut. If you're camping with kids, this is the step they love. Just make sure little hands are washed and cool (warm hands melt the chocolate).
After rolling, refrigerate the balls for at least 30 minutes. This is non-negotiable for camping. It hardens the outer layer so they can handle being packed in a container without smushing together.
Coating Options for the Trail
Cocoa powder is classic, but it can get messy in a bag. For camping, I prefer finely chopped nuts (almonds or pecans work great) or unsweetened shredded coconut. They don't leave a powdery residue and they add a little crunch. Roll each chilled ball in your chosen coating, pressing gently so it sticks.
Packing for the Campout
I use a rigid, sealable container — never a zip-top bag, which squishes the truffles. Line the bottom with wax paper, add a single layer of truffles, then another sheet of wax paper, and repeat. Place the container in the middle of your cooler, surrounded by ice packs, not right on top of the ice. If you have a frozen water bottle, lay it on top of the container for extra insulation.
On a warm day (above 80°F), I keep the cooler in the shade and open it only when needed. These truffles will stay perfect for up to three days this way.
A Note on Safety
Chocolate truffles are a treat, not a meal replacement. If you're camping with kids, make sure they eat a proper dinner first. And always store any leftover truffles in a sealed container — not just for ants, but for raccoons and bears. Sweet smells attract wildlife. Keep the container inside your cooler or in a bear-proof food locker if you're in bear country.
Takeaway
These chocolate truffle balls are everything I want in a camping dessert: rich, portable, and made ahead. The extra chill step and careful packing make all the difference between a glorious bite under the stars and a melted mess. Give them a try on your next trip — I think you'll see why everyone's obsessed.
Frequently Asked Questions
Can I make chocolate truffle balls without a double boiler?
Yes. Place a heat-safe bowl over a pot of simmering water, making sure the bowl doesn't touch the water. Stir until melted. Or use a microwave in 30-second bursts, stirring between each.
How do I keep truffle balls from melting in warm weather?
I pack them in a sealed container buried in the middle of a cooler with ice packs, not near the lid. For hot days, I add a frozen water bottle on top and keep the cooler shaded.
Can I use white chocolate for truffle balls?
Yes, but white chocolate is more heat-sensitive. I'd only bring it on cool-weather trips (below 70°F) and store it in the cooler until serving.
Chocolate Truffle Balls: Everyone's Obsessed Camping Treat

Rich, creamy chocolate truffle balls that hold up beautifully on the trail. My technique uses a simple hands-on rolling method and a secret chill step to prevent melting.
- 1 cup heavy cream
- 8 ounces dark chocolate (60-70% cacao), finely chopped
- 2 tablespoons unsalted butter, softened
- 1 teaspoon vanilla extract
- 1/3 cup cocoa powder, for rolling
- 1/4 cup finely chopped nuts or shredded coconut (optional) (for coating)
- Place the finely chopped dark chocolate in a heat-safe bowl.
- In a small saucepan, heat the heavy cream over medium heat until it just begins to simmer — small bubbles form around the edge, but do not let it boil.
- Pour the hot cream over the chopped chocolate. Let it sit for 2 minutes without stirring.
- Gently stir with a spatula starting from the center, moving outward, until the chocolate is fully melted and the mixture is smooth.
- Add the softened butter and vanilla extract, stirring until glossy and fully combined.
- Cover the bowl with plastic wrap and refrigerate for at least 2 hours, or until the mixture is firm enough to scoop.
- Line a baking sheet with parchment paper. Using a small cookie scoop or teaspoon, portion out rounded tablespoons of the ganache.
- Roll each portion between your palms into a smooth ball. If your hands get sticky, dust them lightly with cocoa powder.
- Place the rolled truffle balls on the parchment-lined sheet and refrigerate for 30 minutes — this step is key for camping so they stay firm.
- Pour cocoa powder (or optional coatings) into a shallow bowl. Roll each chilled truffle ball to coat evenly.
- Transfer to a sealed container layered with wax paper. Refrigerate until you pack for your trip. They keep in a cooler for up to 3 days.
Recipe: Chocolate Truffle Balls: Everyone's Obsessed Camping Treat
Ingredients
- 1 cup heavy cream
- 8 ounces dark chocolate (60-70% cacao), finely chopped
- 2 tablespoons unsalted butter, softened
- 1 teaspoon vanilla extract
- 1/3 cup cocoa powder, for rolling
- 1/4 cup finely chopped nuts or shredded coconut (optional) (for coating)
Instructions
- Place the finely chopped dark chocolate in a heat-safe bowl.
- In a small saucepan, heat the heavy cream over medium heat until it just begins to simmer — small bubbles form around the edge, but do not let it boil.
- Pour the hot cream over the chopped chocolate. Let it sit for 2 minutes without stirring.
- Gently stir with a spatula starting from the center, moving outward, until the chocolate is fully melted and the mixture is smooth.
- Add the softened butter and vanilla extract, stirring until glossy and fully combined.
- Cover the bowl with plastic wrap and refrigerate for at least 2 hours, or until the mixture is firm enough to scoop.
- Line a baking sheet with parchment paper. Using a small cookie scoop or teaspoon, portion out rounded tablespoons of the ganache.
- Roll each portion between your palms into a smooth ball. If your hands get sticky, dust them lightly with cocoa powder.
- Place the rolled truffle balls on the parchment-lined sheet and refrigerate for 30 minutes — this step is key for camping so they stay firm.
- Pour cocoa powder (or optional coatings) into a shallow bowl. Roll each chilled truffle ball to coat evenly.
- Transfer to a sealed container layered with wax paper. Refrigerate until you pack for your trip. They keep in a cooler for up to 3 days.