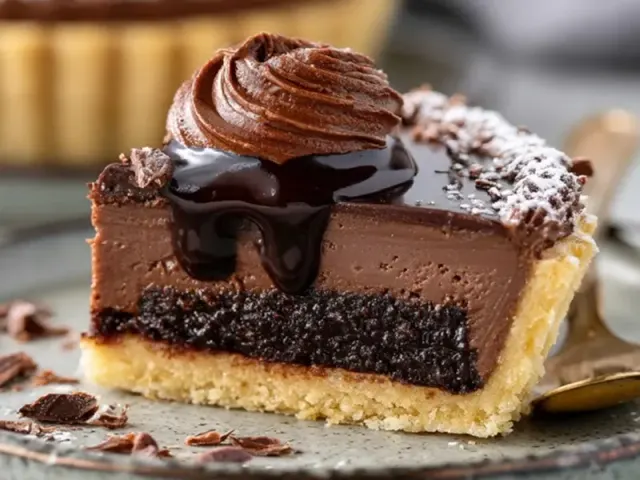
Chocolate Tart: Changes Everything
There's something about the first bite of a chocolate tart at camp that shifts the whole evening. The silence of the woods, the flicker of a lantern, and then that velvety richness melting on your tongue. It's not just dessert—it's a moment that turns a good trip into something memorable. But here's the trick: you don't need a campfire or an oven to pull it off.

Why This Tart Works at Camp
Most camp desserts lean on fire-roasted marshmallows or foil packets of fruit. Those are fine, but they're also messy and weather-dependent. A no-bake chocolate tart is different. It's cool, creamy, and forgiving. Rainy evening? No problem. Windy night? The tart stays put. Plus, you can prep most of it at home and assemble it in minutes at the campsite.
The real game-changer is the texture. A well-made chocolate tart has a crackling crust and a filling that's both dense and silky. It feels indulgent, like something you'd order at a café, but you're eating it on a camp chair under the stars. That contrast is what makes it special.
The Gear You'll Actually Need
Keep it simple. A 9-inch pie tin or a shallow dish works as the mold. I prefer a metal tin because it chills faster and doesn't crack like glass. You'll also need a small pot for the camp stove, a spatula, and a bowl for mixing the crust. A cooler with a good seal is non-negotiable—it's your refrigerator for the night.
One specific trick: line the tin with a strip of parchment paper before pressing in the crust. Leave the ends hanging over the edges. This gives you handles to lift the tart out cleanly later. No crumbling edges, no fuss.
Building the Crust (No Oven Required)
The crust is where most people go wrong. They press too hard or not hard enough. The goal is a firm, even layer that won't crumble when you slice. Use crushed chocolate cookies or graham crackers. Mix them with melted butter until the texture feels like wet sand. Then press it into the tin using the flat bottom of a cup. Apply steady pressure, especially at the edges.
Here's the common mistake: skipping the chill time. The crust needs at least 20 minutes in the cooler to set. If you pour the filling on a warm crust, the butter melts and the crust turns soggy. Patience pays off.
Making the Filling at Camp
Heat the heavy cream on a low flame until it steams—small bubbles around the edge, but no rolling boil. Boiling can scorch the cream and ruin the silkiness. Pour it over the chopped chocolate and let it sit for a full minute before stirring. That rest is critical. It allows the chocolate to melt evenly without seizing.
Stir slowly from the center outward until the mixture is glossy and smooth. Add a pinch of sea salt and a splash of vanilla. The salt doesn't make it salty—it makes the chocolate taste deeper. If you want a little sweetness, a drizzle of maple syrup works wonders.
Pour the filling into the chilled crust and spread it evenly. Tap the tin gently on the table to release air bubbles. Then back into the cooler for at least two hours. Overnight is even better.
Serving and Storing
Slice with a sharp knife, wiping the blade between cuts. This gives you clean, photo-worthy slices. Serve on small plates or napkins. The tart keeps in the cooler for about 24 hours, but after that the crust can soften. If you're camping for multiple nights, make a second tart on day two.
A safety note: keep the cooler in the shade and check the temperature. If the tart feels warm to the touch, it's time to eat it or toss it. Food safety matters, especially with dairy.
The Takeaway
One dessert can change the rhythm of a camping trip. A chocolate tart brings a touch of elegance to the wild without adding complexity. It's proof that good camping food doesn't have to be rough or rustic. Sometimes the best thing you can do is sit back, take a bite, and let the chocolate do its work.
Frequently Asked Questions
Can I make chocolate tart without a camp stove?
Yes. If you don't have a camp stove, you can prepare the filling at home using a microwave or stovetop, then pour it into the crust at camp. Keep the tart chilled in a cooler until serving.
How do I keep chocolate tart cold while camping?
Use a high-quality cooler with ice packs. Pre-chill the tart overnight at home, then wrap it in foil and place it in the cooler. Serve within 24 hours for best texture.
What is the best crust for a camping chocolate tart?
A no-bake crumb crust—made from crushed cookies or graham crackers mixed with melted butter—works best. It sets firm without an oven and travels well.
Chocolate Tart: Changes Everything

A no-bake chocolate tart that is creamy, rich, and surprisingly easy to make at a campsite. This dessert uses simple ingredients and a camp stove, no oven required.
- 1.5 cups crushed chocolate cookies or graham crackers (for the crust)
- 6 tablespoons unsalted butter (melted)
- 1 cup heavy cream
- 8 ounces dark chocolate (60-70% cacao) (chopped)
- 2 tablespoons maple syrup or honey (optional, for sweetness)
- 1 teaspoon vanilla extract
- 1 pinch sea salt
- Line the bottom of a 9-inch pie tin or shallow dish with parchment paper for easy removal.
- In a bowl, mix the crushed cookies and melted butter until evenly moistened. Press firmly into the tin to form an even crust. Place in a cooler or refrigerator to set while you make the filling.
- Pour the heavy cream into a small pot and heat over a camp stove on low-medium heat until it just begins to steam—do not let it boil.
- Remove the pot from heat and add the chopped dark chocolate. Let it sit for 1 minute, then stir until smooth and glossy.
- Stir in the maple syrup (if using), vanilla, and sea salt. Mix well.
- Pour the chocolate filling over the prepared crust. Spread evenly with a spatula.
- Place the tart in the cooler and let it chill for at least 2 hours, or until firm. Serve cold.
- Slice with a sharp knife, wiping the blade between cuts for clean edges.
Recipe: Chocolate Tart: Changes Everything
Ingredients
- 1.5 cups crushed chocolate cookies or graham crackers (for the crust)
- 6 tablespoons unsalted butter (melted)
- 1 cup heavy cream
- 8 ounces dark chocolate (60-70% cacao) (chopped)
- 2 tablespoons maple syrup or honey (optional, for sweetness)
- 1 teaspoon vanilla extract
- 1 pinch sea salt
Instructions
- Line the bottom of a 9-inch pie tin or shallow dish with parchment paper for easy removal.
- In a bowl, mix the crushed cookies and melted butter until evenly moistened. Press firmly into the tin to form an even crust. Place in a cooler or refrigerator to set while you make the filling.
- Pour the heavy cream into a small pot and heat over a camp stove on low-medium heat until it just begins to steam—do not let it boil.
- Remove the pot from heat and add the chopped dark chocolate. Let it sit for 1 minute, then stir until smooth and glossy.
- Stir in the maple syrup (if using), vanilla, and sea salt. Mix well.
- Pour the chocolate filling over the prepared crust. Spread evenly with a spatula.
- Place the tart in the cooler and let it chill for at least 2 hours, or until firm. Serve cold.
- Slice with a sharp knife, wiping the blade between cuts for clean edges.