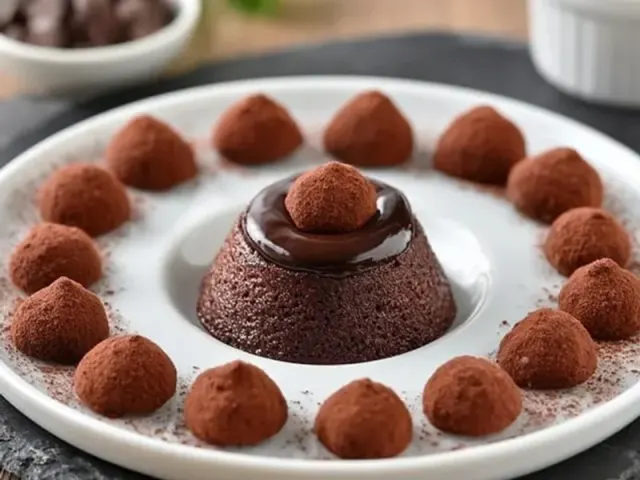
Chocolate Snack Bites: Melts In Your Mouth
There's a sound I love at camp: the soft thump of a mug being set down on a log, followed by the quiet rustle of a wrapper. That's the moment a chocolate snack bite comes out of the pack. One bite, and the cocoa hits first—deep and dark. Then the date sweetness spreads across your tongue. The almonds give a faint crunch, and then it all just... melts. No crumbs, no mess. Just pure chocolate satisfaction under the pines.

But here's the thing about bringing chocolate-based treats camping: heat. A warm pocket or a sunny pack can turn your carefully rolled bites into a sticky, shapeless blob. I've been there. The trick isn't just in the recipe—it's in one specific technique that most campers skip. And I'm going to show you exactly how to avoid that disaster.
Why These Bites Work at Camp
Standard chocolate chip cookies crumble. Brownies leave greasy fingerprints on your gear. These chocolate snack bites are different. They're no-bake, so you don't need an oven or a stove. They hold their shape at moderate temperatures—up to about 75°F (24°C)—because the dates act as a natural binder. The coconut oil helps them set firmly without becoming rock hard in the cold.
The real magic? A single ingredient that adds structure without changing the flavor: almond meal from whole almonds. Not almond flour, which is too fine. You want coarse bits that create tiny pockets of texture. Those pockets also trap air, which means the bites feel lighter on the tongue. They melt faster because the cocoa and fat hit your taste buds first, before the denser date paste.
The One Trick That Keeps Them From Melting
Here's the technique that separates a successful camping treat from a sad, squished mess: chill the rolled bites for a full 30 minutes before packing, then wrap each one individually in parchment paper. Not wax paper—parchment. Wax paper melts in warm conditions and sticks to the chocolate. Parchment breathes just enough to wick away condensation.
Why does this work? When you roll the bites, your hands warm the coconut oil and almond butter. If you pack them immediately, the warmth trapped inside the container creates a microclimate of humidity. The bites soften, then re-set in a flat, deformed shape. A half-hour in the fridge (or a cool stream, if you're already camping) lets the oil re-solidify evenly. The parchment paper then acts as a buffer: even if one bite warms slightly, it won't fuse to its neighbor.
One more tip for hot-weather camping: swap the coconut oil for cacao butter. Cacao butter has a higher melting point—around 93°F (34°C) versus coconut oil's 76°F (24°C). The texture stays creamier, and the bites hold their shape longer. You can find cacao butter in the baking aisle or online. Grate it before adding to the food processor.
How to Adapt for Kids, Rain, and Cold Nights
Camping with kids? Let them help roll the bites. Damp hands are essential—dry hands will stick to the mixture. Show them how to press firmly without squeezing too hard. For little ones who prefer plainer flavors, leave out the cocoa powder and use 1/4 cup of peanut butter instead. You'll get a milder, nuttier bite that still melts in the mouth.
Rainy camp? Humidity is the enemy of these bites. If you're making them at home before a wet-weather trip, add an extra tablespoon of almond butter. The extra fat coats the date fibers and prevents them from absorbing atmospheric moisture. Pack them in a sealed container with a silica gel packet (food-grade only) tucked under the parchment layer.
Cold nights? These bites become firmer in low temperatures. That's fine—they still melt in your mouth because the coconut oil softens instantly from body heat. But if you want a softer bite, hold one in your closed palm for 30 seconds before eating. The warmth of your hand does the work.
The Common Mistake to Avoid
Over-processing the dates. I see this all the time. You pulse the food processor, and the mixture looks dry, so you keep going. And going. Suddenly you have date paste—sticky, glue-like, and impossible to roll. The mixture should look like a coarse dough that holds together when pinched, not a smooth paste. Stop the processor the moment it clumps. If it's still too crumbly, add one teaspoon of warm water and pulse once. That's usually enough.
Packing and Storing at Camp
Use a hard-sided container, not a soft bag. A wide-mouth Nalgene-style jar or a small locking plastic box works perfectly. Layer the parchment-wrapped bites vertically, like books on a shelf. This prevents them from crushing each other under the weight of your gear. Store the container in a bear canister or a sealed dry bag—these bites smell sweet, and that scent travels. Always follow local food storage regulations. In bear country, keep all food (including these bites) in an approved container at least 100 feet from your tent.
If the temperature climbs above 80°F (27°C) during the day, move the container to a shaded spot. Better yet, bury it in a shallow hole under a log or rock. The ground stays cooler than the air. Just mark the spot with a visible stick so you don't lose your dessert.
A Final Bite-Sized Thought
The best camping treats are the ones that ask nothing of you. No stove to light, no bowl to wash, no spoon to dig for. A chocolate snack bite sits in your palm, quiet and patient. You unwrap it. You bite. And for a few seconds, the world narrows to that single moment of sweetness melting on your tongue. That's the kind of camp food worth packing.
Frequently Asked Questions
How do I keep chocolate snack bites from melting in my pack while hiking?
Use a double-walled insulated food jar or a small cooler with an ice pack. Wrap each bite individually in parchment paper, then place them in a sealed bag. Keep the container in the center of your pack, away from the sides where body heat transfers. On hot days, hike early and store them in a bear canister in the shade at camp.
Can I make these chocolate snack bites without a food processor?
Yes. Finely chop the dates and nuts with a sharp knife, then mash everything together in a bowl with a fork or your hands. It takes a bit more elbow grease, but the texture will be just as good. The key is to make sure the dates are very soft—soak them in warm water for 10 minutes if they feel dry.
Are these chocolate snack bites safe for kids with nut allergies?
You can substitute the nut butter with sunflower seed butter and use toasted pumpkin seeds or crushed sunflower seeds instead of chopped nuts. Check all other ingredients (like chocolate chips) for cross-contamination labels. Sunflower seed butter has a slightly different flavor profile—it works well with the cocoa and dates.
Chocolate Snack Bites: Melts In Your Mouth

These no-bake chocolate snack bites are the ultimate melt-in-your-mouth camping treat. Made with dates, cocoa, and a secret trick to keep them from turning into a sticky mess in your pack, they deliver rich chocolate flavor and steady energy for the trail.
- 1 cup soft dates (pitted, preferably Medjool for stickiness)
- 1 cup almonds (raw or roasted)
- 3 tablespoons cocoa powder (unsweetened)
- 2 tablespoons almond butter (natural, no sugar added)
- 1 tablespoon coconut oil (melted)
- 1/4 teaspoon sea salt
- 1/3 cup chocolate chips (dark, mini chips work best)
- 1 tablespoon shredded coconut (optional) (for rolling)
- Soak the dates in warm water for 10 minutes if they aren't already soft. Drain well.
- In a food processor, pulse the almonds until they form a coarse meal. Be careful not to over-process into almond butter.
- Add the soaked dates, cocoa powder, almond butter, melted coconut oil, and sea salt. Process until the mixture sticks together when pressed between your fingers. It should form a cohesive dough.
- Transfer the mixture to a bowl. Fold in the chocolate chips by hand.
- Using slightly damp hands, roll the mixture into 1-inch balls. If the mixture is too sticky, chill it in the refrigerator for 15 minutes first.
- Optional: roll each bite in shredded coconut to coat.
- Place the bites on a parchment-lined tray and refrigerate for at least 30 minutes to firm up. This is the critical step for packability.
- Transfer to an airtight container with parchment paper between layers. Store in a cooler or insulated bag until ready to eat.
Recipe: Chocolate Snack Bites: Melts In Your Mouth
Ingredients
- 1 cup soft dates (pitted, preferably Medjool for stickiness)
- 1 cup almonds (raw or roasted)
- 3 tablespoons cocoa powder (unsweetened)
- 2 tablespoons almond butter (natural, no sugar added)
- 1 tablespoon coconut oil (melted)
- 1/4 teaspoon sea salt
- 1/3 cup chocolate chips (dark, mini chips work best)
- 1 tablespoon shredded coconut (optional) (for rolling)
Instructions
- Soak the dates in warm water for 10 minutes if they aren't already soft. Drain well.
- In a food processor, pulse the almonds until they form a coarse meal. Be careful not to over-process into almond butter.
- Add the soaked dates, cocoa powder, almond butter, melted coconut oil, and sea salt. Process until the mixture sticks together when pressed between your fingers. It should form a cohesive dough.
- Transfer the mixture to a bowl. Fold in the chocolate chips by hand.
- Using slightly damp hands, roll the mixture into 1-inch balls. If the mixture is too sticky, chill it in the refrigerator for 15 minutes first.
- Optional: roll each bite in shredded coconut to coat.
- Place the bites on a parchment-lined tray and refrigerate for at least 30 minutes to firm up. This is the critical step for packability.
- Transfer to an airtight container with parchment paper between layers. Store in a cooler or insulated bag until ready to eat.