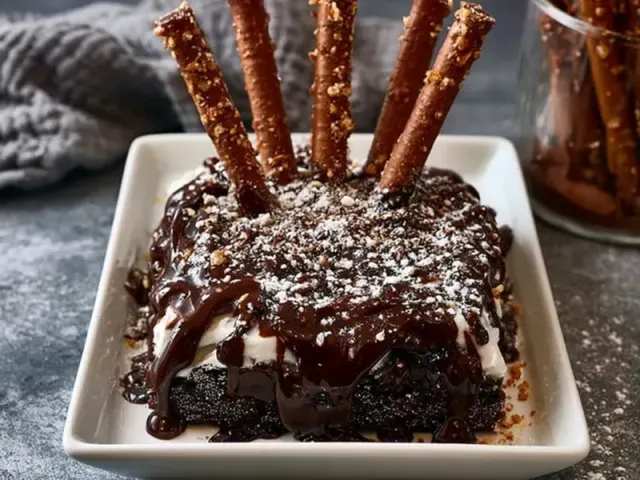
Chocolate Pretzel Rods: 5-Minute Hack
The first time I tried making chocolate pretzel rods at a campsite, I melted the chocolate in a metal cup over the fire. It scorched. I ended up with a grainy mess and a cup I couldn't scrub clean.

That's when I switched to a two-minute microwave method at home before I leave. No double boiler. No scorched chocolate. No dishes to wash in a bucket of cold water.
Here's the hack that changed my camping snack game forever.
Why This Method Works for Camping
Standard chocolate-dipped pretzels need tempering or a steady cool environment. This version skips the tempering step entirely. By using a small amount of coconut oil, the chocolate stays fluid enough for a thin, even coat, but sets firmly at room temperature. That means you can make them the night before you leave, pack them in a hard-sided container, and they won't smear or melt in your pack — as long as you keep them out of direct sun.
The real trick is the coconut oil. It lowers the melting point just enough to give you a smooth coating without the chalky bloom that happens when chocolate gets too warm then cools unevenly. A half teaspoon per cup of chips is all you need.
Choosing the Right Pretzel Rods
Not all pretzel rods are the same. Thin rods snap easily when you dip them. Thick, sturdy rods hold up better. Look for rods that are at least as thick as your index finger. If you can only find thin ones, handle them gently and dip only the bottom half to reduce stress on the rod.
Salt level matters too. Some pretzel rods are heavily salted on one side only. If that's the case, dip the less salty end so the final bite isn't overwhelmingly salty.
The 5-Minute Process
I use a microwave at home, but you can also use a camp stove with a double boiler setup if you're making these at the campsite. The key is low, indirect heat.
Microwave the chocolate chips in a glass bowl for 30 seconds, stir, then repeat once or twice until most chips are melted. The residual heat will finish the job as you stir. Add the coconut oil now and stir until glossy.
Dip each rod, let the excess drip back into the bowl, then lay it on parchment. While the chocolate is still wet, sprinkle your topping. Sea salt flakes are my go-to because they stick well and contrast the sweetness. Crushed freeze-dried raspberries add a tart pop that works beautifully in warm weather.
Let them set. In a cool kitchen (under 70°F), they firm up in about 10 minutes. If it's hot, I slide the tray into the fridge for 5 minutes. At camp, I use the cooler lid as a makeshift cooling surface — the cold air from inside helps set the chocolate faster.
Packing for the Trail
Once set, wrap each rod individually in wax paper. Stack them in a hard-sided container — a sturdy plastic food container works — with a sheet of wax paper between layers. If temperatures will be above 80°F, add a small ice pack on top, but make sure it doesn't touch the chocolate directly. Condensation can make the coating sticky.
I pack them in my bear canister or food bag, not with my cooking gear, to avoid any accidental crushing.
Adapting for Weather Conditions
Hot weather (above 85°F): Use dark chocolate with at least 70% cacao. It has a higher melting point than milk chocolate. Skip the coconut oil — the chocolate will be thick enough to stay put. Dip quickly and let set in the cooler.
Cold weather (below 50°F): Milk chocolate works fine, but the coconut oil is essential. Without it, the chocolate can seize and become crumbly. Let the rods set at room temperature, not outside, or the chocolate may crack from the rapid temperature drop.
Rainy or humid conditions: Chocolate absorbs moisture from the air, which can cause it to bloom (white streaks). Make these rods only if you can keep them sealed in an airtight container until you eat them. Don't make them at a damp campsite — the chocolate won't set properly.
Common Mistakes to Avoid
Don't overheat the chocolate. Burnt chocolate is bitter and grainy. Low and slow is the rule.
Don't dip the entire rod. Leave about an inch bare at the top so you have a clean handle to hold. Your fingers will thank you.
Don't skip the parchment. Wax paper works too, but parchment is more heat-resistant if you're pouring warm chocolate directly onto it.
Don't crowd the rods. Leave at least an inch between them on the tray so the chocolate doesn't pool and create a thick, uneven base.
A Final Word on Safety
If you're making these over a camp stove, never leave the melting chocolate unattended. Chocolate is flammable if it gets too hot. Use a low flame and stir constantly. Keep a lid nearby to smother any flare-up.
Store the finished rods in a sealed container away from wildlife. The sweet smell can attract bears and raccoons. In bear country, pack them in an approved bear canister.
These chocolate pretzel rods are a simple, satisfying treat that takes more time to describe than to make. Five minutes of prep, a short cool-down, and you have a snack that tastes like you fussed — but you didn't.
Frequently Asked Questions
Can I use milk chocolate instead of dark chocolate?
Yes, milk chocolate works fine. It melts more easily in warm weather, so store the finished rods in a cool spot or insulated bag if temperatures are above 75°F.
How do I keep the chocolate from melting in my pack?
Wrap each rod individually in wax paper, then pack them in a hard-sided container with a small ice pack. Keep the container out of direct sun.
Can I make these vegan?
Absolutely. Use dairy-free dark chocolate chips and check that your pretzel rods are vegan-friendly (most are). The method stays the same.
Chocolate Pretzel Rods: 5-Minute Hack

This 5-minute hack for chocolate pretzel rods uses a microwave-and-bag method that skips the double boiler and dirty dishes. Perfect for camping trips where you want a sweet-and-salty treat without the fuss.
- 8 pretzel rods (standard size, about 8 inches long)
- 1 cup dark chocolate chips (or milk chocolate chips, 60% cacao or higher for heat stability)
- 1/2 teaspoon coconut oil (optional, helps thin the chocolate for even coating)
- sea salt flakes (for sprinkling, or crushed nuts, sprinkles, freeze-dried fruit)
- Line a baking sheet or flat tray with parchment paper. Set it near your workspace.
- Pour the chocolate chips into a microwave-safe bowl. Add coconut oil if using. Microwave in 30-second bursts, stirring after each, until fully melted (about 1–1.5 minutes total).
- Dip each pretzel rod into the melted chocolate, turning to coat the bottom two-thirds. Let excess drip off back into the bowl.
- Place the coated rod on the parchment. While the chocolate is still wet, sprinkle with sea salt or your chosen topping.
- Let the rods set at room temperature until the chocolate hardens. In cool weather (below 70°F) this takes about 10 minutes. In warm weather, pop the tray in a cooler or fridge for 5 minutes.
- Store in an airtight container between layers of wax paper. They keep for up to 5 days at camp.
Recipe: Chocolate Pretzel Rods: 5-Minute Hack
Ingredients
- 8 pretzel rods (standard size, about 8 inches long)
- 1 cup dark chocolate chips (or milk chocolate chips, 60% cacao or higher for heat stability)
- 1/2 teaspoon coconut oil (optional, helps thin the chocolate for even coating)
- sea salt flakes (for sprinkling, or crushed nuts, sprinkles, freeze-dried fruit)
Instructions
- Line a baking sheet or flat tray with parchment paper. Set it near your workspace.
- Pour the chocolate chips into a microwave-safe bowl. Add coconut oil if using. Microwave in 30-second bursts, stirring after each, until fully melted (about 1–1.5 minutes total).
- Dip each pretzel rod into the melted chocolate, turning to coat the bottom two-thirds. Let excess drip off back into the bowl.
- Place the coated rod on the parchment. While the chocolate is still wet, sprinkle with sea salt or your chosen topping.
- Let the rods set at room temperature until the chocolate hardens. In cool weather (below 70°F) this takes about 10 minutes. In warm weather, pop the tray in a cooler or fridge for 5 minutes.
- Store in an airtight container between layers of wax paper. They keep for up to 5 days at camp.