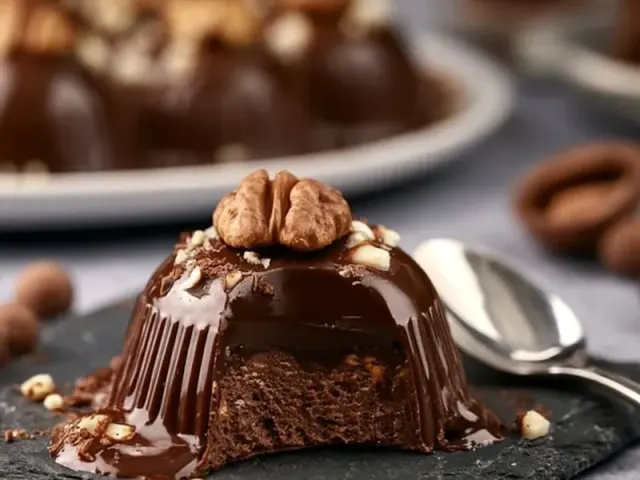
Chocolate Pralines: The Only Recipe You Need
The first time I pulled a saucepan of chocolate pralines off the camp stove and watched them set into glossy, nut-studded discs, I knew I had something special. This recipe is the one I come back to again and again — not because it's fancy, but because it works. Every time. No crystals, no graininess, just that creamy, melt-in-your-mouth texture that makes pralines irresistible.

Why This Recipe Works at Camp
Most praline recipes rely on a candy thermometer and precise temperature control. This one does too — but it also accounts for the quirks of cooking outdoors. The heavy-bottomed pan distributes heat evenly on a camp stove's sometimes uneven flame. The butter and evaporated milk create a stable emulsion that's forgiving if your heat wavers. And the soft-ball stage (235°F) gives you a wide enough window that you won't ruin the batch if you're a few degrees off.
One tip I've learned the hard way: don't try this in high humidity. Sugar absorbs moisture from the air, and your pralines will turn out sticky instead of firm. If the air feels thick and damp, save this recipe for a dry day.
The Technique That Makes the Difference
The secret to smooth pralines is controlling sugar crystallization. Here's how:
Start with a Clean Pan
Any stray sugar crystals on the sides of the pan can seed the entire batch and turn your pralines grainy. Before you start, wash the pan well and dry it. Once the sugars are dissolved and the mixture is boiling, use a wet pastry brush to wipe down the inner walls of the pan just above the liquid line. This dissolves any clinging crystals before they cause trouble.
Don't Stir After It Boils
Stirring introduces air and agitation, which encourages crystallization. Once the mixture reaches a rolling boil, leave it alone. Let the bubbles do the work. Trust the thermometer.
Cool Before You Beat
This is the step most people rush. If you beat the mixture while it's still hot, the pralines will be soft and runny. If you wait too long, they'll be crumbly and dry. Let it cool undisturbed until the thermometer reads 110°F. That's the sweet spot. The mixture will look glossy and fluid — but it's ready to transform into a thick, matte fudge with a few minutes of vigorous stirring.
Adapting for Camp Conditions
Wind is the biggest challenge when candy-making outdoors. A gust can cool your pan unevenly or blow the thermometer reading off. Set up your stove in a sheltered spot — behind a windbreak, a vehicle, or even a large cooler. If the flame sputters, use a lower heat setting and extend the cooking time slightly. The temperature target doesn't change, just the time to reach it.
If you're cooking on a small backpacking stove, use a smaller pan (2-quart) to keep the mixture deep enough for the thermometer to read accurately. And always bring extra fuel — nothing worse than running out at 234°F.
Making Pralines with Kids
This recipe involves hot sugar, so keep children at a safe distance during the boiling and beating stages. Let them help measure ingredients, chop pecans (with a kid-safe knife), and drop the finished pralines onto the parchment. The cooling and setting stage is a great time for a nature walk — by the time you're back, they're ready to eat.
Storage and Safety
Pralines keep well in an airtight container at room temperature for up to two weeks. If you're camping in bear country, store them in a bear canister or hung properly away from your sleeping area — the sweet smell attracts wildlife. Never leave food in your tent, even sealed containers.
When cooking, keep a small bowl of cold water nearby. If you get a drop of hot sugar on your skin, dip it immediately — don't wipe it off, or you'll spread the burn. A camp first-aid kit should include burn cream and sterile gauze just in case.
The Takeaway
Chocolate pralines are one of those treats that feel like a luxury, but they're surprisingly achievable with a camp stove and a little patience. The technique is simple once you understand the why behind each step: clean pan, no stirring after boil, cool to 110°F, then beat until matte. Get that right, and you'll have a batch of pralines that rivals any candy shop — right from your campsite.
Frequently Asked Questions
Why did my pralines turn out grainy?
Graininess usually means sugar crystals formed during cooking. To prevent this, use a clean pan with no sugar residue on the sides, and never stir the mixture once it reaches a boil. Wipe down the sides of the pan with a wet pastry brush before boiling to dissolve stray crystals.
Can I use milk chocolate instead of semi-sweet?
Yes, but milk chocolate has more sugar and less cocoa butter, so the pralines will be softer and sweeter. If you swap, reduce the granulated sugar by 2 tablespoons to keep the texture firm enough to hold its shape.
How do I store chocolate pralines?
Store in an airtight container at cool room temperature (60-70°F) for up to two weeks. Do not refrigerate — condensation can cause sugar bloom (white spots). For longer storage, freeze in a sealed bag for up to 3 months, then thaw in the container to avoid moisture.
My pralines didn't set. What went wrong?
The mixture likely didn't reach the correct temperature. Use a candy thermometer and cook to exactly 235°F (soft-ball stage). Also, let the mixture cool undisturbed to 110°F before beating — beating too early or too late affects the set.
Can I make pralines without a candy thermometer?
Yes, but it's riskier. Use the cold-water test: drop a small spoonful of the hot syrup into a bowl of cold water. If it forms a soft, pliable ball that flattens when pressed, it's ready. This takes practice, so a thermometer is recommended for consistent results.
Chocolate Pralines: The Only Recipe You Need

These chocolate pralines are creamy, nutty, and perfectly sweet — a camp-friendly treat that needs only a camp stove and a saucepan. The secret is cooking to the soft-ball stage and beating at exactly the right temperature for a smooth, melt-in-your-mouth texture.
- 1 cup granulated sugar
- 3/4 cup packed light brown sugar
- 1/2 cup unsalted butter (cut into cubes)
- 1/2 cup evaporated milk
- 1 cup semi-sweet chocolate chips
- 1 teaspoon vanilla extract
- 1 cup pecan halves (toasted and roughly chopped)
- Line a baking sheet with parchment paper or a silicone mat. Set aside.
- In a heavy-bottomed saucepan (at least 3-quart), combine the granulated sugar, brown sugar, butter, and evaporated milk. Stir gently with a wooden spoon over medium heat until the butter melts and the sugars dissolve — about 3 minutes.
- Once the mixture is smooth and bubbling, stop stirring. Clip a candy thermometer to the side of the pan, making sure the tip is submerged but not touching the bottom. Bring to a rolling boil over medium heat.
- Cook without stirring until the thermometer reads 235°F (soft-ball stage). This takes about 5–7 minutes. If any sugar crystals form on the sides of the pan, wipe them away with a wet pastry brush to prevent graininess.
- Remove the pan from heat immediately. Add the chocolate chips and vanilla extract, but do not stir yet. Let the mixture sit undisturbed for 2 minutes to melt the chocolate.
- Stir gently with the wooden spoon until the chocolate is fully incorporated and the mixture is smooth. Add the chopped pecans and stir just until evenly distributed.
- Let the mixture cool in the pan, undisturbed, until the temperature drops to 110°F — about 8–10 minutes. Do not skip this step: beating too early makes runny pralines, beating too late makes crumbly ones.
- Once at 110°F, beat the mixture vigorously with the wooden spoon for 2–3 minutes. It will thicken and lose its gloss, becoming matte and fudge-like. Work quickly — it sets fast.
- Drop rounded tablespoons of the mixture onto the prepared baking sheet, spacing them about 2 inches apart. If the mixture stiffens too much, stir in a few drops of hot water to loosen it slightly.
- Let the pralines set at room temperature for at least 30 minutes until firm. Store in an airtight container at room temperature.
Recipe: Chocolate Pralines: The Only Recipe You Need
Ingredients
- 1 cup granulated sugar
- 3/4 cup packed light brown sugar
- 1/2 cup unsalted butter (cut into cubes)
- 1/2 cup evaporated milk
- 1 cup semi-sweet chocolate chips
- 1 teaspoon vanilla extract
- 1 cup pecan halves (toasted and roughly chopped)
Instructions
- Line a baking sheet with parchment paper or a silicone mat. Set aside.
- In a heavy-bottomed saucepan (at least 3-quart), combine the granulated sugar, brown sugar, butter, and evaporated milk. Stir gently with a wooden spoon over medium heat until the butter melts and the sugars dissolve — about 3 minutes.
- Once the mixture is smooth and bubbling, stop stirring. Clip a candy thermometer to the side of the pan, making sure the tip is submerged but not touching the bottom. Bring to a rolling boil over medium heat.
- Cook without stirring until the thermometer reads 235°F (soft-ball stage). This takes about 5–7 minutes. If any sugar crystals form on the sides of the pan, wipe them away with a wet pastry brush to prevent graininess.
- Remove the pan from heat immediately. Add the chocolate chips and vanilla extract, but do not stir yet. Let the mixture sit undisturbed for 2 minutes to melt the chocolate.
- Stir gently with the wooden spoon until the chocolate is fully incorporated and the mixture is smooth. Add the chopped pecans and stir just until evenly distributed.
- Let the mixture cool in the pan, undisturbed, until the temperature drops to 110°F — about 8–10 minutes. Do not skip this step: beating too early makes runny pralines, beating too late makes crumbly ones.
- Once at 110°F, beat the mixture vigorously with the wooden spoon for 2–3 minutes. It will thicken and lose its gloss, becoming matte and fudge-like. Work quickly — it sets fast.
- Drop rounded tablespoons of the mixture onto the prepared baking sheet, spacing them about 2 inches apart. If the mixture stiffens too much, stir in a few drops of hot water to loosen it slightly.
- Let the pralines set at room temperature for at least 30 minutes until firm. Store in an airtight container at room temperature.