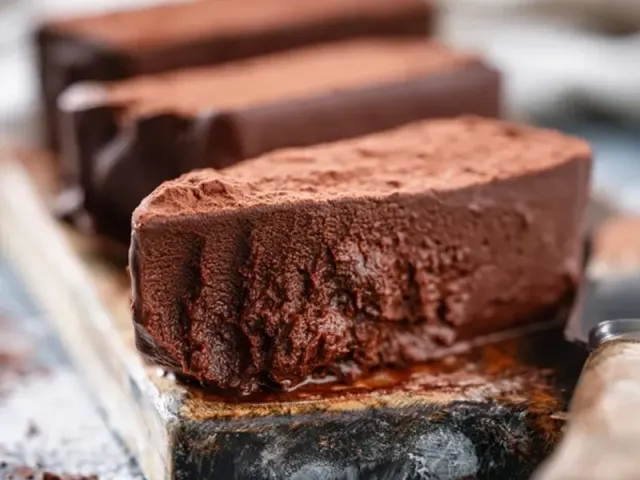
Chocolate Popsicles: Cool Camp Treats Without a Freezer
The first time I tried making chocolate popsicles at a campsite, I was holding a warm spoonful of melted chocolate and thinking: this is never going to work. But then I remembered a trick from my early backpacking days—using a thermos as a makeshift freezer. The result was a creamy, rich chocolate popsicle that tasted like something from a fancy ice cream shop, not a tent in the middle of nowhere.

This method relies on a simple principle: a pre-chilled thermos keeps things cold by trapping the temperature inside. When you pour melted chocolate into it, the cold walls of the thermos start to solidify the chocolate from the outside in. Over a few hours, the entire mixture sets into a firm, luscious popsicle. No electricity, no ice cream maker, no freezer required.
What You Need
The key piece of gear here is a wide-mouth thermos with at least a 1-liter capacity. A narrow mouth makes it impossible to get the popsicles out. I use a stainless steel thermos because it holds cold better than plastic, but a good-quality insulated bottle works too. You also need popsicle sticks—or clean, sturdy twigs if you're in a pinch. Just wash them and peel off any bark.
For the chocolate, use dark chocolate chips with 60-70% cocoa. The higher cocoa butter content helps the popsicles set firmly. Coconut cream (the thick part from a can of full-fat coconut milk) adds creaminess without dairy, which is great for warm weather since it doesn't spoil quickly. A tablespoon of coconut oil helps the texture stay smooth and prevents ice crystals.
The Method: Step by Step
Step 1: Pre-chill the thermos
Fill your thermos with ice water and let it sit for a full 10 minutes. This is crucial—if the thermos is warm, the chocolate will just stay liquid. While it chills, melt your chocolate mixture in a small pot over low heat. Stir constantly to avoid burning. Once smooth, remove from heat and stir in vanilla extract. Let it cool to room temperature—about 5 minutes. If the chocolate is too hot, it will warm up the thermos and ruin the cold seal.
Step 2: Pour and position
Pour out the ice water and dry the inside of the thermos quickly with a clean cloth. Pour the melted chocolate mixture in, but only fill it three-quarters full. The chocolate expands slightly as it solidifies, and you need room for the sticks. Insert the popsicle sticks into the mixture, spacing them evenly. They will want to lean; I prop them upright by balancing a clean fork or a short twig across the thermos opening, then resting each stick against it.
Step 3: Wait and chill
Screw the lid on loosely—not airtight, because a tiny bit of air circulation helps prevent condensation. Place the thermos in the coolest spot at your campsite. In summer, that means deep shade, preferably on the north side of a large tree. If you're near a cold stream, you can submerge the bottom half of the thermos in the water. In winter, bury it in snow. Let it sit for at least 4 hours; overnight is even better. The chocolate will set from the outside in, so the center might be slightly softer—that's the best part, like a molten core.
Common Mistakes to Avoid
Don't skip the pre-chill. I tried once out of laziness, and the popsicles were soupy after 6 hours. Also, don't use milk chocolate—it has too much sugar and not enough cocoa butter, so it stays soft. If you only have milk chocolate, add an extra tablespoon of coconut oil to help it firm up. Another mistake is overfilling the thermos. Leave that headspace; otherwise, the popsicles will be stuck together and impossible to pull out individually.
Adapting for Weather and Conditions
On a hot day (above 85°F), the thermos alone might not stay cold enough. Wrap it in a wet bandana or a damp towel—evaporative cooling helps. Or bury it in a shallow hole in the ground and cover with a wet cloth. In cold weather, this method works even better; just be careful not to let the chocolate freeze completely solid, or it will be too hard to bite. If that happens, let the thermos sit at room temperature for 10 minutes before serving.
For camping with kids, this is a fun afternoon project. Let them stir the chocolate and insert the sticks. Just make sure the chocolate has cooled enough that it's not hot to the touch. And always supervise when using sticks or twigs.
Safety Note
If you're using a camp stove to melt the chocolate, keep the stove on a stable, flat surface away from tent walls and dry leaves. Never leave a lit stove unattended. And store the thermos in a place where it won't be knocked over by kids or pets.
The first time I pulled a perfectly set chocolate popsicle out of that thermos, I felt like I'd discovered a secret. It's one of those camping hacks that seems too simple to work—but it does. And the taste? Rich, creamy, deeply chocolatey. You really won't believe it came from a thermos.
Frequently Asked Questions
How long do these chocolate popsicles last in the thermos?
They stay solid for about 4-6 hours if the thermos is pre-chilled and kept out of direct sun. After that, they start to soften but still taste great as a pudding.
Can I use milk chocolate instead of dark?
Yes, but milk chocolate has more sugar and less cocoa butter, so it may be softer. Add 1 tablespoon of coconut oil to help it firm up better.
What if I don't have popsicle sticks?
Use sturdy twigs or skewers instead. Just peel off the bark if using fresh twigs, and wash them first.
Is this safe for kids?
Absolutely, as long as the chocolate is not too hot when pouring. Let it cool to room temperature before handling. Also, supervise children when using sticks.
Chocolate Popsicles: Cool Camp Treats Without a Freezer

Make creamy chocolate popsicles at your campsite using only a thermos, melted chocolate, and a bit of patience. No freezer needed.
- 1 cup dark chocolate chips (60-70% cocoa)
- 1/2 cup coconut cream (full fat, from a can)
- 1 tablespoon coconut oil
- 1 teaspoon vanilla extract
- 4 popsicle sticks or clean twigs
- 1 wide-mouth thermos (1 liter capacity) (pre-chilled with ice water)
- Pre-chill your thermos: Fill it with ice water and let it sit for 10 minutes while you prepare the chocolate.
- Pour out the ice water and dry the inside of the thermos with a clean cloth.
- In a small pot over low heat (or in a heatproof bowl set over a camp stove), combine dark chocolate chips, coconut cream, and coconut oil. Stir constantly until fully melted and smooth.
- Remove from heat and stir in vanilla extract. Let the mixture cool to room temperature—about 5 minutes.
- Pour the melted chocolate mixture into the pre-chilled thermos. Do not fill more than 3/4 full—leave room for expansion.
- Insert popsicle sticks into the mixture, spacing them evenly. The sticks should stand upright; if they lean, prop them with a clean fork or twig across the thermos opening.
- Screw the lid on loosely (not airtight, to allow a little air circulation) and place the thermos in the coolest part of your campsite—shade, near a cold stream, or buried in a snowbank if available.
- Let it sit undisturbed for at least 4 hours. For best results, leave it overnight.
- To serve, unscrew the lid, gently twist each stick to loosen the popsicle, and pull straight up. If stuck, dip the outside of the thermos in cool water for 30 seconds.
Recipe: Chocolate Popsicles: Cool Camp Treats Without a Freezer
Ingredients
- 1 cup dark chocolate chips (60-70% cocoa)
- 1/2 cup coconut cream (full fat, from a can)
- 1 tablespoon coconut oil
- 1 teaspoon vanilla extract
- 4 popsicle sticks or clean twigs
- 1 wide-mouth thermos (1 liter capacity) (pre-chilled with ice water)
Instructions
- Pre-chill your thermos: Fill it with ice water and let it sit for 10 minutes while you prepare the chocolate.
- Pour out the ice water and dry the inside of the thermos with a clean cloth.
- In a small pot over low heat (or in a heatproof bowl set over a camp stove), combine dark chocolate chips, coconut cream, and coconut oil. Stir constantly until fully melted and smooth.
- Remove from heat and stir in vanilla extract. Let the mixture cool to room temperature—about 5 minutes.
- Pour the melted chocolate mixture into the pre-chilled thermos. Do not fill more than 3/4 full—leave room for expansion.
- Insert popsicle sticks into the mixture, spacing them evenly. The sticks should stand upright; if they lean, prop them with a clean fork or twig across the thermos opening.
- Screw the lid on loosely (not airtight, to allow a little air circulation) and place the thermos in the coolest part of your campsite—shade, near a cold stream, or buried in a snowbank if available.
- Let it sit undisturbed for at least 4 hours. For best results, leave it overnight.
- To serve, unscrew the lid, gently twist each stick to loosen the popsicle, and pull straight up. If stuck, dip the outside of the thermos in cool water for 30 seconds.