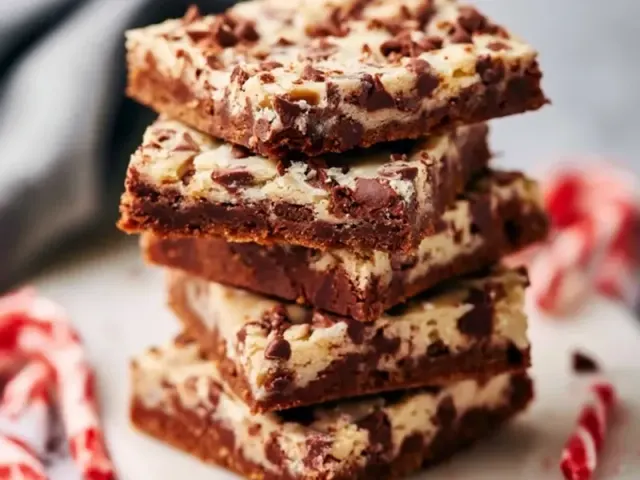
Chocolate Peppermint Bark: Easy Camping Treat Recipe
The first time I made chocolate peppermint bark at a campsite, I was skeptical. Melting chocolate over a camp stove felt like asking for a sticky disaster. But the payoff—a crisp, cool-weather treat that tastes like winter in a single bite—was worth the careful technique. This isn't a fussy recipe. It's a method for turning simple ingredients into something that feels special, even when you're miles from a kitchen.

Why This Bark Works for Camping
No bake time, no oven, and no complicated equipment. You just need a heat source, a pot or heatproof bowl, and a flat surface. The bark travels well if you keep it cool, and it satisfies that deep craving for something sweet after a day on the trail. The trick is in the layering: a thin, even base of dark chocolate, a smooth white chocolate top, and a generous shower of crushed peppermint. The candy canes add crunch and a burst of flavor that cuts through the richness.
Gear and Setup
You'll need a small pot for a double boiler, or a heatproof bowl that fits snugly over a pot. A camp stove with a low simmer works best. If you're using a campfire, keep the flame low and stir constantly to avoid burning. A silicone spatula makes spreading easy, and a small baking sheet or even a flat, foil-covered piece of cardboard serves as your cooling tray. I like to line it with parchment paper first—foil works too, but parchment peels off more cleanly.
Choosing Your Chocolate
Dark chocolate with 60-70% cacao holds up better in cooler temperatures and doesn't get overly sweet. White chocolate can be finicky—it seizes if it touches water. Keep your bowl and utensils bone-dry. If you're in humid weather, add a teaspoon of coconut oil to the white chocolate to help it stay smooth. Skip the cheap white chips; real white chocolate (with cocoa butter) melts more evenly.
Step-by-Step Technique
Start by crushing the candy canes. Place them in a zip-top bag and smash them with a rock or the bottom of a pot. You want a mix of fine powder and small chunks—not dust, not boulders. Set them aside.
Melt the dark chocolate first. Fill the pot with an inch of water, bring it to a bare simmer, then set the bowl on top. Stir until smooth. Pour it onto your lined tray and spread it to an even 1/4-inch thickness. Let it cool for about five minutes—just enough so the surface is set but still tacky.
Wipe out the bowl and melt the white chocolate the same way. If you're adding peppermint extract, stir it in after the chocolate is fully melted. Pour the white chocolate over the dark layer and spread gently. Don't press hard or you'll mix the layers. Immediately sprinkle the crushed candy canes on top. Let everything cool completely at room temperature. If it's warm, set the tray in a cooler (no ice directly on the bark) or in the shade until firm. Once solid, break the bark into irregular pieces by hand.
Common Mistakes and Fixes
- Chocolate seized or turned grainy: A drop of water got in. To prevent this, dry your bowl and utensils thoroughly. If it happens, stir in a teaspoon of vegetable oil or coconut oil to smooth it out.
- Layers mixed together: You poured the white chocolate too soon or spread too aggressively. Let the dark chocolate cool until it's just tacky, and pour gently.
- Bark didn't set: Warm weather is the culprit. Let it set in the coolest spot you have, or place it in a cooler with a cold pack (wrap the pack in a towel to avoid direct contact).
Packing and Storage
Store the finished bark in an airtight container or zip-top bag. In cool weather (below 60°F), it stays firm for up to three days. In warmer conditions, keep it in a cooler. If you're backpacking, consider making the bark at home and packing it in a crush-proof container. It's a dense, energy-packed treat that won't melt if you keep it shaded.
Safety Notes
When melting chocolate over a camp stove or fire, keep the flame low and never leave it unattended. Use a pot holder or glove to handle the hot bowl. If you're near a campfire, watch for sparks that could land in the chocolate. And remember: store any leftovers in a bear-proof container or hang them in a food bag if you're in bear country. The sweet smell can attract wildlife.
The beauty of this bark is its simplicity. A few ingredients, a little patience, and you have a treat that feels like a reward after a long hike. Break off a piece, savor the crunch of peppermint against the smooth chocolate, and enjoy the quiet of the campsite.
Frequently Asked Questions
How do I keep chocolate peppermint bark from melting in my pack?
Pack it in an insulated lunch bag with a small ice pack. Keep it in the shade, and if temperatures are above 75°F, consider making it at home and eating it on the first night.
Can I make this bark without a camp stove?
Yes. Use a double boiler over a campfire grate, or melt the chocolate in a heatproof bowl set in a shallow pan of hot water. Stir constantly to avoid scorching.
What if I don't have a baking sheet?
Line a flat, sturdy piece of cardboard with aluminum foil. It works as a temporary tray. Just make sure it's clean and level.
Chocolate Peppermint Bark: Easy Camping Treat Recipe

This no-bake chocolate peppermint bark is the perfect treat for a cool-weather camping trip. Dark chocolate and white chocolate are layered with crushed candy canes for a festive, packable dessert.
- 12 ounces dark chocolate chips or chopped dark chocolate (60-70% cacao)
- 12 ounces white chocolate chips or chopped white chocolate
- 1/2 teaspoon peppermint extract (optional) (use natural peppermint oil for stronger flavor)
- 4 full-size candy canes, crushed into small pieces (about 1/3 cup crushed)
- Line a small baking sheet (or a flat, foil-covered piece of cardboard) with parchment paper or foil. Set aside.
- Place the dark chocolate in a heatproof bowl. Set it over a pot of barely simmering water (a double boiler) on your camp stove or campfire grate. Stir until completely melted and smooth. Remove from heat.
- Pour the melted dark chocolate onto the lined tray. Use a spatula to spread it into an even rectangle, about 1/4 inch thick. Let it cool for 5 minutes at room temperature.
- While the dark chocolate sets, melt the white chocolate in the same double boiler (wash and dry the bowl first). Stir in the peppermint extract if using.
- Gently pour the white chocolate over the dark chocolate layer. Spread evenly. Immediately sprinkle the crushed candy cane pieces over the top, pressing them in lightly.
- Let the bark cool completely at room temperature until firm. If it's warm out (above 70°F), place it in a cool spot or a cooler (without ice directly on it) to set. Once firm, break into irregular pieces by hand.
- Store in an airtight container or zip-top bag in a cool place. Enjoy within 3 days.
Recipe: Chocolate Peppermint Bark: Easy Camping Treat Recipe
Ingredients
- 12 ounces dark chocolate chips or chopped dark chocolate (60-70% cacao)
- 12 ounces white chocolate chips or chopped white chocolate
- 1/2 teaspoon peppermint extract (optional) (use natural peppermint oil for stronger flavor)
- 4 full-size candy canes, crushed into small pieces (about 1/3 cup crushed)
Instructions
- Line a small baking sheet (or a flat, foil-covered piece of cardboard) with parchment paper or foil. Set aside.
- Place the dark chocolate in a heatproof bowl. Set it over a pot of barely simmering water (a double boiler) on your camp stove or campfire grate. Stir until completely melted and smooth. Remove from heat.
- Pour the melted dark chocolate onto the lined tray. Use a spatula to spread it into an even rectangle, about 1/4 inch thick. Let it cool for 5 minutes at room temperature.
- While the dark chocolate sets, melt the white chocolate in the same double boiler (wash and dry the bowl first). Stir in the peppermint extract if using.
- Gently pour the white chocolate over the dark chocolate layer. Spread evenly. Immediately sprinkle the crushed candy cane pieces over the top, pressing them in lightly.
- Let the bark cool completely at room temperature until firm. If it's warm out (above 70°F), place it in a cool spot or a cooler (without ice directly on it) to set. Once firm, break into irregular pieces by hand.
- Store in an airtight container or zip-top bag in a cool place. Enjoy within 3 days.