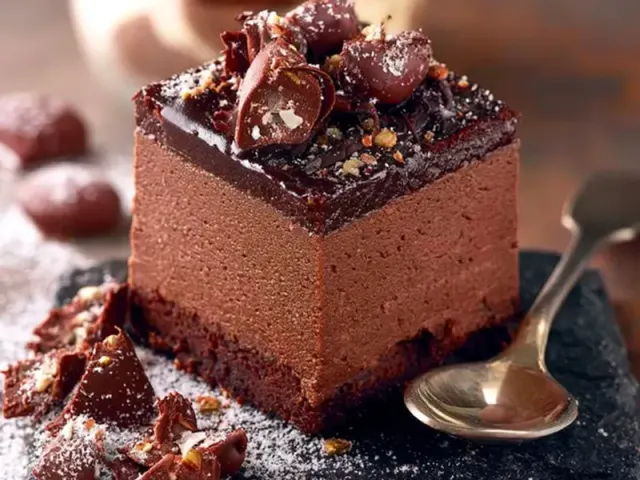
Chocolate Peanut Butter Fudge Recipe for Camping
There's something about the combination of chocolate and peanut butter that hits different when you're sitting by a tent. Maybe it's the fresh air sharpening your appetite. Maybe it's the satisfaction of making something genuinely indulgent with just a camp stove and a pan. Either way, this no-bake chocolate peanut butter fudge has become the dessert everyone asks for on every trip.

I've tested this recipe in rain, wind, and high humidity. The technique below works every time — no oven, no complicated steps, no fancy equipment. Just rich, creamy fudge that holds up in a cooler and disappears fast.
Why This Fudge Works at Camp
Most fudge recipes require precise temperature control and a candy thermometer. Not this one. By using powdered sugar instead of granulated, you skip the boiling stage entirely. The butter and peanut butter provide enough fat to create a smooth, melt-in-your-mouth texture without any graininess.
The real trick? Sifting the powdered sugar. I know it sounds fussy for camping, but one extra step prevents lumps that never fully dissolve. If you don't have a sifter, press the powdered sugar through a fine-mesh strainer or even a clean bandana. The difference is worth the 30 seconds.
Choosing Your Ingredients
Peanut butter matters here. Use a standard creamy peanut butter like Skippy or Jif — the kind that doesn't separate. Natural peanut butter has too much oil and will make the fudge greasy. If that's all you have, stir it thoroughly and expect a slightly softer result.
For the chocolate layer, semi-sweet chips give the best balance. Milk chocolate makes the fudge overly sweet. Dark chocolate works beautifully if you like a more intense, less sugary finish. The pinch of flaky salt on top is optional but highly recommended — it cuts the sweetness and adds a professional touch.
Step-by-Step Camp Stove Method
Setting Up
Find a flat, stable surface for your stove. Wind is your enemy here — even a light breeze makes low heat inconsistent. Set up a windbreak using a backpack or a folded tarp. Use a small saucepan (1.5 to 2 quarts) so the mixture heats evenly. A larger pan spreads the heat too thin and can scorch the peanut butter.
Line your pan or container with foil or parchment before you start. Nothing worse than scraping fudge out of a pan with a spork. Leave overhang on two sides — this becomes handles for lifting the whole block out cleanly.
Melting
Low heat is non-negotiable. High heat separates the oils and makes the fudge grainy. Stir constantly with a wooden spoon or silicone spatula. I use a silicone spatula because it scrapes the bottom and corners where hot spots form. The butter and peanut butter should just melt together — no bubbling, no sizzling.
Once smooth, remove from heat immediately. The residual heat in the pan will continue melting. Stir in the vanilla and cream now, while the mixture is still warm.
Combining
Sift the powdered sugar directly into the saucepan. Stir in one cup at a time. The mixture will go from glossy to stiff very quickly. This is normal. Keep stirring until no white streaks remain. If it's too thick to stir, add a teaspoon of warm water or milk — but only if needed.
Press this peanut butter base into your lined pan. Use a piece of wax paper or a clean plastic bag over your hand to prevent sticking. Get it as even as possible — the chocolate layer will look better and set more uniformly.
Chocolate Topping
Rinse your saucepan (or use a second one) and melt the chocolate chips with the extra butter over the lowest heat. Stir constantly. Chocolate burns easily. The moment it's smooth, pour it over the peanut butter layer. Tilt the pan to spread, or use a spatula. Tap the pan a few times on the table to release air bubbles and level the surface.
If you're adding flaky salt, sprinkle it now while the chocolate is still wet.
Setting the Fudge Without a Fridge
This is where most camp fudge fails — it never firms up properly. You need a cool, stable temperature. In mild weather (below 70°F), placing the pan in the shade on a rock or picnic table works. In warmer conditions, use your cooler. Place the pan on top of a cold pack, not directly on ice, and cover it loosely. Check after one hour. It should feel firm to the touch but still soft inside. Give it two hours for clean cuts.
Pro tip: If the fudge still seems soft after two hours, it's likely too warm. Pop it back in the cooler for another hour. Don't rush this step — warm fudge crumbles when you cut it.
Storing and Serving at Camp
Cut the fudge into 16 squares. Stack them in a single layer in a sealed container with wax paper between layers. Keep the container in the cooler. The fudge stays fresh for up to five days — if it lasts that long.
Serve directly from the cooler on hot days. In cooler weather, let it sit at room temperature for 10 minutes before serving for the creamiest texture. Pair it with black coffee or a mug of hot cocoa for the full camp dessert experience.
Common Mistakes and Fixes
- Grainy fudge: You didn't sift the powdered sugar, or the heat was too high. Next time, sift and use low heat.
- Greasy fudge: The peanut butter separated. Use standard creamy peanut butter, or stir natural peanut butter very well before measuring.
- Chocolate layer too thick: Use a smaller pan or less chocolate. An 8x8 pan is ideal. A 9x9 pan makes thinner layers that set faster.
- Fudge won't set: The temperature was too warm during setting. Move it to a cooler spot or into the cooler for longer.
The Takeaway
This chocolate peanut butter fudge is the kind of camping treat that makes people lean in and ask for the recipe. It's simple enough for a first-time camp cook, yet satisfying enough for seasoned outdoor folks. No oven, no thermometer, no fuss. Just real, honest dessert that tastes like home — even when home is a tent.
Frequently Asked Questions
Can I make this fudge without a camp stove?
Yes. If you have no stove, melt the butter and peanut butter in a heatproof bowl set over a pot of simmering water (a makeshift double boiler), or use a campfire: place the bowl on a grate just above low embers, stirring frequently until smooth.
How do I keep fudge from melting in hot weather?
Store the fudge in a sealed container inside a cooler with an ice pack. If daytime temperatures are above 80°F (27°C), wrap the container in a towel and place it in the coldest part of the cooler. Serve directly from the cooler.
Can I use crunchy peanut butter instead of creamy?
Yes, crunchy peanut butter adds texture. The fudge will be slightly less smooth but still delicious. If using natural peanut butter (the kind that separates), stir it very well before measuring and expect a slightly softer fudge.
How long does this fudge last when camping?
Stored in a sealed container in a cooler, it stays fresh for up to 5 days. Without refrigeration, eat within 2 days and keep it in a shaded, cool spot.
What if I don't have a saucepan?
You can use a small camp kettle or a metal coffee percolator base. Alternatively, melt the ingredients in a sturdy zip-top bag placed in a pot of simmering water (sous-vide style) — just be careful not to let water inside the bag.
Chocolate Peanut Butter Fudge Recipe for Camping

A no-bake chocolate peanut butter fudge that comes together in minutes on a camp stove. Rich, creamy, and perfectly portable for your next tent camping trip.
- 1 cup peanut butter (creamy, not natural style)
- 1/2 cup butter (salted, cut into pieces)
- 2 cups powdered sugar (sifted if lumpy)
- 1 cup chocolate chips (semi-sweet or milk)
- 2 tablespoons heavy cream or milk (optional, for extra creaminess)
- 1/2 teaspoon vanilla extract (optional)
- 1 pinch salt (optional, flaky salt for topping)
- Line an 8x8-inch pan or a shallow camp container with aluminum foil or parchment paper, leaving overhang on two sides.
- Set up your camp stove in a well-ventilated area away from tent fabric. Place a small saucepan on the stove over low heat.
- Add the peanut butter and butter to the saucepan. Stir constantly with a wooden spoon or silicone spatula until completely melted and smooth — about 3 minutes. Do not let it boil.
- Remove the saucepan from the heat. Immediately stir in the vanilla extract and heavy cream (if using).
- Sift the powdered sugar into the saucepan, one cup at a time, stirring vigorously after each addition. The mixture will thicken into a stiff dough.
- Press the peanut butter mixture evenly into the prepared pan. Use a piece of wax paper or a clean spatula to avoid sticking.
- Rinse the saucepan and return it to low heat. Add the chocolate chips and remaining 1 tablespoon butter (if desired). Stir until melted and smooth.
- Pour the melted chocolate over the peanut butter layer. Spread to cover completely. Tap the pan gently on the table to settle the chocolate.
- Sprinkle a pinch of flaky salt on top if you like sweet-salty contrast.
- Place the pan in a cool, shaded spot or on a cold rock. For faster setting, put it in a cooler (not touching ice directly) for 1-2 hours until firm.
- Lift the fudge out using the foil overhang. Cut into 16 squares. Store in a sealed container in the cooler.
Recipe: Chocolate Peanut Butter Fudge Recipe for Camping
Ingredients
- 1 cup peanut butter (creamy, not natural style)
- 1/2 cup butter (salted, cut into pieces)
- 2 cups powdered sugar (sifted if lumpy)
- 1 cup chocolate chips (semi-sweet or milk)
- 2 tablespoons heavy cream or milk (optional, for extra creaminess)
- 1/2 teaspoon vanilla extract (optional)
- 1 pinch salt (optional, flaky salt for topping)
Instructions
- Line an 8x8-inch pan or a shallow camp container with aluminum foil or parchment paper, leaving overhang on two sides.
- Set up your camp stove in a well-ventilated area away from tent fabric. Place a small saucepan on the stove over low heat.
- Add the peanut butter and butter to the saucepan. Stir constantly with a wooden spoon or silicone spatula until completely melted and smooth — about 3 minutes. Do not let it boil.
- Remove the saucepan from the heat. Immediately stir in the vanilla extract and heavy cream (if using).
- Sift the powdered sugar into the saucepan, one cup at a time, stirring vigorously after each addition. The mixture will thicken into a stiff dough.
- Press the peanut butter mixture evenly into the prepared pan. Use a piece of wax paper or a clean spatula to avoid sticking.
- Rinse the saucepan and return it to low heat. Add the chocolate chips and remaining 1 tablespoon butter (if desired). Stir until melted and smooth.
- Pour the melted chocolate over the peanut butter layer. Spread to cover completely. Tap the pan gently on the table to settle the chocolate.
- Sprinkle a pinch of flaky salt on top if you like sweet-salty contrast.
- Place the pan in a cool, shaded spot or on a cold rock. For faster setting, put it in a cooler (not touching ice directly) for 1-2 hours until firm.
- Lift the fudge out using the foil overhang. Cut into 16 squares. Store in a sealed container in the cooler.