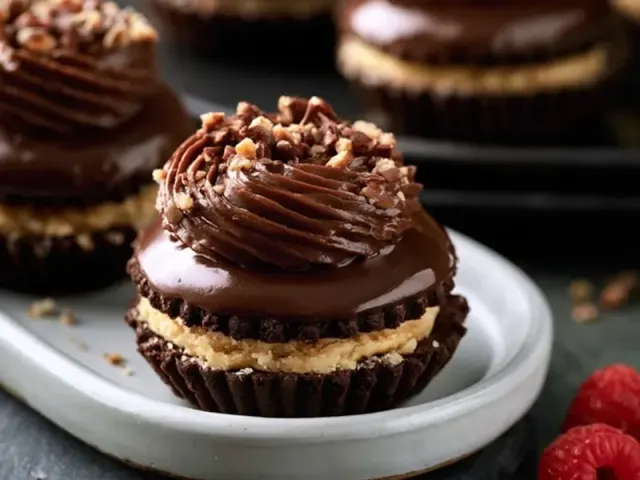
Chocolate Macarons: Bakery-Quality At Home
The first time I pulled a tray of chocolate macarons from the oven, I held my breath. Would they have feet? Would the tops be smooth? When I saw those delicate ruffled edges and the glossy domes, I knew I'd cracked the code. The secret? It's not about expensive equipment or a pastry degree. It's about understanding the rhythm of the batter—knowing exactly when to stop folding.

The One Trick That Changed Everything
Most recipes tell you to fold until the batter flows like lava. That's true, but vague. Here's the specific test I use: after folding, lift your spatula and let a ribbon of batter fall back into the bowl. It should settle into the surface within 10 seconds—not disappear immediately, and not sit on top. That 10-second window is your sweet spot. Fold two more times if it's too thick, and stop the instant it flows. Overmixing gives you flat, spread-out macarons. Undermixing gives you nippled tops with no feet.
Aging Egg Whites: Not Optional
I separate my eggs three days before baking. I place the whites in a clean bowl, cover loosely with plastic wrap, and let them sit on the counter. Why? Aged egg whites lose some moisture and become more elastic. They whip into a stiffer, more stable meringue. If you're in a hurry, you can microwave fresh egg whites for 10 seconds, then let them cool. But the texture won't be quite as reliable. For consistent results, plan ahead.
The Dry Ingredient Dance
Pulse your powdered sugar, almond flour, and cocoa powder together in a food processor for 15 seconds. Then sift. Always sift. The first time I skipped this step, I ended up with tiny lumps in my shells. Sifting removes any coarse almond bits and aerates the mixture, making it easier to fold into the meringue. Use a fine-mesh sieve, not a colander. Push everything through with a spoon—be patient. It makes a difference.
Meringue: The Backbone
Whip your egg whites with cream of tartar on medium speed until soft peaks form. Then gradually add the granulated sugar while increasing to high speed. Whip until the meringue is stiff and glossy—when you lift the whisk, the peak should stand up straight without drooping. But don't overwhip. If the meringue looks dry and grainy, you've gone too far. It should be smooth and shiny, like marshmallow cream.
Folding: The Make-or-Break Step
Add your dry mixture to the meringue in three parts. Use a silicone spatula. Cut through the center of the batter, scrape the bottom and sides of the bowl, then press the spatula against the bowl to deflate some air. Repeat this motion. After the first addition, the batter looks lumpy. After the second, it starts to come together. After the third, you're looking for that lava flow. The number of folds varies, but I usually land between 35 and 40. Trust your eyes, not a count.
Piping with Precision
Use a piping bag with a round tip—no star tips. Hold the bag vertically, tip about half an inch above the baking mat. Squeeze gently until the batter spreads to a 1-inch circle, then stop pressure and lift in a quick spiral motion. The batter should not have a peak; if it does, tap the baking sheet firmly on the counter several times. That tapping also releases air bubbles that could cause cracks. I tap each sheet five times, rotating it 90 degrees between taps.
The Resting Phase
This is where patience pays off. Let the piped macarons sit at room temperature until a skin forms. In dry weather, that's about 30 minutes. In humid weather, it can take an hour or more. Touch one gently. If your finger comes away clean, they're ready. If it sticks, wait longer. A proper skin prevents the tops from cracking in the oven and helps the feet rise evenly.
Baking: Low and Slow Wins
Preheat your oven to 300°F. Use an oven thermometer—I've had ovens that run 25 degrees hot. Bake one sheet at a time on the middle rack. After 10 minutes, peek through the oven window. You should see feet beginning to form. Bake for 14 to 16 minutes total. To test doneness, gently touch the top of a macaron. It should feel set and not wiggle. If it moves, give it another minute. Let them cool completely on the baking sheet before attempting to remove them.
The Filling: Simple Ganache
Heat heavy cream until it just simmers. Pour it over chopped dark chocolate, let sit for two minutes, then stir until smooth. Add a tablespoon of softened butter for shine and a softer bite. Let the ganache cool until it's thick enough to pipe without running. This filling is forgiving—you can adjust the chocolate-to-cream ratio to your taste. More cream yields a softer ganache; more chocolate gives a firmer set.
Assembly and Maturation
Match your shells by size. Pipe a small amount of ganache onto the flat side of one shell, then press its partner gently on top. Twist slightly to spread the filling evenly. Place the assembled macarons in an airtight container and refrigerate for at least 24 hours. This step is crucial. The filling slowly softens the shells, creating that delicate, slightly chewy texture that makes macarons so special. Let them sit at room temperature for 10 minutes before serving.
Common Mistakes and Fixes
No feet: Your batter was too thick or you didn't let them rest long enough. Fold a few more times next batch.
Cracked tops: Oven too hot, or not enough resting time. Use an oven thermometer and wait for a proper skin.
Lopsided feet: Your baking sheet wasn't level, or you piped uneven rounds. Rotate the sheet halfway through baking.
Hollow shells: Overmixed batter. Stop folding earlier next time.
Takeaway
Bakery-quality chocolate macarons at home are absolutely achievable. Focus on the folding, respect the resting phase, and give them time to mature in the fridge. Each batch teaches you something. The first might not be perfect, but the second will be closer. I've baked dozens of batches, and I still learn something new every time. That's the beauty of this cookie—it rewards precision but forgives small mistakes. Keep practicing, and soon you'll be known as the person who brings macarons to every gathering.
Frequently Asked Questions
Why do my macarons have no feet?
The most common cause is undermixing the batter or letting the piped rounds rest too long. You want a thick lava-like flow that spreads slightly but still holds a peak. Also, check that your oven temperature is accurate—too low and the feet won't form.
Can I use regular cocoa powder?
Yes, but for the deepest chocolate flavor and color, I recommend a Dutch-processed cocoa powder. It's less acidic and blends more smoothly into the almond flour.
How do I store finished macarons?
Store them in an airtight container in the refrigerator for up to 5 days. For best texture, let them come to room temperature for 10 minutes before serving. You can also freeze them for up to a month.
My macarons cracked on top. What went wrong?
Cracking usually means the oven is too hot or the macarons didn't rest long enough to form a skin. Let them rest until the surface is dry to the touch—this can take 30–60 minutes depending on humidity.
Chocolate Macarons: Bakery-Quality At Home

Learn to make bakery-quality chocolate macarons at home with this precise method. The key is a perfectly aged egg white meringue and a gentle folding technique that creates the signature smooth top and ruffled feet.
- 1 cup powdered sugar
- 1/2 cup almond flour (finely ground)
- 2 tablespoons Dutch-process cocoa powder (sifted)
- 3 large egg whites (aged at room temperature for 24 hours)
- 1/4 cup granulated sugar
- 1/4 teaspoon cream of tartar
- 1/2 cup heavy cream (for filling)
- 4 ounces dark chocolate (chopped, for filling)
- 1 tablespoon unsalted butter (softened, for filling)
- Line two baking sheets with silicone mats or parchment paper. Have a piping bag fitted with a 1/2-inch round tip ready.
- In a food processor, pulse the powdered sugar, almond flour, and cocoa powder together until fine. Sift through a fine-mesh sieve into a bowl. Discard any large bits.
- In a clean stand mixer bowl, combine the aged egg whites, granulated sugar, and cream of tartar. Whisk on medium speed until soft peaks form, then increase to high and whip until stiff, glossy peaks—about 5 minutes. The meringue should hold its shape without being dry.
- Fold the dry mixture into the meringue in three additions. Use a spatula to cut through the center and scrape the sides. After each addition, press the batter against the bowl to deflate it slightly. Stop when the batter flows like thick lava and a ribbon falls back into the bowl in a continuous stream—about 30 to 40 folds total.
- Transfer the batter to the piping bag. Hold the bag vertically 1/2 inch above the baking sheet. Pipe 1-inch rounds, spacing them 1 inch apart. Tap the baking sheet firmly on the counter 5 times to release air bubbles.
- Let the piped macarons rest at room temperature until a skin forms—touch the surface and it should feel dry and not stick. This takes 30 to 60 minutes depending on humidity.
- Preheat the oven to 300°F (150°C) with a rack in the middle. Bake one sheet at a time for 14 to 16 minutes. The macarons should have risen feet and the tops should be set. Let cool completely on the sheet before removing.
- For the filling, heat the heavy cream in a small saucepan until simmering. Pour over the chopped dark chocolate in a bowl. Let sit 2 minutes, then stir until smooth. Add the softened butter and stir until glossy. Let cool until thick enough to pipe.
- Match macaron shells by size. Pipe a small dollop of filling onto one shell, then sandwich with its partner. Press gently to spread the filling to the edges.
- Refrigerate the assembled macarons in an airtight container for at least 24 hours. This allows the filling to soften the shells and develop the classic texture.
Recipe: Chocolate Macarons: Bakery-Quality At Home
Ingredients
- 1 cup powdered sugar
- 1/2 cup almond flour (finely ground)
- 2 tablespoons Dutch-process cocoa powder (sifted)
- 3 large egg whites (aged at room temperature for 24 hours)
- 1/4 cup granulated sugar
- 1/4 teaspoon cream of tartar
- 1/2 cup heavy cream (for filling)
- 4 ounces dark chocolate (chopped, for filling)
- 1 tablespoon unsalted butter (softened, for filling)
Instructions
- Line two baking sheets with silicone mats or parchment paper. Have a piping bag fitted with a 1/2-inch round tip ready.
- In a food processor, pulse the powdered sugar, almond flour, and cocoa powder together until fine. Sift through a fine-mesh sieve into a bowl. Discard any large bits.
- In a clean stand mixer bowl, combine the aged egg whites, granulated sugar, and cream of tartar. Whisk on medium speed until soft peaks form, then increase to high and whip until stiff, glossy peaks—about 5 minutes. The meringue should hold its shape without being dry.
- Fold the dry mixture into the meringue in three additions. Use a spatula to cut through the center and scrape the sides. After each addition, press the batter against the bowl to deflate it slightly. Stop when the batter flows like thick lava and a ribbon falls back into the bowl in a continuous stream—about 30 to 40 folds total.
- Transfer the batter to the piping bag. Hold the bag vertically 1/2 inch above the baking sheet. Pipe 1-inch rounds, spacing them 1 inch apart. Tap the baking sheet firmly on the counter 5 times to release air bubbles.
- Let the piped macarons rest at room temperature until a skin forms—touch the surface and it should feel dry and not stick. This takes 30 to 60 minutes depending on humidity.
- Preheat the oven to 300°F (150°C) with a rack in the middle. Bake one sheet at a time for 14 to 16 minutes. The macarons should have risen feet and the tops should be set. Let cool completely on the sheet before removing.
- For the filling, heat the heavy cream in a small saucepan until simmering. Pour over the chopped dark chocolate in a bowl. Let sit 2 minutes, then stir until smooth. Add the softened butter and stir until glossy. Let cool until thick enough to pipe.
- Match macaron shells by size. Pipe a small dollop of filling onto one shell, then sandwich with its partner. Press gently to spread the filling to the edges.
- Refrigerate the assembled macarons in an airtight container for at least 24 hours. This allows the filling to soften the shells and develop the classic texture.