Chocolate Lava Cake: Changes Everything
The first time I pulled a Dutch oven lid off to reveal a perfectly domed chocolate lava cake, I knew I had stumbled onto something that changes everything. Not just for dessert—for the whole camping experience. The smell of rich chocolate mixing with woodsmoke, the anticipation as you lift the heavy lid, and that first spoonful breaking through the tender cake into a molten center. It transforms a simple campsite into something memorable.

Why This Technique Works
Baking a lava cake over a campfire is not the same as using an oven. The key is even, indirect heat. A water bath (bain-marie) is your best friend here. It prevents the edges from overcooking while the center stays soft. Without it, you risk a fully baked cake with no molten surprise. The water bath also helps regulate temperature swings from uneven coals.
Use a 12-inch Dutch oven for the water bath. Place a trivet or a few small rocks in the bottom to keep your ramekins off the direct heat. Then pour in hot water until it reaches halfway up the sides of the ramekins. This technique works in any weather, but on windy days, shield the coals with a windbreak—a piece of foil or a camp stove windscreen works well.
Fuel Management: The Real Trick
Charcoal briquettes give the most consistent heat. Use 10 on the lid and 6 underneath for a 12-inch Dutch oven. This creates an oven temperature around 350°F. If you use lump charcoal, you'll need about 15-20% more because it burns hotter and faster. Light the briquettes 20 minutes before you start baking so they are covered with gray ash—that's the sweet spot for steady heat.
Check the cake at 25 minutes. The top should look set and slightly puffed, but the center should wobble when you gently shake the Dutch oven. If the top is browning too fast, remove 2-3 briquettes from the lid. If it's still liquid after 30 minutes, add 2-3 more briquettes to the lid and give it 5 more minutes.
The Water Bath Setup
Place your ramekins or a single small Dutch oven on the trivet. Pour hot water carefully—don't splash into the batter. The water should not touch the top of the ramekins. Cover the large Dutch oven with its lid, then arrange the coals. The water bath keeps the batter from setting too quickly, which is the most common mistake. I have seen many campers skip this step and end up with a fully cooked cake. The water bath is non-negotiable for a true lava center.
Adapting for Cold Weather
If the temperature is below 50°F, you will lose heat faster. Start with 12 briquettes on top and 8 underneath. Check at 20 minutes. The cold air also cools the Dutch oven lid, so keep a small piece of foil or a second lid nearby to place over the coals if the wind picks up. In very cold conditions, preheat the water for the bath to near boiling before adding it.
Adapting for High Altitude
At elevations above 5,000 feet, cakes tend to rise faster and then collapse. Reduce the sugar by 1 tablespoon and add 1 tablespoon of flour to stabilize the structure. Reduce the cooking time by 5 minutes and check earlier. The water bath becomes even more important at altitude to prevent the outside from setting before the center.
Gear and Setup
You need a 12-inch Dutch oven with a flat lid for holding coals. A lid with a rim helps keep briquettes in place. Bring a pair of heavy leather gloves or a lid lifter for handling the hot lid. A small camp table or a flat rock works as your work surface. Keep a spray bottle of water nearby to tame any flare-ups if a coal drops.
For the ramekins, use 6-ounce ceramic or oven-safe glass. Metal ramekins conduct heat faster and may overcook the edges. If you only have a small Dutch oven, you can bake the batter directly in it—just grease it well and line the bottom with a circle of parchment paper for easy removal.
Safety Notes
Never use a camp stove or propane flame directly under a Dutch oven for baking lava cake. The direct heat will burn the bottom. Stick to charcoal or wood coals. Keep children and pets away from the hot Dutch oven and coals. When lifting the lid, tilt it away from you to avoid steam burns. Let the ramekins cool for one minute before inverting—they are extremely hot. Serve immediately, because the lava center sets as it cools.
The Takeaway
Chocolate lava cake changes everything about camping dessert because it proves you can create something truly special over a fire. The technique is precise but forgiving once you understand the water bath and coal count. A little patience, a few simple ingredients, and you have a dessert that rivals any restaurant. That first spoonful, with the dark chocolate flowing out, makes the whole effort worthwhile. Try it on your next trip—you will never look at camping dessert the same way.
Frequently Asked Questions
Can I use a regular cake mix for lava cake?
No, a standard cake mix will not create the proper molten center. You need a specific ratio of chocolate, butter, eggs, and flour to get the gooey center. A box mix bakes through evenly and won't leave a liquid core.
How do I know when the lava cake is done?
The edges should look set and slightly pulling away from the pan, but the center should jiggle when you gently shake the Dutch oven. For a 6-inch Dutch oven, this takes about 25-30 minutes with 10 briquettes on top and 6 underneath.
What if I don't have ramekins?
You can bake the batter directly in a well-greased Dutch oven. Just be careful when serving—scoop portions gently so the molten center stays intact. A 12-inch Dutch oven works best for this method.
Can I make lava cake ahead of time?
You can prepare the batter and keep it in a sealed container in a cooler for up to 24 hours. Pour it into the greased pan just before baking. Do not refrigerate the batter for longer or the eggs may affect the texture.
How do I prevent the lava cake from sticking?
Generously grease your pan or ramekins with butter or cooking spray, then dust with cocoa powder instead of flour. Cocoa powder blends into the chocolate flavor and prevents white patches from flour.
Chocolate Lava Cake: Changes Everything

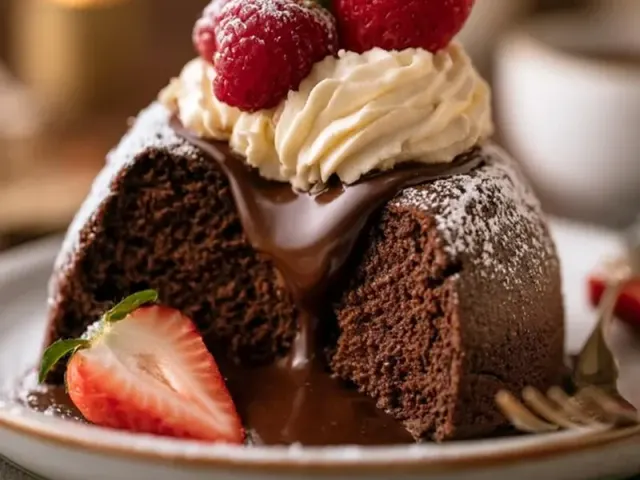
A rich, individual chocolate lava cake baked in a Dutch oven over a campfire. The outside is a tender chocolate cake, while the center stays warm and molten. This technique uses a water bath for even heat and a precise briquette count for consistent results.
- 1/2 cup unsalted butter
- 6 ounces dark chocolate (60-70% cacao) (chopped)
- 2 large eggs
- 2 large egg yolks
- 1/4 cup granulated sugar
- 2 tablespoons all-purpose flour
- 1 teaspoon vanilla extract
- butter and cocoa powder (for greasing ramekins or pan)
- Grease four 6-ounce ramekins or a single 6-inch Dutch oven with butter. Dust with cocoa powder, tapping out the excess.
- Melt the butter and chocolate together in a heatproof bowl set over simmering water. Stir until smooth. Remove from heat and let cool for 5 minutes.
- In a separate bowl, whisk the whole eggs, egg yolks, and sugar until thick and pale, about 3 minutes.
- Fold the melted chocolate mixture into the egg mixture until just combined.
- Sift the flour and vanilla over the batter. Fold gently until no streaks remain. Do not overmix.
- Divide the batter evenly among the prepared ramekins, filling each about 3/4 full. If using a single Dutch oven, pour all batter into the greased pan.
- Set the ramekins or Dutch oven on a trivet inside a larger Dutch oven. Add hot water to reach halfway up the sides of the ramekins (the water bath).
- Cover the larger Dutch oven with its lid. Place 10 hot charcoal briquettes on top and 6 underneath. Bake for 25-30 minutes, checking at 25 minutes. The edges should be set, the center jiggly.
- Carefully remove the ramekins from the water bath. Let cool for 1 minute. Run a knife around the edge, invert onto a plate, and serve immediately.
Recipe: Chocolate Lava Cake: Changes Everything
Ingredients
- 1/2 cup unsalted butter
- 6 ounces dark chocolate (60-70% cacao) (chopped)
- 2 large eggs
- 2 large egg yolks
- 1/4 cup granulated sugar
- 2 tablespoons all-purpose flour
- 1 teaspoon vanilla extract
- butter and cocoa powder (for greasing ramekins or pan)
Instructions
- Grease four 6-ounce ramekins or a single 6-inch Dutch oven with butter. Dust with cocoa powder, tapping out the excess.
- Melt the butter and chocolate together in a heatproof bowl set over simmering water. Stir until smooth. Remove from heat and let cool for 5 minutes.
- In a separate bowl, whisk the whole eggs, egg yolks, and sugar until thick and pale, about 3 minutes.
- Fold the melted chocolate mixture into the egg mixture until just combined.
- Sift the flour and vanilla over the batter. Fold gently until no streaks remain. Do not overmix.
- Divide the batter evenly among the prepared ramekins, filling each about 3/4 full. If using a single Dutch oven, pour all batter into the greased pan.
- Set the ramekins or Dutch oven on a trivet inside a larger Dutch oven. Add hot water to reach halfway up the sides of the ramekins (the water bath).
- Cover the larger Dutch oven with its lid. Place 10 hot charcoal briquettes on top and 6 underneath. Bake for 25-30 minutes, checking at 25 minutes. The edges should be set, the center jiggly.
- Carefully remove the ramekins from the water bath. Let cool for 1 minute. Run a knife around the edge, invert onto a plate, and serve immediately.