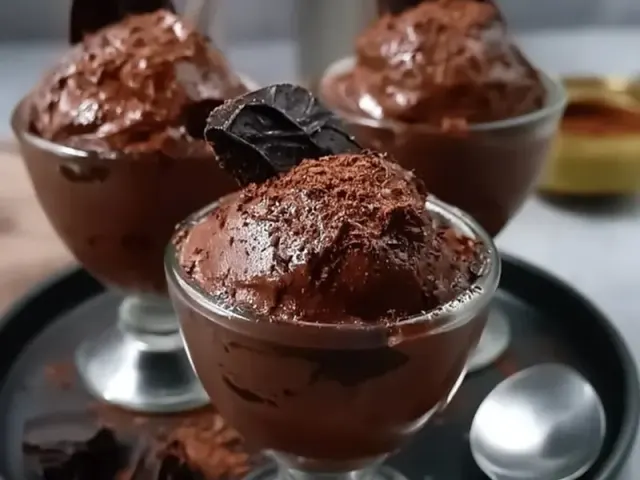
Chocolate Ice Cream: The Secret Revealed
The first spoonful tells you everything. It’s not just cold and sweet—it’s dense, velvety, with a deep chocolate taste that lingers. No ice crystals. No artificial aftertaste. Just pure, creamy satisfaction. And you made it yourself, without any fancy machine.

The secret is in the technique. Most homemade chocolate ice cream turns icy or bland because the water content is too high or the fat is too low. The no-churn method solves both. By using heavy cream and sweetened condensed milk, you build a base that freezes soft and smooth. The condensed milk adds sugar and body while keeping the mixture from turning into a block of ice.
Why This Method Works
Traditional ice cream requires churning to break up ice crystals as they form. The no-churn approach skips that step by relying on fat. Heavy cream whips to stiff peaks, trapping air. Sweetened condensed milk adds viscosity and sugar, which lowers the freezing point. Together, they create a structure that resists large ice crystals.
The real trick is the chocolate. Using both cocoa powder and melted dark chocolate gives a double hit of flavor. Cocoa powder provides the dry, roasted notes. Melted dark chocolate adds a silky richness and helps the mixture stay scoopable straight from the freezer. Skip the chocolate chips—they freeze hard and ruin the texture.
The Exact Steps for Silky Ice Cream
1. Prep Your Ingredients
Start with cold heavy cream straight from the fridge. Warm cream won’t whip properly. Chop the dark chocolate into small, even pieces so it melts evenly. Sift the cocoa powder to remove lumps—nobody wants a gritty bite.
2. Melt the Chocolate
Place the chopped dark chocolate in a heatproof bowl over a saucepan with an inch of simmering water. Stir occasionally until just melted. Remove from heat and let it cool for five minutes. Do not let it cool completely—warm chocolate folds in more evenly.
3. Build the Base
In a medium bowl, whisk together the sweetened condensed milk, sifted cocoa powder, melted chocolate, vanilla, and a pinch of salt. Whisk until the cocoa is fully dissolved and the mixture looks like thick, glossy fudge. This is your flavor concentrate.
4. Whip the Cream
Pour the cold heavy cream into a large, clean bowl. Use a hand whisk or electric mixer on medium-high speed. Whip until the cream holds stiff peaks—when you lift the whisk, the cream stands up without flopping over. Over-whipping turns it into butter, so stop as soon as it’s firm.
5. Fold Gently
Scoop about one-third of the whipped cream into the chocolate base. Stir vigorously to lighten the base. Then pour the lightened base into the remaining whipped cream. Use a rubber spatula to fold: cut down through the center, scrape along the bottom, and lift up. Rotate the bowl as you go. Fold until no white streaks remain. Do not stir or you’ll deflate all the air.
6. Freeze with Care
Pour the mixture into a freezer-safe container. A loaf pan works well because it chills evenly. Smooth the top. Press a piece of plastic wrap directly onto the surface to prevent ice crystals from forming. Then snap on the lid. Freeze for at least six hours, preferably overnight.
For the creamiest texture, stir the mixture with a fork every thirty minutes for the first two hours. This breaks up any early ice crystals and keeps the ice cream soft. If you skip this step, the ice cream will still be good—just slightly firmer.
Making It at Camp
This recipe is ideal for car camping or basecamp trips where you have a cooler and a little patience. No stove required. Just pack the ingredients, a whisk, and a mixing bowl. Whip the cream by hand—it takes about five minutes of brisk whisking. The effort is worth it when you’re sitting by the fire with a bowl of homemade ice cream.
If you want to go old-school, try the ice cream in a bag method. Combine the heavy cream, condensed milk, cocoa, and chocolate in a quart-sized zip-top bag. Seal it tight. Place that bag inside a gallon-sized bag filled with ice and a generous amount of rock salt. Shake for ten to fifteen minutes, wearing gloves or wrapping the bag in a towel. The salt lowers the ice temperature, freezing the mixture as you shake. The texture won’t be as silky as the no-churn version, but it’s a fun camp activity and works in under twenty minutes.
Common Mistakes and Fixes
Ice crystals: Your cream wasn’t whipped stiff enough, or the mixture wasn’t stirred during freezing. Fix by whipping cream to firm peaks and stirring every thirty minutes.
Too hard to scoop: The base is too low in fat or sugar. Use full-fat condensed milk and heavy cream with at least 36% milk fat. Let the ice cream sit at room temperature for five minutes before scooping.
Grainy texture: The cocoa powder wasn’t fully dissolved. Sift it first, and whisk it into the condensed milk until completely smooth.
Separated or greasy: The chocolate was too hot when added, or you over-whipped the cream. Let melted chocolate cool slightly, and stop whipping as soon as peaks form.
Takeaway
The best chocolate ice cream isn’t about a machine or a secret ingredient. It’s about technique: using the right fat ratio, whipping cream properly, folding gently, and freezing with care. Once you master these steps, you can make any flavor. But chocolate—deep, dark, creamy chocolate—will always be the one that proves you know the secret.
Frequently Asked Questions
Can I make chocolate ice cream without an ice cream maker?
Yes. The secret is a no-churn method using condensed milk and heavy cream. Whip the cream to stiff peaks, fold in sweetened condensed milk and cocoa, then freeze.
What is the best chocolate to use for intense flavor?
Use a mix of unsweetened cocoa powder and melted dark chocolate (70% cocoa or higher). This gives both depth and creaminess without being too sweet.
How do I prevent ice crystals in homemade ice cream?
The high fat content from heavy cream and condensed milk helps. Also, stir the mixture every 30 minutes for the first 2 hours of freezing to break up crystals.
Can I make this ice cream at a campsite?
Absolutely. The no-churn method requires no cooking. Just bring a whisk, a bowl, and a cooler with ice. For a campfire version, use the 'ice cream in a bag' technique with a salt-ice mixture.
How long does homemade chocolate ice cream keep?
Store in a sealed container in the freezer for up to two weeks. Place plastic wrap directly on the surface to prevent freezer burn.
Chocolate Ice Cream: The Secret Revealed

Rich, creamy chocolate ice cream made without an ice cream maker. Uses a no-churn base of heavy cream and sweetened condensed milk, with cocoa and dark chocolate for deep flavor. Perfect for camping or home.
- 2 cups heavy cream (cold)
- 1 can (14 oz) sweetened condensed milk
- 1/2 cup cocoa powder (unsweetened)
- 3 ounces dark chocolate (70% cocoa, chopped)
- 1 teaspoon vanilla extract
- 1/8 teaspoon salt (optional)
- Melt the dark chocolate in a heatproof bowl set over a pan of simmering water (or in a microwave in 20-second bursts). Let cool slightly.
- In a large bowl, whisk together the sweetened condensed milk, cocoa powder, melted chocolate, vanilla, and salt until smooth and glossy.
- In a separate chilled bowl, whip the heavy cream to stiff peaks—the cream should hold a firm peak when you lift the whisk.
- Gently fold one-third of the whipped cream into the chocolate mixture to lighten it. Then fold in the remaining cream until no white streaks remain. Do not overmix or the cream will deflate.
- Pour the mixture into a freezer-safe container. Smooth the top. Cover with plastic wrap pressed directly onto the surface, then seal with a lid.
- Freeze for at least 6 hours or overnight. For the creamiest texture, stir the mixture with a fork every 30 minutes for the first 2 hours of freezing.
- Scoop and serve straight from the freezer. Let it sit at room temperature for 5 minutes if too hard to scoop.
Recipe: Chocolate Ice Cream: The Secret Revealed
Ingredients
- 2 cups heavy cream (cold)
- 1 can (14 oz) sweetened condensed milk
- 1/2 cup cocoa powder (unsweetened)
- 3 ounces dark chocolate (70% cocoa, chopped)
- 1 teaspoon vanilla extract
- 1/8 teaspoon salt (optional)
Instructions
- Melt the dark chocolate in a heatproof bowl set over a pan of simmering water (or in a microwave in 20-second bursts). Let cool slightly.
- In a large bowl, whisk together the sweetened condensed milk, cocoa powder, melted chocolate, vanilla, and salt until smooth and glossy.
- In a separate chilled bowl, whip the heavy cream to stiff peaks—the cream should hold a firm peak when you lift the whisk.
- Gently fold one-third of the whipped cream into the chocolate mixture to lighten it. Then fold in the remaining cream until no white streaks remain. Do not overmix or the cream will deflate.
- Pour the mixture into a freezer-safe container. Smooth the top. Cover with plastic wrap pressed directly onto the surface, then seal with a lid.
- Freeze for at least 6 hours or overnight. For the creamiest texture, stir the mixture with a fork every 30 minutes for the first 2 hours of freezing.
- Scoop and serve straight from the freezer. Let it sit at room temperature for 5 minutes if too hard to scoop.