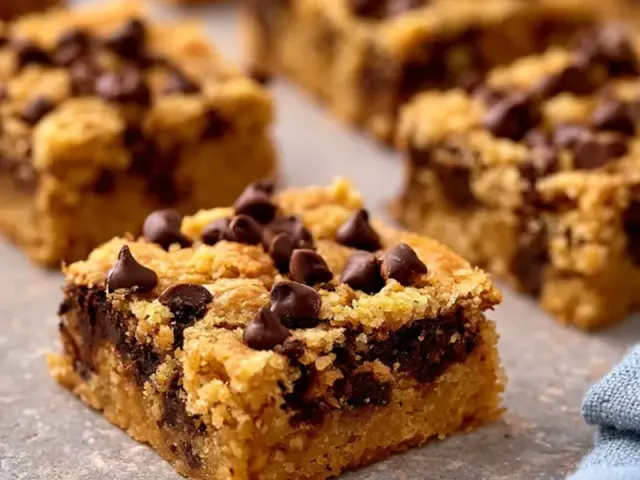
Chocolate Granola Bars: The Only Recipe You Need
There's a specific sound a good granola bar makes when you bite into it on the trail. Not a dry crunch that scatters crumbs down your jacket, but a clean, chewy snap. The kind that holds together even after bouncing around in a pack for two days. After years of testing batches that crumbled, turned to dust, or melted into a sticky mess, I landed on this one formula. It's the only chocolate granola bar recipe I use anymore, whether I'm heading out for a day hike or a week-long tent trip.

The Binding Secret: Dates, Not Syrup
Most recipes rely on honey or corn syrup to hold things together. Those work, but they create a bar that's either too hard in cool weather or too soft when the sun hits your tent. The trick here is Medjool dates. When processed into a paste, they provide a natural chew that stays consistent across temperatures. They also add fiber and potassium — real fuel for a long day outdoors.
If your dates feel dry and stiff, soak them in warm water for ten minutes before processing. Drain them well, then proceed. The paste should be smooth and tacky, almost like a thick caramel. That's your binder.
Why Toasting the Oats Matters
Raw oats work in a pinch, but toasting transforms them. A quick dry-roast in a skillet brings out a nutty flavor and changes the texture. The oats become slightly crisp on the outside while staying tender inside. This contrast keeps the bar from feeling like a dense block of sawdust. Do not skip this step — it's the difference between a bar that tastes flat and one that tastes complete.
Let the oats cool completely before mixing. Hot oats will melt the chocolate chips and make the whole mixture greasy.
Press Harder Than You Think
This is where most homemade bars fail. You dump the mixture into the pan, pat it down gently, and hope for the best. That hope leads to crumbs. You need to apply real, consistent pressure. Use the flat bottom of a measuring cup or a drinking glass. Push down until the surface is level and firm, with no loose bits around the edges. The mixture should feel compact and solid under your palm.
For extra insurance, chill the pan for 15 minutes before cutting. This sets the coconut oil and makes clean edges easy. Cut with a long, sharp knife in one smooth motion — no sawing back and forth.
Adapting for Hot Weather Camping
Chocolate chips can soften in direct sun. If you're camping in summer heat, swap them for cacao nibs or omit them entirely. The bars will still taste deeply chocolate from the cocoa powder. Another option is to dip the finished bars in tempered dark chocolate and let them set. That coating stays firm at higher temperatures and adds a satisfying shell.
Store bars in a sealed container inside your cooler, not in the tent. They'll stay firm and refreshing, and you avoid attracting ants or other wildlife to your sleeping area.
Making Them Nut-Free for Group Trips
Peanut butter gives these bars protein and richness, but sunflower seed butter works exactly the same way. It swaps in one-to-one with no adjustment needed. The flavor is slightly earthier, which pairs well with the dark cocoa. If you're camping with kids or in a group where allergies are a concern, this switch keeps everyone safe without sacrificing texture.
The Takeaway
One recipe. Twelve bars. Fifteen minutes of active work. No oven required. These chocolate granola bars travel well, taste like real food, and don't leave you picking crumbs out of your tent floor. Master the press technique and the date binder, and you'll never search for another granola bar recipe again.
Frequently Asked Questions
Why do my homemade granola bars fall apart?
The most common mistake is not pressing the mixture firmly enough into the pan. Use the bottom of a measuring cup to compact the oats and chocolate mixture into a dense, even layer. Also, let the bars chill for a full 2 hours before cutting — patience here is key.
Can I make these granola bars without a food processor?
Absolutely. Instead of processing dates into a paste, use 1/3 cup of honey or maple syrup and 2 tablespoons of coconut oil as your binder. Warm the honey and oil together on the stove or in the microwave, then stir into the dry ingredients.
How do I keep granola bars from melting in warm weather?
Swap the chocolate chips for cacao nibs or use a tempered chocolate coating. You can also store the bars in a sealed container inside your cooler — they stay firm and refreshing on hot days.
Chocolate Granola Bars: The Only Recipe You Need

These no-bake chocolate granola bars are chewy, rich, and sturdy enough for the trail. They come together in 15 minutes and hold their shape without crumbling, thanks to a date-and-oat binder technique.
- 1.5 cups rolled oats (not quick oats)
- 1 cup pitted Medjool dates, packed (soak in warm water 10 minutes if dry)
- 0.5 cup unsweetened cocoa powder
- 0.25 cup creamy peanut butter or sunflower seed butter
- 2 tablespoons coconut oil, melted
- 1 teaspoon vanilla extract
- 0.25 teaspoon salt
- 0.5 cup dark chocolate chips (optional) (or chopped dark chocolate)
- 2 tablespoons water (only if needed for blending)
- Line an 8x8-inch baking dish with parchment paper, leaving overhang on two sides for easy removal.
- Place the rolled oats in a dry skillet over medium heat. Toast, stirring frequently, for 3-4 minutes until fragrant and lightly golden. Transfer to a bowl and let cool.
- In a food processor, combine the pitted dates, cocoa powder, peanut butter, coconut oil, vanilla, and salt. Process until a sticky, cohesive paste forms. If it seems dry, add water 1 tablespoon at a time.
- Add the toasted oats and chocolate chips (if using) to the food processor. Pulse 8-10 times until the oats are evenly distributed but still have some texture. Do not over-process into a powder.
- Transfer the mixture to the prepared dish. Press it down firmly and evenly using the bottom of a measuring cup or a flat glass. The more compact, the better the bars will hold.
- Refrigerate for at least 2 hours, or until completely firm. Lift the block out using the parchment overhang, then cut into 12 rectangles with a sharp knife.
- Wrap each bar individually in wax paper or reusable snack bags. Store in the refrigerator for up to 2 weeks, or in a cooler for camping trips.
Recipe: Chocolate Granola Bars: The Only Recipe You Need
Ingredients
- 1.5 cups rolled oats (not quick oats)
- 1 cup pitted Medjool dates, packed (soak in warm water 10 minutes if dry)
- 0.5 cup unsweetened cocoa powder
- 0.25 cup creamy peanut butter or sunflower seed butter
- 2 tablespoons coconut oil, melted
- 1 teaspoon vanilla extract
- 0.25 teaspoon salt
- 0.5 cup dark chocolate chips (optional) (or chopped dark chocolate)
- 2 tablespoons water (only if needed for blending)
Instructions
- Line an 8x8-inch baking dish with parchment paper, leaving overhang on two sides for easy removal.
- Place the rolled oats in a dry skillet over medium heat. Toast, stirring frequently, for 3-4 minutes until fragrant and lightly golden. Transfer to a bowl and let cool.
- In a food processor, combine the pitted dates, cocoa powder, peanut butter, coconut oil, vanilla, and salt. Process until a sticky, cohesive paste forms. If it seems dry, add water 1 tablespoon at a time.
- Add the toasted oats and chocolate chips (if using) to the food processor. Pulse 8-10 times until the oats are evenly distributed but still have some texture. Do not over-process into a powder.
- Transfer the mixture to the prepared dish. Press it down firmly and evenly using the bottom of a measuring cup or a flat glass. The more compact, the better the bars will hold.
- Refrigerate for at least 2 hours, or until completely firm. Lift the block out using the parchment overhang, then cut into 12 rectangles with a sharp knife.
- Wrap each bar individually in wax paper or reusable snack bags. Store in the refrigerator for up to 2 weeks, or in a cooler for camping trips.