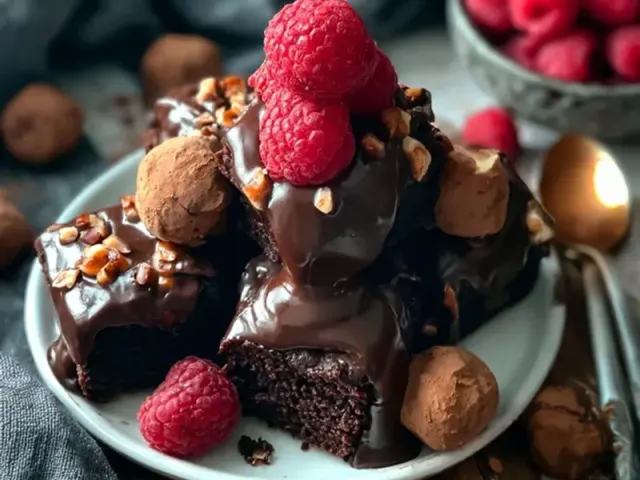
Chocolate Dipped Fruit: Broke Pinterest? Fix It
The first time I tried chocolate-dipped fruit at camp, it looked like a Pinterest fail. The chocolate was dull, streaky, and slid off the strawberries in sad, greasy sheets. I’d used cheap chocolate chips and melted them directly in a pan over the fire—too hot, too fast. The result was a crumbly mess that tasted fine but looked nothing like the glossy photos.

Here’s the good news: you don’t need a double boiler, a thermometer, or expensive ingredients. You just need the right technique and one pantry staple that fixes most chocolate-dipping disasters. Let’s break down exactly how to get that snappy, shiny shell that actually stays on the fruit.
Why Your Chocolate Dipped Fruit Fails (and How to Fix It)
The most common mistake is overheating. Chocolate is sensitive. When it gets above about 115°F (46°C), the cocoa butter separates, and you get a dull, streaky finish. The second mistake is moisture. Even a single drop of water will make chocolate seize into a grainy, stiff paste.
At camp, you’re working with a camp stove or a small fire grate. The heat is uneven, and you’re often in a hurry. That’s exactly when things go wrong. The fix is simple: use the indirect heat method and keep everything bone-dry.
The Technique: Gentle Heat + Coconut Oil
Here’s the method I use every time, and it works whether I’m at a campsite with a two-burner stove or using a small grate over coals.
Step 1: Set Up a Makeshift Double Boiler
Fill a small pot with about an inch of water. Bring it to a simmer over your stove or fire, then turn off the heat completely. Place a heat-safe bowl (metal or glass) over the pot. The bowl should not touch the water. The residual steam will gently melt the chocolate without scorching it.
Common mistake: Keeping the heat on while melting. That’s what causes the chocolate to overheat. Turn the heat off after the water simmers.
Step 2: Add Coconut Oil for Shine and Snap
For every cup of chocolate chips, add one tablespoon of unrefined coconut oil. This does two things: it lowers the melting point slightly so the chocolate stays fluid longer, and it helps the chocolate set with a glossy, snappy finish. It also makes the coating a little more forgiving if you’re working in warm weather.
Stir gently with a dry spoon or whisk until the chocolate is about 80% melted. Then remove the bowl from the pot and keep stirring until it’s completely smooth. The residual heat will finish the job.
Step 3: Prep Your Fruit
Wash and dry your fruit thoroughly. This is where most people slip up. Any moisture on the surface will make the chocolate slide off or turn grainy. Pat each strawberry or apple slice with a paper towel until completely dry. For bananas, slice them right before dipping and blot with a towel.
Which fruits work best? Strawberries, apple slices, and firm banana chunks are my go-to. Avoid very juicy fruits like oranges or melon—the moisture seeps out and ruins the chocolate shell.
Dipping and Setting at Camp
Line a plate or tray with parchment paper. One by one, dip each piece of fruit into the chocolate, letting the excess drip off. For an even coat, tilt the bowl slightly and roll the fruit as you lift it out.
If you want toppings—crushed graham crackers, freeze-dried berries, or shredded coconut—sprinkle them on right after dipping, before the chocolate sets.
Now for the setting. If it’s a cool day (under 70°F), just leave the tray in a shady spot for 15 minutes. If it’s warm, place the tray in your cooler on a clean towel, making sure the fruit doesn’t touch any ice or ice packs. The cool air will set the chocolate without making it sweat.
One Camp-Specific Trick
If you’re near a stream or lake in the evening, set the tray on a rock near the water. The cooler air and slight breeze will set the chocolate perfectly in about 10 minutes. Just keep it covered with a mesh food cover or a clean bandana to keep bugs off.
Safety note: If you’re using a campfire grate, make sure your bowl is stable and not touching the flames. Use a pot holder or leather gloves when handling hot bowls. And always keep melted chocolate away from tent fabric—it stains and attracts wildlife.
The Takeaway
Chocolate-dipped fruit at camp doesn’t have to look like a Pinterest fail. The secret is gentle indirect heat, a tablespoon of coconut oil, and bone-dry fruit. That’s it. No thermometer, no fancy equipment. Just a little patience and the right technique. The result is a glossy, snappy shell that tastes as good as it looks—and that’s something worth sharing.
Frequently Asked Questions
Why does my chocolate dip turn out crumbly or grainy?
That usually means the chocolate got too hot or a drop of water touched it. Melt gently over simmering water (not direct heat), and keep everything bone-dry. If it seizes, stir in a teaspoon of coconut oil to smooth it out.
Can I use milk chocolate instead of dark?
Yes, but milk chocolate is softer and more prone to blooming (white streaks). Add a teaspoon of coconut oil to help it stay fluid and shiny. Keep dipped fruit in a cool spot, not the sun.
How do I keep chocolate from melting off the fruit at a warm campsite?
Use a higher cocoa percentage (60-70%) and add a tablespoon of coconut oil per cup of chips. This raises the melting point slightly. After dipping, place fruit on a parchment-lined tray in the shade or in a cooler (not touching ice) for 15 minutes to set.
What fruits work best for camping chocolate dip?
Sturdy fruits like strawberries, apple slices, and banana chunks hold up well. Avoid very juicy fruits like oranges or melon—the moisture makes the chocolate slide off. Pat all fruit completely dry before dipping.
Chocolate Dipped Fruit: Broke Pinterest? Fix It

A simple, foolproof method for making glossy, snappy chocolate-dipped fruit without a double boiler or candy thermometer. Perfect for camping or home.
- 1 cup chocolate chips (semi-sweet or dark (60%+ cacao))
- 1 tablespoon coconut oil (unrefined, for shine and snap)
- 12 large strawberries (or other firm fruit) (washed and patted bone-dry)
- optional toppings (like crushed graham crackers, freeze-dried berries, or shredded coconut)
- Set up a small pot with an inch of water over your camp stove or campfire grate. Bring to a simmer, then turn off the heat.
- Place a heat-safe bowl (metal or glass) over the pot, making sure it doesn't touch the water. Add chocolate chips and coconut oil.
- Stir gently until the chocolate is about 80% melted—then remove the bowl from the heat and keep stirring until fully smooth and glossy. This gentle method prevents overheating.
- Line a plate or tray with parchment paper. One by one, dip each fruit into the chocolate, letting excess drip off. For even coating, tilt the bowl and roll the fruit.
- Place dipped fruit on the parchment. If adding toppings, sprinkle them on now before the chocolate sets.
- Let the fruit sit in a cool, dry spot (or in a cooler on a towel, not touching ice) for about 15 minutes, until the chocolate is firm and snappy. Serve immediately or store in a cool container.
Recipe: Chocolate Dipped Fruit: Broke Pinterest? Fix It
Ingredients
- 1 cup chocolate chips (semi-sweet or dark (60%+ cacao))
- 1 tablespoon coconut oil (unrefined, for shine and snap)
- 12 large strawberries (or other firm fruit) (washed and patted bone-dry)
- optional toppings (like crushed graham crackers, freeze-dried berries, or shredded coconut)
Instructions
- Set up a small pot with an inch of water over your camp stove or campfire grate. Bring to a simmer, then turn off the heat.
- Place a heat-safe bowl (metal or glass) over the pot, making sure it doesn't touch the water. Add chocolate chips and coconut oil.
- Stir gently until the chocolate is about 80% melted—then remove the bowl from the heat and keep stirring until fully smooth and glossy. This gentle method prevents overheating.
- Line a plate or tray with parchment paper. One by one, dip each fruit into the chocolate, letting excess drip off. For even coating, tilt the bowl and roll the fruit.
- Place dipped fruit on the parchment. If adding toppings, sprinkle them on now before the chocolate sets.
- Let the fruit sit in a cool, dry spot (or in a cooler on a towel, not touching ice) for about 15 minutes, until the chocolate is firm and snappy. Serve immediately or store in a cool container.