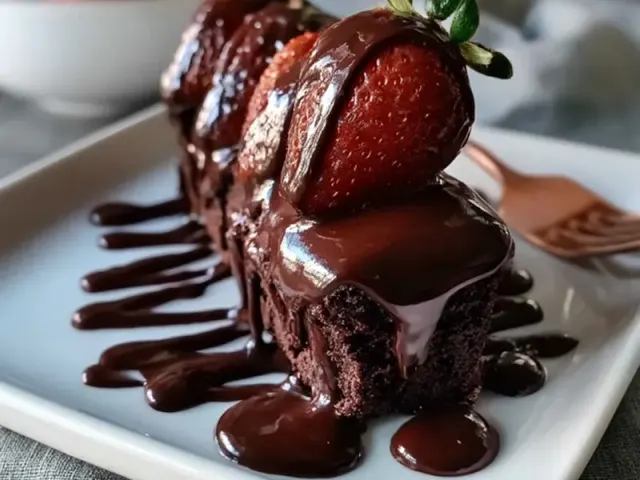
Chocolate Covered Strawberries: The Secret Revealed
The first time I tried making chocolate covered strawberries for a camping trip, the chocolate seized into a grainy mess. The second time, they melted into a sticky puddle before we even reached the trailhead. But the third time—that was the charm. The secret isn't fancy equipment or a secret ingredient. It's a simple technique that transforms these glossy treats into a camp-friendly dessert that holds its shape and tastes like a luxury.

Why Most Chocolate Covered Strawberries Fail at Camp
Two problems ruin outdoor chocolate strawberries: moisture and heat. Wet strawberries make chocolate seize—it turns dull and crumbly. Warm temperatures turn a perfect shell into a sticky mess. The fix is straightforward, but it requires a shift in how you think about the coating.
The trick is tempering with coconut oil. Adding a small amount of oil to the melted chocolate lowers its melting point just enough to keep it from blooming in cool weather, while raising its stability in mild warmth. One teaspoon per eight ounces of chocolate is the sweet spot. Too much, and the coating stays soft. Too little, and you're back to square one.
Step One: Prep the Strawberries Right
Wash your strawberries gently under cool water. Then—and this is critical—dry them completely. I lay them out on a clean kitchen towel and pat each one dry, stems and all. Any water droplet left behind will create a steam pocket under the chocolate, causing it to crack or bubble. Let them sit at room temperature for ten minutes after drying. Cold strawberries straight from the fridge will shock the chocolate and cause it to streak.
Step Two: Melt with Control
I use a double boiler setup: a small saucepan with an inch of simmering water, and a heatproof bowl that sits snugly on top. The bowl should not touch the water. Chop your chocolate into even pieces so they melt uniformly. Add the coconut oil at the start. Stir slowly and constantly with a rubber spatula. When about two-thirds of the chocolate has melted, pull the bowl off the heat and keep stirring. The residual heat will melt the rest. This gentle method prevents scorching and gives you that glossy finish.
Step Three: Dip with Purpose
Hold each strawberry by the stem. Dip it straight in, then tilt the bowl slightly as you pull it out. Let the excess drip off for a few seconds—I count to five. A thin, even coating sets faster and stays firmer than a thick glob. Place each dipped berry on a parchment-lined tray, leaving a little space between them so they don't touch.
Step Four: Set in the Right Spot
If you're at home, twenty minutes in the fridge does the job. At a campsite, find the coolest shaded spot—under a picnic table, inside a tent with the fly open, or in a cooler with an ice pack. Never put them directly on ice; the condensation will ruin the coating. I place the tray on a folded towel inside the cooler, with the ice pack wrapped in another towel. They set in about thirty minutes.
Packing for the Trail or Drive
Once set, transfer the strawberries to a hard-sided container. Lay a paper towel on the bottom, then a single layer of berries. Add another paper towel, then another layer. The paper towels absorb any condensation and keep the berries from sticking together. Close the lid tightly and store in a cooler or insulated bag. They'll stay perfect for up to twenty-four hours.
A quick safety note: if you're hiking with these, keep the container inside your pack, away from direct sun. On a hot day, consider serving them as soon as you arrive—don't let them sit in a warm car or tent for hours. Use good judgment with temperatures above 80°F (27°C).
The Takeaway
The secret is simple: dry strawberries, a touch of coconut oil in the chocolate, and careful temperature control from melt to set. No fancy tools, no complicated steps. Just a few small adjustments that turn a fragile dessert into a camping-friendly treat. Next time you want something sweet under the stars, you'll know exactly how to pull it off.
Frequently Asked Questions
Can I make chocolate covered strawberries ahead of time for camping?
Yes, you can make them up to 24 hours in advance. Store them in a cool, shaded spot in a hard-sided container with paper towels between layers to absorb moisture and prevent sticking. Avoid direct sunlight and heat.
How do I keep chocolate covered strawberries from melting at a campsite?
Keep them in a cooler with an ice pack, but not directly on ice. Wrap the container in a towel for extra insulation. Serve them in the evening when temperatures drop, and avoid leaving them out for more than an hour.
What type of chocolate is best for camping chocolate covered strawberries?
Use a high-quality chocolate bar or chips with at least 60% cocoa for dark chocolate. Add a teaspoon of coconut oil per cup of chocolate when melting—this helps the coating stay firm at slightly warmer temperatures and gives a nice shine.
Is it safe to eat chocolate covered strawberries after they've been in a cooler?
Yes, as long as the cooler stays below 40°F (4°C) and the strawberries show no signs of spoilage. Eat them within 24 hours for best texture and flavor.
Chocolate Covered Strawberries: The Secret Revealed

Creamy dark chocolate coats fresh strawberries for a decadent yet simple camping dessert. The secret is in the tempering—adding a touch of coconut oil for a glossy, snap-able shell that holds up better in warm weather.
- 1 pound fresh strawberries with stems (washed and thoroughly dried)
- 8 ounces dark chocolate (60-70% cocoa) (chopped or chips)
- 1 teaspoon coconut oil (unrefined or refined)
- Wash the strawberries gently and pat them completely dry with a paper towel. Any moisture will cause the chocolate to seize or bloom.
- Line a baking sheet or flat plate with parchment paper. Set it near your work area.
- Chop the dark chocolate into small, even pieces if using a bar. Place in a heatproof bowl with the coconut oil.
- Set up a double boiler: bring a small pot with 1 inch of water to a gentle simmer. Place the bowl on top, ensuring the bottom does not touch the water. Stir constantly until the chocolate is mostly melted—remove from heat and keep stirring until completely smooth.
- Hold a strawberry by the stem and dip it into the melted chocolate, twisting slightly to coat evenly. Let excess drip off for a few seconds.
- Place the dipped strawberry on the parchment-lined sheet. Repeat with all strawberries.
- Refrigerate or place in a cool, shaded spot for 20-30 minutes until the chocolate is firm and glossy. If camping without a fridge, a cooler with an ice pack works—just keep them elevated off the ice.
- Pack in a hard-sided container with paper towels between layers. Enjoy within 24 hours for best texture.
Recipe: Chocolate Covered Strawberries: The Secret Revealed
Ingredients
- 1 pound fresh strawberries with stems (washed and thoroughly dried)
- 8 ounces dark chocolate (60-70% cocoa) (chopped or chips)
- 1 teaspoon coconut oil (unrefined or refined)
Instructions
- Wash the strawberries gently and pat them completely dry with a paper towel. Any moisture will cause the chocolate to seize or bloom.
- Line a baking sheet or flat plate with parchment paper. Set it near your work area.
- Chop the dark chocolate into small, even pieces if using a bar. Place in a heatproof bowl with the coconut oil.
- Set up a double boiler: bring a small pot with 1 inch of water to a gentle simmer. Place the bowl on top, ensuring the bottom does not touch the water. Stir constantly until the chocolate is mostly melted—remove from heat and keep stirring until completely smooth.
- Hold a strawberry by the stem and dip it into the melted chocolate, twisting slightly to coat evenly. Let excess drip off for a few seconds.
- Place the dipped strawberry on the parchment-lined sheet. Repeat with all strawberries.
- Refrigerate or place in a cool, shaded spot for 20-30 minutes until the chocolate is firm and glossy. If camping without a fridge, a cooler with an ice pack works—just keep them elevated off the ice.
- Pack in a hard-sided container with paper towels between layers. Enjoy within 24 hours for best texture.