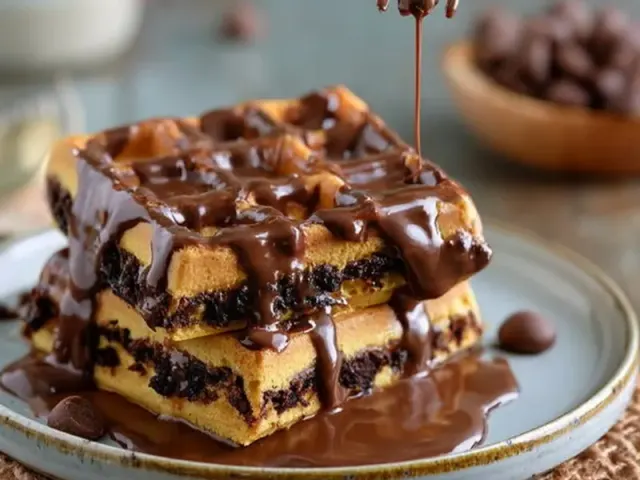
Chocolate Chip Waffles: 5-Minute Hack for Camp Stove Breakfast
There's a particular stillness to morning at camp. The air is cool, the coffee is perking, and the only sound is the gentle hiss of a camp stove. But then you remember: breakfast means dirty dishes. A bowl for the batter, a whisk, a measuring cup, and that sticky spoon. Not anymore.

This chocolate chip waffles hack cuts the cleanup to zero. You mix everything inside a freezer bag—no bowl, no whisk, no mess. The bag becomes your piping tool, and when you're done, you toss it in the trash bag. Five minutes from first squeeze to golden, crisp waffle.
Why This Hack Works
Traditional camp waffles require carrying a mixing bowl, a measuring set, and a whisk. That's volume and weight you don't need. By pre-combining the dry ingredients at home, you save space and time. The freezer bag does double duty: mixing vessel and batter dispenser. The trick is using a heavy-duty bag—freezer grade, not sandwich grade—because it withstands the kneading without splitting.
The Common Mistake
Most people overmix the batter once they add the wet ingredients. Overmixing develops gluten, making waffles tough and rubbery. Knead the bag only until the dry streaks disappear. A few small lumps are fine; they'll steam out during cooking.
Gear and Setup for the 5-Minute Hack
You need a camp waffle iron—cast iron or non-stick stovetop model. I prefer a cast iron one because it holds heat evenly, even on a two-burner stove. Preheat it over medium heat while you assemble the batter. A drop of water should dance on the surface before you add batter.
For the bag: quart-size freezer bag for single batches, or a gallon-size if you're cooking for four. Write the wet ingredient amounts on the bag with a permanent marker before you leave home. That way you don't have to remember or dig out a recipe card at the picnic table.
Adapting for Weather and Conditions
Wind: Set up a windscreen (a folded piece of foil works) around your stove to keep the flame steady. Wind makes the waffle iron temperature erratic—your first waffle might burn, the second be pale.
Cold mornings: Keep the bag of dry mix inside your sleeping bag overnight. In sub-40°F weather, cold milk and egg can make the batter too stiff to squeeze. Warming the dry ingredients helps the batter come together faster.
Rain: Cook under a tarp or vestibule. If you have to cook in the rain, keep the bag of batter in a dry ziplock inside your jacket until you're ready. Moisture in the batter from a wet bag will make waffles gummy.
Safety Note for Camp Stoves
Never use a camp stove inside a tent or enclosed shelter—carbon monoxide builds up fast and is odorless. Cook outside, at least 10 feet from tent walls. Keep the stove on a level, non-flammable surface. When you're done, let the waffle iron cool completely before packing it in a cloth bag to avoid melting nearby gear.
Beyond the Basic Hack: Two Variations
Savory-Sweet Twist: Replace chocolate chips with crumbled cooked bacon and a tablespoon of maple syrup in the batter. The salty-sweet combo is surprisingly satisfying after a day of hiking.
High-Altitude Adjustment: If you're camping above 5,000 feet, reduce the baking powder to 1.5 teaspoons and add an extra tablespoon of milk. The lower air pressure makes batter rise faster and then collapse. This keeps the waffles light.
The Takeaway
This 5-minute hack for chocolate chip waffles isn't just about speed—it's about preserving the quiet of the morning. Less time scrubbing means more time with your hands wrapped around a warm mug, watching the sun filter through the trees. Pre-mix your dry ingredients at home, pack a freezer bag, and you'll have a hot, sweet breakfast ready before the fire is even fully awake.
Frequently Asked Questions
Can I use a different type of waffle iron for this hack?
Yes, any camp waffle iron works—cast iron, non-stick electric (if you have power), or stovetop models. Just adjust the heat and cooking time to match your gear. For electric models, bring a long extension cord rated for outdoor use.
How do I keep the waffles warm while cooking the rest?
Wrap cooked waffles in a clean towel inside a small insulated cooler. The towel absorbs steam, keeping them crisp. Alternatively, place them in a foil packet on a warm (but off) corner of the camp stove.
What if I don't have a freezer bag?
Use a heavy-duty zip-top bag (freezer grade is best) or a reusable silicone bag. Standard sandwich bags may split under pressure. You can also use a squeeze bottle with a wide tip, but bags pack flatter.
Chocolate Chip Waffles: 5-Minute Hack for Camp Stove Breakfast

This 5-minute hack lets you make chocolate chip waffles on a camp stove with zero bowl to wash. Pre-mix the dry ingredients at home, add wet ingredients in a freezer bag at camp, snip the corner, and squeeze directly into your waffle iron.
- 1.5 cups all-purpose flour
- 2 tablespoons granulated sugar
- 2 teaspoons baking powder
- 0.5 teaspoon salt
- 1 large egg
- 1.25 cups milk (or buttermilk for tang)
- 3 tablespoons butter or neutral oil (melted and slightly cooled)
- 1 teaspoon vanilla extract
- 0.5 cup chocolate chips (mini or regular)
- At home: In a quart-size freezer bag, combine flour, sugar, baking powder, and salt. Seal and shake to mix. Label the bag with a permanent marker: 'Add egg, milk, oil, vanilla.' Pack the bag flat inside your food bin.
- At camp: Crack the egg into the bag of dry mix. Add milk, melted butter (or oil), and vanilla. Seal the bag, squeezing out air. Knead the bag with your fingers until just combined—lumps are fine, do not overmix.
- Open the bag and add chocolate chips. Seal and gently press chips into the batter.
- Preheat your camp waffle iron over medium heat until a drop of water sizzles on contact. Lightly grease the iron with cooking spray or a butter wrapper.
- Snip a 1/2-inch corner off the bag. Squeeze batter into the center of the waffle iron, filling each well about 2/3 full. Close the lid and cook for 3–5 minutes, flipping the iron halfway if it's a stovetop model. Cook until steam slows and waffle is golden.
- Carefully open the iron and lift waffle with a fork or silicone spatula. Repeat with remaining batter. Serve with extra chocolate chips, syrup, or fruit.
Recipe: Chocolate Chip Waffles: 5-Minute Hack for Camp Stove Breakfast
Ingredients
- 1.5 cups all-purpose flour
- 2 tablespoons granulated sugar
- 2 teaspoons baking powder
- 0.5 teaspoon salt
- 1 large egg
- 1.25 cups milk (or buttermilk for tang)
- 3 tablespoons butter or neutral oil (melted and slightly cooled)
- 1 teaspoon vanilla extract
- 0.5 cup chocolate chips (mini or regular)
Instructions
- At home: In a quart-size freezer bag, combine flour, sugar, baking powder, and salt. Seal and shake to mix. Label the bag with a permanent marker: 'Add egg, milk, oil, vanilla.' Pack the bag flat inside your food bin.
- At camp: Crack the egg into the bag of dry mix. Add milk, melted butter (or oil), and vanilla. Seal the bag, squeezing out air. Knead the bag with your fingers until just combined—lumps are fine, do not overmix.
- Open the bag and add chocolate chips. Seal and gently press chips into the batter.
- Preheat your camp waffle iron over medium heat until a drop of water sizzles on contact. Lightly grease the iron with cooking spray or a butter wrapper.
- Snip a 1/2-inch corner off the bag. Squeeze batter into the center of the waffle iron, filling each well about 2/3 full. Close the lid and cook for 3–5 minutes, flipping the iron halfway if it's a stovetop model. Cook until steam slows and waffle is golden.
- Carefully open the iron and lift waffle with a fork or silicone spatula. Repeat with remaining batter. Serve with extra chocolate chips, syrup, or fruit.