Chocolate Chip Cream Cheese Danish: Broke Pinterest
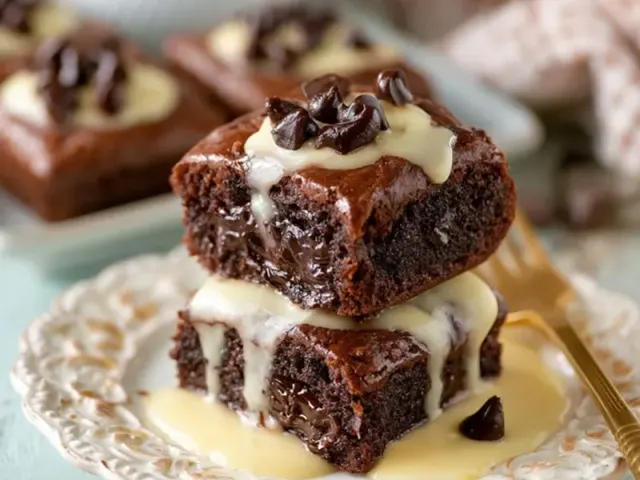
The first bite tells you everything. The crunch of flaky layers giving way to a soft, tangy cream cheese center, with pockets of melted chocolate that stretch as you pull. It's the kind of pastry that looks like it broke Pinterest—all golden swirls and glossy icing. But here's the secret: it's not complicated. It just looks that way.

I bake these danishes on a camp stove more often than in a kitchen. The method adapts beautifully to a Dutch oven or a covered skillet with a heat diffuser. The key is indirect heat. Direct flame will char the bottom before the inside sets. You want a gentle, even warmth that coaxes the dough into those delicate layers.
Dough That Actually Works at Camp
Forget laminated dough with a hundred folds. This is a rough puff pastry—quick, forgiving, and still produces real flakiness. The trick is keeping the butter and cream cheese cold. I cube both and pop them in the freezer for ten minutes while I measure the flour. Then I work fast, using my fingertips to rub the fat into the flour until it looks like coarse meal with some pea-sized chunks. Those chunks are what create steam pockets in the oven, lifting the dough into layers.
Ice water goes in one tablespoon at a time. Stop when the dough just holds together when squeezed. Too much water makes it tough. Wrap it, flatten it into a disk, and let it rest in a cooler or fridge for at least 30 minutes. This rest relaxes the gluten and chills the fat again—both critical for flakiness.
The Filling That Doesn't Leak
Here's the specific tip that separates a Pinterest-worthy danish from a sad puddle of burned sugar: chill the filling before assembly. Mix the brown sugar and vanilla into the cream cheese until smooth, then fold in the chocolate chips. Pop the bowl in the cooler for 15 minutes. Cold filling stays put when you roll the dough. It doesn't ooze out the sides or soak into the bottom layers.
I use mini chocolate chips because they distribute evenly without tearing the dough. Regular chips work fine, just press them in gently. And don't skip the brown sugar—it adds a caramel depth that plain white sugar can't match.
Rolling and Cutting Without the Mess
Roll the dough on a floured surface into a rectangle about ¼-inch thick. Don't stress about perfect edges. Spread the chilled filling to within an inch of the edges, then roll from the long side, keeping it tight but not squeezing. Pinch the seam firmly. Use a sharp knife to cut into eight even slices. A bench scraper works even better—it cuts cleanly without dragging the filling.
Place each slice cut-side up in a greased cast iron skillet or on a parchment-lined baking sheet. Leave a little space between them—they'll puff and spread. Brush the tops with egg wash for that deep golden color.
Baking Without an Oven
If you're using a camp stove, set it to medium-low and place a heat diffuser under your skillet. Preheat the skillet with the lid on for five minutes. Then put the danishes in, cover, and bake for 20-25 minutes. Rotate the skillet halfway through if your burner has hot spots. The danishes are done when they're golden brown and the filling bubbles at the edges.
For a Dutch oven, use about 10 briquettes on the bottom and 15 on top. Check after 20 minutes. Every setup runs a little different, so rely on sight and smell more than a timer.
The Icing That Makes It Look Broken
While the danishes cool for five minutes, whisk powdered sugar with milk until it's thick but pourable. A fork works fine for drizzling. Let the icing fall in irregular lines—that messy, organic look is exactly what makes it seem Pinterest-worthy. The contrast of white icing against dark chocolate and golden pastry is what catches the eye.
Serve warm. The cream cheese should still be soft, the chocolate just barely melted. If you're camping, these disappear fast. Make a double batch if you want any left for breakfast the next day.
The Common Mistake to Avoid
Don't rush the chilling steps. Warm dough and warm filling are the fastest route to a flat, greasy danish. If your campsite is hot, work in the shade and return the dough to the cooler between steps. Patience here pays off in layers.
Also, don't overbake. The bottoms can burn quickly, especially on a camp stove. Lift one danish with a spatula after 20 minutes to check. If the bottom is golden but the top is pale, cover with foil for the last few minutes.
This danish breaks Pinterest because it looks like it took hours of fussing. In reality, it's a straightforward technique that rewards attention to temperature and timing. The result is a pastry that tastes as good as it looks—flaky, creamy, chocolatey, and utterly satisfying after a day on the trail.
Takeaway: Cold ingredients, a short chill, and indirect heat are the three pillars of a danish that looks like it broke Pinterest. Master those, and you'll have a camp dessert that everyone remembers.
Frequently Asked Questions
Can I make this danish without an oven?
Yes. Use a camp stove with a heat diffuser and a covered skillet, or bake in a Dutch oven with coals. The key is indirect heat to avoid burning the bottom before the dough cooks through.
How do I keep the cream cheese filling from leaking out?
Chill the cream cheese mixture for 15 minutes before assembling. Also, pinch the dough edges firmly and avoid overfilling. A little leak is okay—it caramelizes nicely.
What if my danish gets soggy on the bottom?
Soggy bottoms happen when the dough sits on a cold surface or steam gets trapped. Bake on a preheated surface (like a cast iron skillet) and lift the danish onto a rack or a clean dry towel as soon as it's done.
Can I use store-bought crescent roll dough?
Absolutely. It's a great shortcut. Just press the seams together, add filling, and bake. The texture won't be as flaky as homemade, but it's still delicious and much faster.
Chocolate Chip Cream Cheese Danish: Broke Pinterest

A camp-friendly chocolate chip cream cheese danish that looks like it broke Pinterest but is surprisingly simple. Layers of flaky pastry, creamy filling, and melty chocolate chips, all baked to golden perfection.
- 2 cups all-purpose flour (plus more for dusting)
- 1/2 cup cold unsalted butter (cubed)
- 1/2 cup cold cream cheese (cubed)
- 1/4 cup ice water (or as needed)
- 1/4 cup granulated sugar
- 1/4 cup brown sugar (packed)
- 1 tsp vanilla extract
- 1/2 cup chocolate chips (mini or regular)
- 1 egg (for egg wash)
- 1/2 cup powdered sugar (for icing)
- 1-2 tbsp milk (for icing)
- In a large bowl, combine flour and granulated sugar. Cut in cold butter and cream cheese using a pastry blender or your fingers until the mixture resembles coarse crumbs with some pea-sized pieces.
- Sprinkle ice water over the mixture one tablespoon at a time, tossing with a fork, until the dough just comes together. Do not overwork. Form into a disk, wrap in plastic, and refrigerate for at least 30 minutes.
- Preheat your oven to 375°F (190°C) or prepare your camp stove/Dutch oven for baking at medium-low heat.
- On a floured surface, roll the chilled dough into a rectangle about 1/4-inch thick. Mix the brown sugar and vanilla extract together, then spread over the dough, leaving a 1-inch border. Sprinkle chocolate chips evenly on top.
- Roll the dough tightly from the long side, like a jelly roll. Pinch the seam to seal. Cut into 8 even slices and place them cut-side up on a parchment-lined baking sheet or in a greased cast iron skillet.
- Beat the egg with a tablespoon of water and brush lightly over the tops of each danish.
- Bake for 20-25 minutes, until golden brown and the filling is bubbly. If using a camp stove, rotate the pan halfway through for even browning.
- While the danishes cool slightly, whisk powdered sugar with milk until smooth. Drizzle over the warm danishes. Serve immediately or store in an airtight container for up to two days.
Recipe: Chocolate Chip Cream Cheese Danish: Broke Pinterest
Ingredients
- 2 cups all-purpose flour (plus more for dusting)
- 1/2 cup cold unsalted butter (cubed)
- 1/2 cup cold cream cheese (cubed)
- 1/4 cup ice water (or as needed)
- 1/4 cup granulated sugar
- 1/4 cup brown sugar (packed)
- 1 tsp vanilla extract
- 1/2 cup chocolate chips (mini or regular)
- 1 egg (for egg wash)
- 1/2 cup powdered sugar (for icing)
- 1-2 tbsp milk (for icing)
Instructions
- In a large bowl, combine flour and granulated sugar. Cut in cold butter and cream cheese using a pastry blender or your fingers until the mixture resembles coarse crumbs with some pea-sized pieces.
- Sprinkle ice water over the mixture one tablespoon at a time, tossing with a fork, until the dough just comes together. Do not overwork. Form into a disk, wrap in plastic, and refrigerate for at least 30 minutes.
- Preheat your oven to 375°F (190°C) or prepare your camp stove/Dutch oven for baking at medium-low heat.
- On a floured surface, roll the chilled dough into a rectangle about 1/4-inch thick. Mix the brown sugar and vanilla extract together, then spread over the dough, leaving a 1-inch border. Sprinkle chocolate chips evenly on top.
- Roll the dough tightly from the long side, like a jelly roll. Pinch the seam to seal. Cut into 8 even slices and place them cut-side up on a parchment-lined baking sheet or in a greased cast iron skillet.
- Beat the egg with a tablespoon of water and brush lightly over the tops of each danish.
- Bake for 20-25 minutes, until golden brown and the filling is bubbly. If using a camp stove, rotate the pan halfway through for even browning.
- While the danishes cool slightly, whisk powdered sugar with milk until smooth. Drizzle over the warm danishes. Serve immediately or store in an airtight container for up to two days.