Chocolate Brownie Sundae: Broke Pinterest
There's a moment, just after the sun drops behind the pines, when the fire settles into a bed of coals and the air smells like woodsmoke and pine. That's when you want something sweet—something that feels like a reward for a day spent hiking, setting up camp, and maybe wrestling with a tent pole or two. The chocolate brownie sundae that broke Pinterest isn't about fancy ingredients or elaborate assembly. It's about one skillet, a handful of pantry staples, and a technique that works every time, even when the wind gusts and the fire spits.

Why This Brownie Sundae Breaks the Pinterest Mold
Most Pinterest camp desserts rely on foil packets, pre-made mixes, or complicated layering. This one uses a single cast iron skillet and a scratch brownie batter that comes together in the time it takes the fire to settle. The trick that makes it work: preheating the skillet before adding the batter. That initial sizzle creates a slightly crisp, fudgy edge while the center stays tender—something a cold pan can't replicate. I've tried both, and the preheated skillet wins every time.
Gear and Setup for Fire-Baked Brownies
You'll need a 10-inch cast iron skillet (or a Dutch oven), a lid or heavy-duty foil, a long-handled spatula, and a campfire grate. A fire with a good bed of coals—not tall flames—is essential. Flames scorch the top before the center sets. Build your fire at least 30 minutes before you plan to bake, letting it burn down to glowing coals. If it's windy, position a windbreak (a cooler or log) on the upwind side of the fire to keep the heat steady. In cold weather, you'll need to add a few extra coals or bake for an extra 5 minutes.
The Technique That Makes It Work
Melt the butter in a small pot or directly in the skillet over the fire. Let it cool slightly—hot butter can scramble the eggs. Mix the sugar, eggs, and vanilla until smooth. Sift the dry ingredients separately to avoid lumps, then fold them in gently. Overmixing activates the gluten and makes the brownies cakey instead of fudgy. Pour the batter into the preheated, greased skillet. Cover and rotate every 7 minutes to compensate for uneven fire heat. Check doneness with a toothpick: a few moist crumbs mean it's ready. Wet batter means more time.
Common Mistake to Avoid
Don't lift the lid too often. Every time you peek, heat escapes and adds 2-3 minutes to the bake time. Trust the 20-minute mark, then check. Also, resist the urge to use a cold skillet—the batter will spread thin and cook unevenly.
Building the Sundae
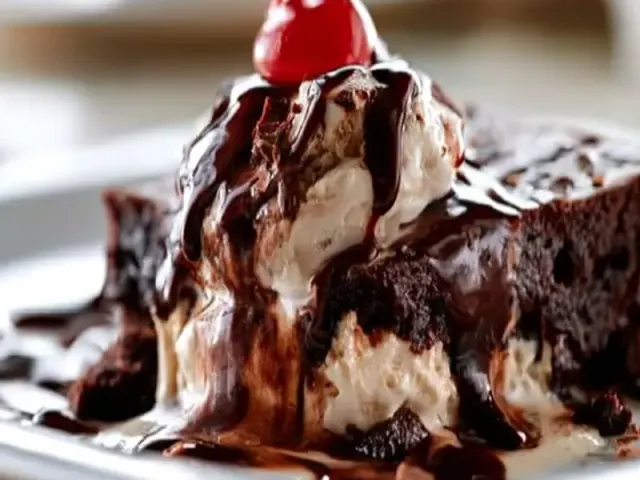
Once the brownie is done, let it rest for two minutes—just long enough to set without cooling the skillet too much. Scoop vanilla ice cream right onto the warm brownie. It will melt into creamy pools. Drizzle with chocolate syrup or melted chocolate chips. That's it. No whipped cream, no cherry, no fuss. The contrast of warm fudgy brownie and cold ice cream is the whole point.
Adapting for Weather and Conditions
Rain: Set up a tarp or awning over your cooking area. A wet fire is a sad fire. Store your dry ingredients in a sealed container. Wind: Use a windbreak and weigh down the skillet lid with a rock. Cold: Increase the fire's coal bed by 20% and add 5 minutes to the bake time. High altitude: Reduce the baking powder to 1/8 teaspoon and add an extra tablespoon of flour to prevent spreading.
The Takeaway
This chocolate brownie sundae isn't about breaking Pinterest for the sake of being different. It's about a method that actually works in the unpredictable conditions of tent camping. One skillet, a simple batter, and the patience to let the fire do its work. The result is a dessert that tastes like the best kind of campfire memory—warm, shared, and exactly what you needed after a day outdoors.
Frequently Asked Questions
Can I use a boxed brownie mix for this recipe?
Yes, you can use a boxed mix to save time, but the scratch recipe here lets you control sweetness and cocoa depth. If using a mix, follow the box instructions for oil and eggs, then pour into the preheated cast iron skillet and bake as directed over the fire.
How do I know when the brownie is done without an oven thermometer?
Insert a toothpick or thin knife into the center. If it comes out with a few moist crumbs (not wet batter), it's done. The edges will pull away slightly from the skillet. In windy or cold weather, expect an extra 5-10 minutes.
What if I don't have a cast iron skillet?
You can use a heavy-duty Dutch oven or a camp-safe baking pan placed on a grate. Avoid thin aluminum pans—they scorch. For a Dutch oven, use 8-10 briquettes on top and 6-8 underneath for even heat.
Chocolate Brownie Sundae: Broke Pinterest

A rich, fudgy chocolate brownie sundae baked from scratch in a cast iron skillet over a campfire. Topped with vanilla ice cream and a simple chocolate sauce, this dessert breaks the Pinterest trend of complicated camp cooking.
- 1/2 cup unsalted butter (1 stick)
- 1 cup sugar (granulated)
- 2 large eggs
- 1 teaspoon vanilla extract
- 1/3 cup cocoa powder (unsweetened)
- 1/2 cup flour (all-purpose)
- 1/4 teaspoon salt
- 1/4 teaspoon baking powder (optional)
- 1 cup vanilla ice cream (for topping)
- 2 tablespoons chocolate syrup or melted chocolate chips (for sauce)
- Grease a 10-inch cast iron skillet with butter or oil. Place it on a campfire grate over medium heat (a hand held 6 inches above the grate should feel hot but not scorching—about 350°F).
- In a medium bowl, melt the 1/2 cup butter over the fire or in a separate pan. Let cool slightly, then stir in the sugar until combined.
- Beat in the eggs one at a time, then add the vanilla. The mixture should look smooth and glossy.
- Sift in the cocoa powder, flour, salt, and baking powder. Stir gently—just until no dry streaks remain. Overmixing makes the brownies tough.
- Pour the batter into the hot skillet. It will sizzle slightly—that's good. Spread evenly.
- Cover the skillet with a lid or foil. Bake for 20-25 minutes, rotating the skillet a quarter turn every 7 minutes to avoid hot spots. Check at 20 minutes with a toothpick.
- Remove from heat. Let cool for 2 minutes, then scoop ice cream on top. Drizzle with chocolate syrup. Serve immediately.
- Safety note: The skillet handle stays hot for a long time. Always use a leather glove or pot holder. Keep a bucket of water or sand nearby for the fire.
Recipe: Chocolate Brownie Sundae: Broke Pinterest
Ingredients
- 1/2 cup unsalted butter (1 stick)
- 1 cup sugar (granulated)
- 2 large eggs
- 1 teaspoon vanilla extract
- 1/3 cup cocoa powder (unsweetened)
- 1/2 cup flour (all-purpose)
- 1/4 teaspoon salt
- 1/4 teaspoon baking powder (optional)
- 1 cup vanilla ice cream (for topping)
- 2 tablespoons chocolate syrup or melted chocolate chips (for sauce)
Instructions
- Grease a 10-inch cast iron skillet with butter or oil. Place it on a campfire grate over medium heat (a hand held 6 inches above the grate should feel hot but not scorching—about 350°F).
- In a medium bowl, melt the 1/2 cup butter over the fire or in a separate pan. Let cool slightly, then stir in the sugar until combined.
- Beat in the eggs one at a time, then add the vanilla. The mixture should look smooth and glossy.
- Sift in the cocoa powder, flour, salt, and baking powder. Stir gently—just until no dry streaks remain. Overmixing makes the brownies tough.
- Pour the batter into the hot skillet. It will sizzle slightly—that's good. Spread evenly.
- Cover the skillet with a lid or foil. Bake for 20-25 minutes, rotating the skillet a quarter turn every 7 minutes to avoid hot spots. Check at 20 minutes with a toothpick.
- Remove from heat. Let cool for 2 minutes, then scoop ice cream on top. Drizzle with chocolate syrup. Serve immediately.
- Safety note: The skillet handle stays hot for a long time. Always use a leather glove or pot holder. Keep a bucket of water or sand nearby for the fire.