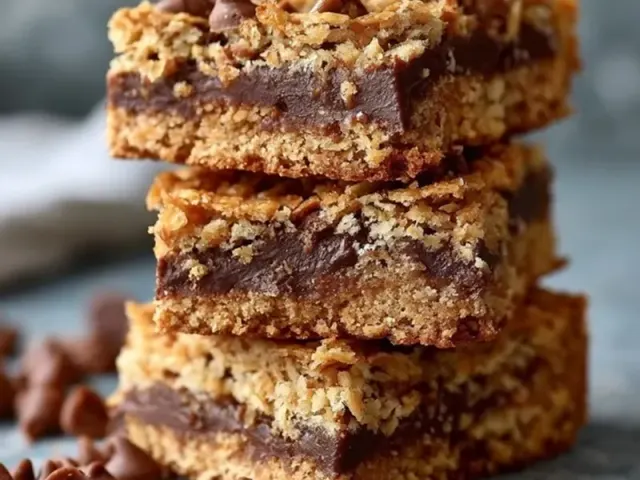
Chocolate Breakfast Granola Bars: Everyone's Obsessed
The first bite of a homemade chocolate breakfast granola bar at camp is a small moment of pure satisfaction. The oats are chewy, the cocoa is deep, and the whole thing holds together without crumbling into your sleeping bag. These bars have become a staple in my camp kitchen because they solve a real problem: a filling, portable breakfast that doesn't require cooking at dawn.

Why These Bars Work for Tent Camping
Most store-bought granola bars are either too sugary or too fragile. These homemade bars are neither. They pack a steady-release energy from oats and healthy fats, and they stay intact even after bouncing around in a backpack for a day. The chocolate is rich but not overwhelming — it's a breakfast bar, not a dessert. Plus, they're no-bake, so you make them entirely at home and just grab and go.
Key Technique: Pressing for Packability
The single most important step is pressing the mixture into the pan with serious force. If you're gentle, the bars will fall apart the first time you unwrap them at camp. Use the flat bottom of a glass or a measuring cup to compact the mixture until it feels dense and uniform. I press until the surface is smooth and no loose oats remain. This creates a bar that can survive a tumble inside a stuff sack.
Adapting for Weather and Terrain
Hot weather: If you're camping in summer heat, coconut oil can soften. Swap it for an equal amount of solid cocoa butter or a vegan butter stick. Store bars in a cooler, not just a pack. Cold weather: The bars become firmer in chilly conditions, which is fine. Let them sit at room temperature for a few minutes before eating if they feel too hard. Humid conditions: Wrap each bar individually in parchment paper, then store them in a zip-top bag with a silica gel packet (food-safe) to prevent stickiness.
Common Mistake: Skipping the Chill
Do not skip the two-hour refrigeration. The bars need that time for the coconut oil and peanut butter to set into a solid matrix. If you try to cut them too soon, you'll get a crumbly mess. Patience here pays off in perfect, clean-cut bars.
Packing for the Trail
Once cut, wrap each bar in parchment paper and twist the ends. Stack them in a hard-sided container — a plastic food storage box works perfectly. This prevents crushing. For day hikes, I slide two bars into a snack pocket. For longer trips, I pack a dozen in a lightweight Tupperware. Remember to keep all food sealed and stored away from your tent at night to avoid attracting wildlife.
Make-Ahead and Storage
These bars keep in the refrigerator for up to two weeks, or in the freezer for three months. For a weekend trip, I make them on Thursday, chill overnight, wrap on Friday morning, and pack them in the cooler. They thaw quickly and are ready to eat by Saturday breakfast.
A Note on Variations
You can swap peanut butter for almond, cashew, or sunflower seed butter for a nut-free version. Add a tablespoon of chia seeds or flax meal for extra fiber. For a crunchier bar, toast the oats in a dry skillet for 3 minutes before mixing. But keep the base ratio the same — that's what makes them sturdy.
The real beauty of these chocolate breakfast granola bars is how they simplify a camp morning. No stove, no cleanup, no decision-making. Just unwrap, eat, and start your day. That's the kind of obsession I can get behind.
Frequently Asked Questions
How do I keep granola bars from getting crushed in my pack?
Pack them in a hard-sided container like a plastic storage box or a metal tin. Nestle them between soft items like clothes or a towel to absorb shocks. Avoid placing them at the bottom of a heavy backpack.
Can I make these bars without a stove or oven?
Yes, this is a no-bake recipe. You only need a mixing bowl and a pan. The bars set in the refrigerator, so no heat source is required at home. At camp, you can also let them set in a cool spot overnight.
What if I don't have a refrigerator at the campsite?
Make the bars at home and keep them chilled until you leave. Pack them in a cooler with ice packs. They will stay firm for several hours unrefrigerated, especially in cool weather. In hot conditions, store them in a shaded, insulated bag.
Chocolate Breakfast Granola Bars: Everyone's Obsessed

These no-bake chocolate breakfast granola bars are chewy, rich, and packed with oats and cocoa. Perfect for a quick camp breakfast or hiking snack, they hold together well and resist melting in warm weather.
- 2 cups old-fashioned rolled oats
- 1/2 cup unsweetened cocoa powder (sifted)
- 1/2 cup creamy peanut butter (or any nut/seed butter)
- 1/3 cup honey (or maple syrup)
- 1/4 cup coconut oil (melted)
- 1 teaspoon vanilla extract
- 1/4 teaspoon salt
- 1/3 cup mini chocolate chips (optional, plus more for topping)
- Line an 8x8-inch baking pan with parchment paper, leaving overhang on two sides for easy lifting.
- In a large bowl, combine the rolled oats and sifted cocoa powder. Stir until the cocoa is evenly distributed.
- In a small saucepan over low heat, warm the peanut butter, honey, and coconut oil. Stir constantly until smooth and well combined. Remove from heat and stir in the vanilla and salt.
- Pour the wet mixture over the dry ingredients. Fold together with a rubber spatula until every oat is coated. The mixture should look like damp, dark sand. If it seems dry, add 1 tablespoon of warm water and mix again.
- Fold in the mini chocolate chips if using. Reserve a handful to press onto the top later.
- Transfer the mixture to the prepared pan. Press it down firmly and evenly. Use the back of a measuring cup or a flat-bottomed glass to compact it well. This step is critical — loose bars will crumble in your pack.
- Sprinkle the reserved chocolate chips on top and press them gently into the surface.
- Refrigerate for at least 2 hours, until firm. Lift the block out using the parchment overhang, then cut into 12 bars using a sharp knife. Wrap each bar individually in parchment or wax paper for camping.
Recipe: Chocolate Breakfast Granola Bars: Everyone's Obsessed
Ingredients
- 2 cups old-fashioned rolled oats
- 1/2 cup unsweetened cocoa powder (sifted)
- 1/2 cup creamy peanut butter (or any nut/seed butter)
- 1/3 cup honey (or maple syrup)
- 1/4 cup coconut oil (melted)
- 1 teaspoon vanilla extract
- 1/4 teaspoon salt
- 1/3 cup mini chocolate chips (optional, plus more for topping)
Instructions
- Line an 8x8-inch baking pan with parchment paper, leaving overhang on two sides for easy lifting.
- In a large bowl, combine the rolled oats and sifted cocoa powder. Stir until the cocoa is evenly distributed.
- In a small saucepan over low heat, warm the peanut butter, honey, and coconut oil. Stir constantly until smooth and well combined. Remove from heat and stir in the vanilla and salt.
- Pour the wet mixture over the dry ingredients. Fold together with a rubber spatula until every oat is coated. The mixture should look like damp, dark sand. If it seems dry, add 1 tablespoon of warm water and mix again.
- Fold in the mini chocolate chips if using. Reserve a handful to press onto the top later.
- Transfer the mixture to the prepared pan. Press it down firmly and evenly. Use the back of a measuring cup or a flat-bottomed glass to compact it well. This step is critical — loose bars will crumble in your pack.
- Sprinkle the reserved chocolate chips on top and press them gently into the surface.
- Refrigerate for at least 2 hours, until firm. Lift the block out using the parchment overhang, then cut into 12 bars using a sharp knife. Wrap each bar individually in parchment or wax paper for camping.