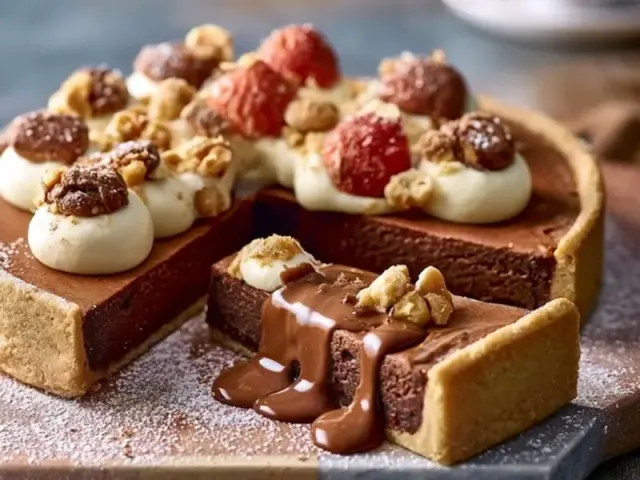
Campfire Chocolate Dessert Pizza That Actually Works
The first time I tried making dessert pizza over a campfire, the chocolate burned black and the dough came out raw in the center. That was a sad, sticky mess. But after a few more tries—and a few more burned fingers—I figured out the method that works every time. This chocolate dessert pizza is the one I make on every trip now. It's simple, forgiving, and the gooey result is worth the small learning curve.

Why This Recipe Works for Tent Camping
This recipe uses only one pan and a handful of ingredients you can pack without a cooler. The dough cooks directly in the skillet, so there's no rolling pin or extra gear needed. The real trick is in the heat management. You don't need a perfect bed of coals or a fancy camp stove. You just need to know when to move the skillet to indirect heat. That single step is what separates a burnt mess from a crisp, melty pizza.
I always bring a small bottle of cooking oil and a brush for greasing the skillet. A little oil on the dough edges gives that golden, crunchy crust. And I never skip pricking the dough with a fork. Those little holes let steam escape, so the crust stays flat and cooks evenly instead of puffing up into a dome.
Choosing Your Toppings
Chocolate chips and marshmallows are the classic duo, but you can adapt based on what you have on hand. Dark chocolate chips hold up better to heat than milk chocolate—they melt slowly and don't scorch as easily. If you only have milk chocolate, add them later in the cooking process. Mini marshmallows melt faster and more evenly than jumbo ones. If you use regular marshmallows, cut them in half with scissors at camp. That's a small prep step that makes a big difference in coverage.
For extra texture, I like to add a handful of chopped pecans or walnuts. They toast in the skillet and add a savory crunch. Coconut flakes work too, but watch them closely—they burn fast. A sprinkle of flaky sea salt right after cooking balances the sweetness and makes the chocolate taste deeper. That's a trick I picked up from making s'mores, and it works just as well here.
Heat Management: The Only Tricky Part
Campfire cooking is all about reading the coals. You want a moderate, even heat—not a blazing fire. Start your fire about 30 minutes before you plan to cook. Let the logs burn down until you have a thick bed of glowing coals with no flames. Rake some coals to the side to create a cooler zone. That's where you'll move the skillet for the final melting step.
I place the skillet directly on a few coals for the first cook. After 6 minutes, I check the bottom by lifting an edge with a spatula. If it's golden brown, I slide the skillet to the cooler zone, add the toppings, and cover. If the bottom is still pale, I leave it on the coals for another 2 minutes. Every fire is different, so trust your eyes and your spatula more than a timer.
Covering the skillet is crucial for melting the toppings without burning the bottom. A tight-fitting lid works best, but a double layer of heavy-duty foil crimped around the edges does the job too. Just make sure the foil is secure so no ash gets in.
Common Mistakes and How to Avoid Them
The biggest mistake I see is cooking over direct flames. Flames lick up the sides of the skillet and char the dough before the inside is done. Always cook over coals, not fire. If your fire is still flaming, wait. Patience pays off here.
Another mistake is overloading the pizza. Too many toppings weigh down the dough and make it soggy. Stick to a single layer of chocolate chips and marshmallows. You can always add more after cooking if you want extra.
And don't forget to grease the skillet well. I've had dough stick to the pan, and scraping it off ruins the crust. A generous coating of butter or oil prevents that and adds flavor.
Adapting for Different Conditions
If it's windy, set up a windbreak using a camp chair or a large rock. Wind steals heat and makes the fire uneven. On cold nights, you may need to add a few more coals under the skillet to compensate. In wet weather, bring a small can of sterno or a camp stove as a backup—sometimes getting a good coal bed in the rain is just not happening.
If you're camping with kids, let them press the dough into the skillet. It's a tactile, messy job they love. And they can sprinkle their own toppings. Just supervise the fire part closely. I always set up a "no-kid zone" around the fire pit, marked with a stick or a rope, so everyone stays safe.
Safety Note
Cast iron gets extremely hot, and the handle stays hot long after you move the skillet off the fire. Always use a thick oven mitt or a folded towel to handle it. Set the hot skillet on a flat, heat-proof surface—never on a plastic table or sleeping bag. And keep a bucket of water or sand nearby for emergencies.
When you're done, let the skillet cool completely before cleaning. Scrape off any stuck bits with a metal spatula, then wipe it clean with a paper towel. A little oil rubbed into the surface keeps it seasoned for the next trip.
The Takeaway
This chocolate dessert pizza is the kind of campfire treat that feels special but doesn't require a lot of gear or fuss. The technique is simple once you learn to manage your heat and trust the process. Make it once, and you'll have the method memorized. That's the only recipe you need.
Frequently Asked Questions
Can I use pre-made pizza dough for this recipe?
Yes, pre-made dough from the grocery store works well. Let it come to room temperature for about 20 minutes before pressing it into the skillet. This prevents it from springing back and makes it easier to shape.
What if I don't have a cast iron skillet?
You can use a heavy-duty aluminum foil pan placed on a campfire grate, or make individual foil packets. For foil packets, roll the dough thin, add toppings, seal tightly, and cook 8-10 minutes per side over medium coals.
How do I keep the chocolate from burning?
The key is indirect heat. Once the dough is partially cooked, move the skillet to the edge of the fire or onto a few hot coals spread out. Add chocolate and marshmallows, then cover with foil or a lid. The residual heat melts them gently without scorching.
Can I make this gluten-free?
Absolutely. Use a gluten-free pizza dough blend or a pre-made gluten-free crust. The cooking time may be slightly shorter, so check the bottom after 8 minutes.
How do I store leftovers?
Wrap cooled slices in foil and store in a sealed container or ziplock bag. Reheat in a skillet over low heat or in a toaster oven at home. It will keep for up to two days in a cooler.
Campfire Chocolate Dessert Pizza That Actually Works

This chocolate dessert pizza is cooked entirely over a campfire using a cast iron skillet. A crispy crust is topped with melted chocolate, gooey marshmallows, and your favorite toppings for a shareable, decadent camping treat.
- 1 lb pizza dough (store-bought or homemade) (room temperature)
- 2 tbsp butter, melted (plus more for greasing)
- 1/2 cup chocolate chips (semi-sweet or dark)
- 1/2 cup marshmallows (mini or regular)
- 2 tbsp chopped nuts (pecans or walnuts) (optional)
- 1 tbsp coconut flakes (optional)
- 1 tbsp powdered sugar (optional) (for dusting)
- Light a campfire and let it burn down to a bed of medium-hot coals. You want steady heat, not roaring flames.
- Grease a 10-inch cast iron skillet generously with butter or cooking spray.
- Press the pizza dough into the skillet, pushing it evenly to the edges. Prick the dough several times with a fork to prevent bubbles.
- Brush the top of the dough with melted butter.
- Place the skillet on a campfire grate or directly on a few hot coals. Cook for 6-8 minutes, rotating the skillet halfway through, until the bottom is golden brown and the top looks set.
- Sprinkle chocolate chips evenly over the partially cooked crust. Add marshmallows and any optional toppings.
- Cover the skillet with a lid or a sheet of heavy-duty foil. Cook for another 4-5 minutes, until the chocolate is melted and marshmallows are puffy and lightly browned.
- Carefully remove the skillet from the heat using heavy oven mitts. Let it cool for 2 minutes.
- Dust with powdered sugar if desired. Slice and serve warm straight from the skillet.
Recipe: Campfire Chocolate Dessert Pizza That Actually Works
Ingredients
- 1 lb pizza dough (store-bought or homemade) (room temperature)
- 2 tbsp butter, melted (plus more for greasing)
- 1/2 cup chocolate chips (semi-sweet or dark)
- 1/2 cup marshmallows (mini or regular)
- 2 tbsp chopped nuts (pecans or walnuts) (optional)
- 1 tbsp coconut flakes (optional)
- 1 tbsp powdered sugar (optional) (for dusting)
Instructions
- Light a campfire and let it burn down to a bed of medium-hot coals. You want steady heat, not roaring flames.
- Grease a 10-inch cast iron skillet generously with butter or cooking spray.
- Press the pizza dough into the skillet, pushing it evenly to the edges. Prick the dough several times with a fork to prevent bubbles.
- Brush the top of the dough with melted butter.
- Place the skillet on a campfire grate or directly on a few hot coals. Cook for 6-8 minutes, rotating the skillet halfway through, until the bottom is golden brown and the top looks set.
- Sprinkle chocolate chips evenly over the partially cooked crust. Add marshmallows and any optional toppings.
- Cover the skillet with a lid or a sheet of heavy-duty foil. Cook for another 4-5 minutes, until the chocolate is melted and marshmallows are puffy and lightly browned.
- Carefully remove the skillet from the heat using heavy oven mitts. Let it cool for 2 minutes.
- Dust with powdered sugar if desired. Slice and serve warm straight from the skillet.