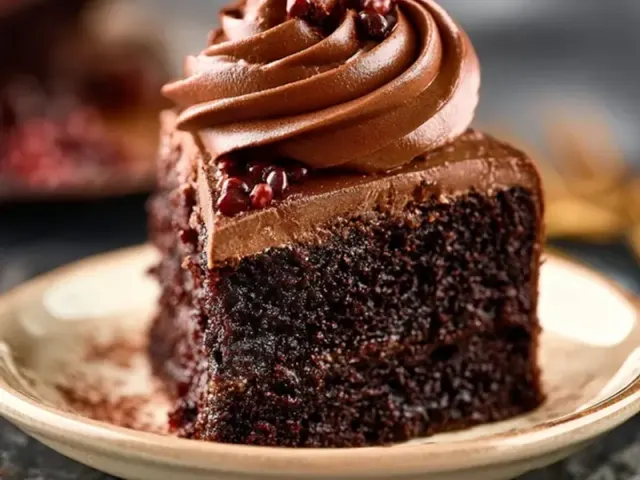
Campfire Chocolate Cupcakes: A No-Fail Guide for Tent Campers
The smell of chocolate drifting through pine smoke is one of those campfire moments that stops conversation. Everyone just inhales. And when that chocolate comes in the form of a tender, moist cupcake—baked right there in a dutch oven—it becomes the thing people talk about long after the fire dies.

Baking cupcakes while tent camping isn't complicated, but it does ask for a slightly different approach than your kitchen oven. The heat is uneven, the temperature is a guess, and you're working with coals instead of a thermostat. But that's exactly what makes them special. Here's how to pull it off without ending up with charcoal pucks or raw batter.
Choosing Your Gear
A 12-inch cast iron dutch oven is the gold standard for campfire baking. Its thick walls and tight lid trap heat and steam, creating a mini oven environment. If you don't have one, a heavy stainless steel pot with a lid can work, but you'll need to be more careful about hot spots. Always pack a pair of heavy leather gloves or a lid lifter—handling hot cast iron with a flimsy cloth is a burn waiting to happen.
For the cupcakes themselves, a standard 12-cup metal cupcake pan fits perfectly inside a 12-inch oven. Place a small metal trivet or three flat, dry stones in the bottom of the dutch oven first. This lifts the pan off the direct heat and prevents the bottoms from scorching. If you forget the trivet, you'll get cupcakes with a crusty black sole—edible, but not your best work.
Fire Management: The Real Secret
Most people either pile on too many coals or not enough. Here's the ratio that works: for a 12-inch dutch oven, use about 6 hot coals underneath and 14 on top. This creates a gentle, even heat that bakes the cupcakes through without burning the bottom. The extra coals on top mimic the radiant heat of a conventional oven's top element.
You need a good bed of coals—not roaring flames. Start your campfire early and let it burn down to glowing embers. If you're impatient and use flaming wood, the temperature swings wildly and the cupcakes will puff unevenly. Use a small shovel to move coals around. And always set up your cooking area on a flat, non-flammable surface like dirt or gravel, away from tent walls and dry grass.
The Batter: Keep It Simple
You don't need a fancy recipe. A basic chocolate cupcake batter works beautifully because it's forgiving. The key is mixing the dry ingredients at home and storing them in a sealed bag or container. At camp, you just add the wet ingredients. This cuts down on prep time and keeps your pack light.
One trick that makes a real difference: use hot water in the batter. It helps bloom the cocoa powder, giving a deeper chocolate flavor. I add it last, stirring gently until the batter is smooth and thin. Don't worry if it looks runny—that's how it should be. The thin batter bakes up moist and tender, even over a campfire.
Baking: Patience Over Precision
Place the filled cupcake pan on the trivet inside the dutch oven. Put the lid on, then arrange your coals. Here's the common mistake: people set the coals and walk away. You need to rotate both the oven and the lid a quarter turn every 10 minutes. This evens out the hot spots. A dutch oven is hottest where the coals touch, so without rotating, one side of your cupcakes will be darker than the other.
Check for doneness after 20 minutes. Use a clean twig or skewer—poke it into the center of a cupcake. If it comes out clean or with a few moist crumbs, they're done. If batter clings to the stick, give them another 5 minutes with the lid on and the coals undisturbed. Total time is usually 20-25 minutes, but wind and outside temperature can shift it.
Cooling and Serving
Let the cupcakes cool in the pan for 5 minutes. Then transfer them to a plate or a clean camp towel. They'll be delicate at first, so handle gently. If you want to top them, a simple dusting of powdered sugar or a drizzle of melted chocolate chips works without needing refrigeration. For a campfire twist, spread a little marshmallow fluff on top and toast it with a stick for a s'mores cupcake hybrid.
Store any leftovers in a sealed container. In warm weather, keep them in a cooler, but honestly, they rarely last long enough to need storage.
Takeaway
Baking chocolate cupcakes in a tent camping setup isn't about perfection—it's about the experience. The slightly uneven tops, the hint of wood smoke, the way everyone gathers around when you lift the lid. That's the real reward. With the right gear, a patient fire, and a simple batter, you'll have a dessert that makes the whole campsite happy.
Frequently Asked Questions
Can I use a regular cupcake pan in a dutch oven?
Yes, a standard 12-cup metal cupcake pan fits inside a 12-inch dutch oven. Just place a small trivet or a few flat stones in the bottom to lift the pan off the direct heat.
How do I know when the cupcakes are done without an oven light?
Insert a clean twig or skewer into the center of a cupcake. If it comes out clean or with just a few moist crumbs, they are done. Also, the tops will spring back when lightly pressed.
What if I don't have a dutch oven?
You can use a heavy pot with a tight lid, like a cast iron pot or even a stainless steel stockpot. The key is trapping heat evenly. Line the bottom with a few pebbles or a metal trivet to prevent burning.
How do I keep the cupcakes from burning on the bottom?
Use fewer coals under the dutch oven and more on top. A good ratio is about 6 coals underneath and 14 on top for a 12-inch oven. Also, rotate the oven and lid a quarter turn every 10 minutes to distribute heat.
Campfire Chocolate Cupcakes: A No-Fail Guide for Tent Campers

These chocolate cupcakes are baked in a dutch oven over a campfire, giving them a tender crumb and rich chocolate flavor with a slightly smoky edge. Perfect for a tent camping dessert.
- 1 cup all-purpose flour
- 1/2 cup unsweetened cocoa powder
- 3/4 cup granulated sugar
- 1 teaspoon baking powder
- 1/2 teaspoon baking soda
- 1/4 teaspoon salt
- 1 large egg
- 1/2 cup milk
- 1/3 cup vegetable oil
- 1 teaspoon vanilla extract
- 1/2 cup hot water
- Light a campfire and let it burn down to a bed of hot coals. You'll need about 20-24 coals for a 12-inch dutch oven.
- In a medium bowl, whisk together the flour, cocoa powder, sugar, baking powder, baking soda, and salt.
- In a separate bowl, beat the egg, then add the milk, oil, and vanilla. Stir until combined.
- Pour the wet ingredients into the dry ingredients and mix just until no dry streaks remain. Do not overmix.
- Stir in the hot water. The batter will be thin—that's correct.
- Line a 12-cup metal cupcake pan with paper liners. Divide the batter evenly among the cups, filling each about two-thirds full.
- Place a small trivet or three flat stones in the bottom of a 12-inch dutch oven. Set the cupcake pan on top.
- Cover the dutch oven with its lid. Arrange about 6 hot coals in a circle under the oven and 14 coals on top of the lid.
- Bake for 20-25 minutes, rotating the oven and lid a quarter turn every 10 minutes for even heat. Check for doneness with a skewer.
- Carefully remove the lid using a hook or heavy gloves. Let the cupcakes cool in the pan for 5 minutes, then transfer to a cooling rack or plate.
- Optional: Top with a simple powdered sugar glaze or a dollop of marshmallow fluff for a s'mores twist.
Recipe: Campfire Chocolate Cupcakes: A No-Fail Guide for Tent Campers
Ingredients
- 1 cup all-purpose flour
- 1/2 cup unsweetened cocoa powder
- 3/4 cup granulated sugar
- 1 teaspoon baking powder
- 1/2 teaspoon baking soda
- 1/4 teaspoon salt
- 1 large egg
- 1/2 cup milk
- 1/3 cup vegetable oil
- 1 teaspoon vanilla extract
- 1/2 cup hot water
Instructions
- Light a campfire and let it burn down to a bed of hot coals. You'll need about 20-24 coals for a 12-inch dutch oven.
- In a medium bowl, whisk together the flour, cocoa powder, sugar, baking powder, baking soda, and salt.
- In a separate bowl, beat the egg, then add the milk, oil, and vanilla. Stir until combined.
- Pour the wet ingredients into the dry ingredients and mix just until no dry streaks remain. Do not overmix.
- Stir in the hot water. The batter will be thin—that's correct.
- Line a 12-cup metal cupcake pan with paper liners. Divide the batter evenly among the cups, filling each about two-thirds full.
- Place a small trivet or three flat stones in the bottom of a 12-inch dutch oven. Set the cupcake pan on top.
- Cover the dutch oven with its lid. Arrange about 6 hot coals in a circle under the oven and 14 coals on top of the lid.
- Bake for 20-25 minutes, rotating the oven and lid a quarter turn every 10 minutes for even heat. Check for doneness with a skewer.
- Carefully remove the lid using a hook or heavy gloves. Let the cupcakes cool in the pan for 5 minutes, then transfer to a cooling rack or plate.
- Optional: Top with a simple powdered sugar glaze or a dollop of marshmallow fluff for a s'mores twist.